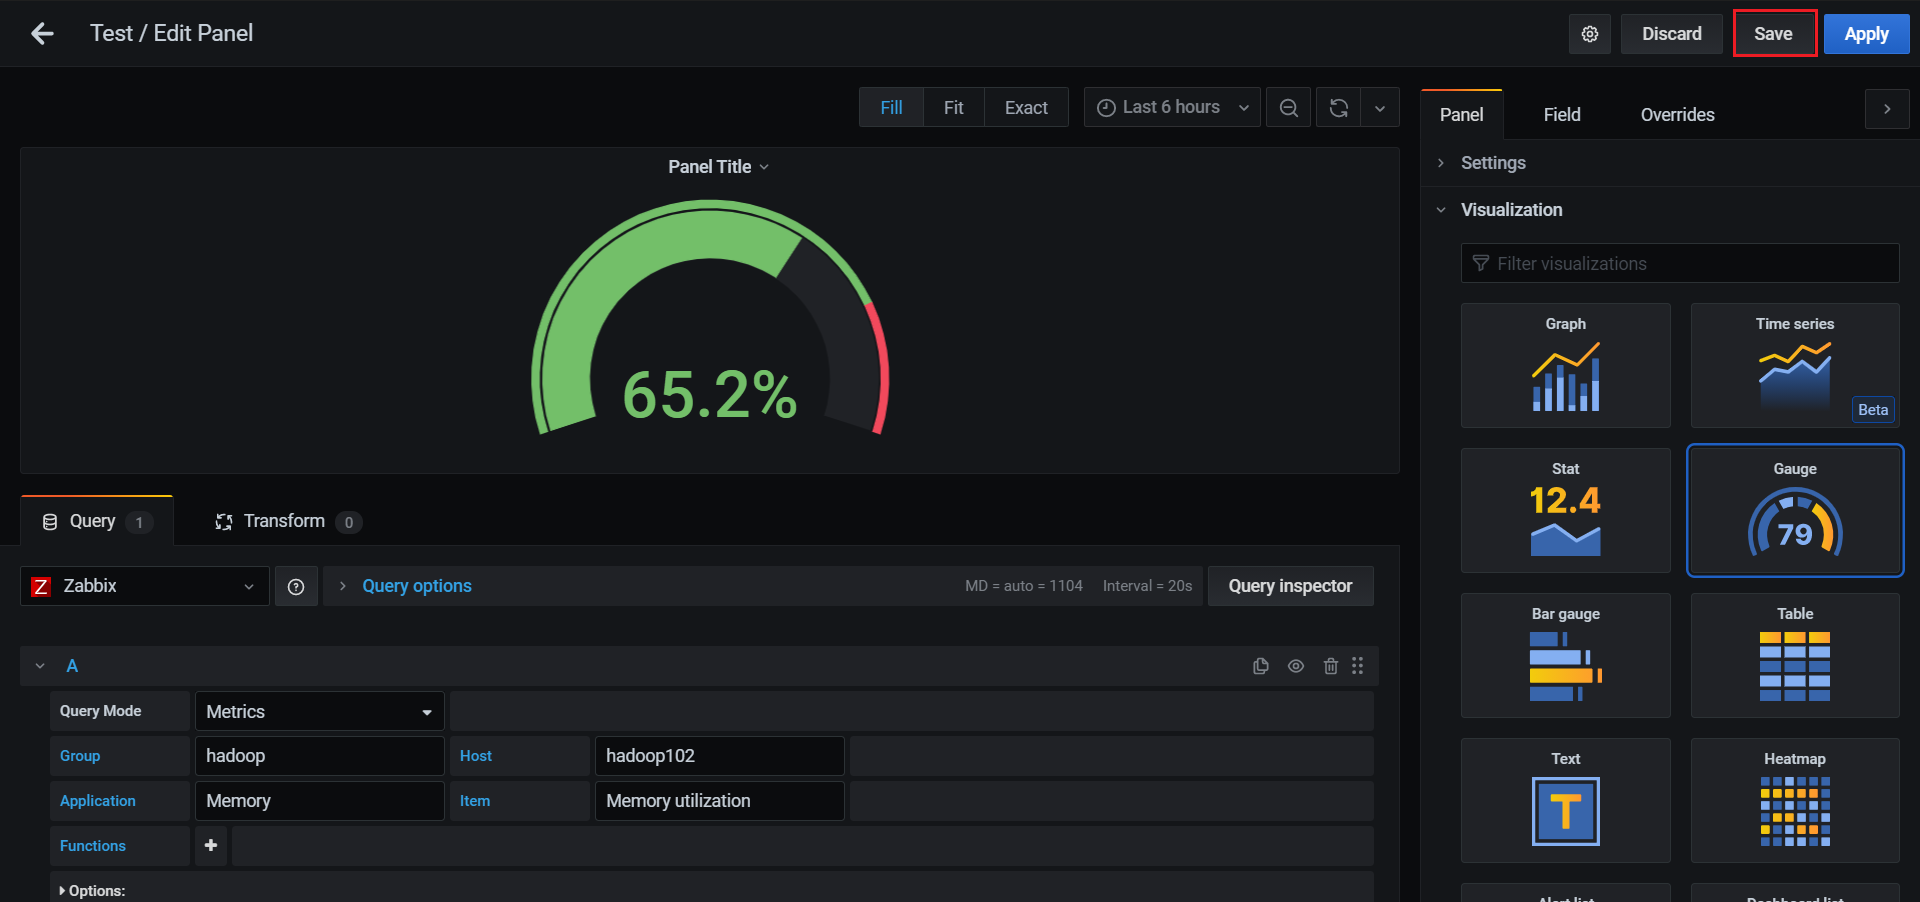
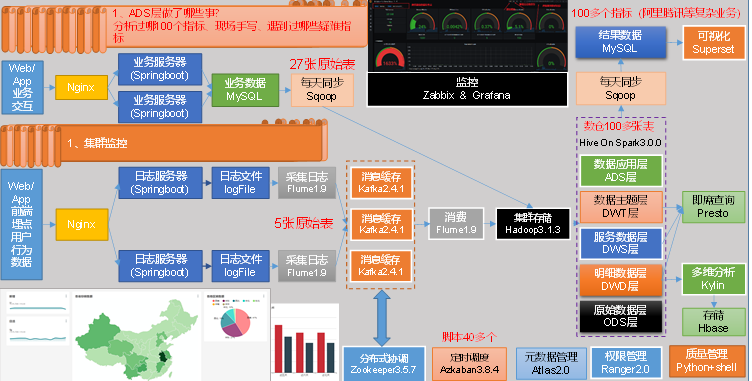
第1章 Zabbix入门
1.1 Zabbix概述
Zabbix是一款能够监控各种网络参数以及服务器健康性和完整性的软件。Zabbix使用灵活的通知机制,允许用户为几乎任何事件配置基于邮件的告警。这样可以快速反馈服务器的问题。基于已存储的数据,Zabbix提供了出色的报告和数据可视化功能。
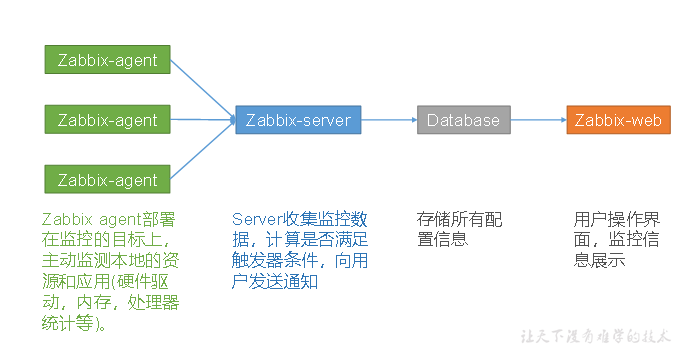
1.2 Zabbix 基础架构
第2章 Zabbix部署
2.1 集群规划
| 进程 | hadoop102节点 | hadoop103节点 | hadoop104节点 |
|---|---|---|---|
| zabbix-agent | √ | √ | √ |
| zabbix-server | √ | ||
| MySQL | √ | ||
| zabbix-web | √ |
2.2 准备工作
2.2.1 关闭集群
如果集群开启,先关闭集群。因为安装Zabbix前,需要重启虚拟机。
[atguigu@hadoop102 ~]$ cluster.sh stop
2.2.2 关闭防火墙(3台节点,已关闭)
[atguigu@hadoop102 ~]$ sudo service iptables stop
[atguigu@hadoop102 ~]$ sudo chkconfig iptables off

[atguigu@hadoop103 ~]$ sudo service iptables stop
[atguigu@hadoop103 ~]$ sudo chkconfig iptables off

[atguigu@hadoop104 ~]$ sudo service iptables stop
[atguigu@hadoop104 ~]$ sudo chkconfig iptables off
2.2.3 关闭SELinux(hadoop102)
1)修改配置文件/etc/selinux/config
[atguigu@hadoop102 ~]$ sudo vim /etc/selinux/config
修改如下内容
# This file controls the state of SELinux on the system.
# SELINUX= can take one of these three values:
#     enforcing - SELinux security policy is enforced.
#     permissive - SELinux prints warnings instead of enforcing.
#     disabled - No SELinux policy is loaded.
SELINUX=disabled
# SELINUXTYPE= can take one of these two values:
#     targeted - Targeted processes are protected,
#     mls - Multi Level Security protection.
SELINUXTYPE=targeted
2)重启服务器
[atguigu@hadoop102 ~]$ sudo reboot
2.3 配置Zabbix yum源(3台节点)
2.3.1 安装yum仓库
1)安装zabbix的yum仓库
[atguigu@hadoop102 ~]$ sudo rpm -Uvh https://mirrors.aliyun.com/zabbix/zabbix/5.0/rhel/7/x86_64/zabbix-release-5.0-1.el7.noarch.rpm

[atguigu@hadoop103 ~]$ sudo rpm -Uvh https://mirrors.aliyun.com/zabbix/zabbix/5.0/rhel/7/x86_64/zabbix-release-5.0-1.el7.noarch.rpm

[atguigu@hadoop104 ~]$ sudo rpm -Uvh https://mirrors.aliyun.com/zabbix/zabbix/5.0/rhel/7/x86_64/zabbix-release-5.0-1.el7.noarch.rpm
2)安装Software Collections仓库
[atguigu@hadoop102 ~]$ sudo yum install -y centos-release-scl

[atguigu@hadoop103 ~]$ sudo yum install -y centos-release-scl

[atguigu@hadoop104 ~]$ sudo yum install -y centos-release-scl
2.3.2 修改zabbix仓库配置文件
hadoop102、hadoop103、hadoop104三台节点,依次执行如下步骤。
1)修改为阿里云镜像
(1)查看原始zabbix.repo文件
[atguigu@hadoop102 ~]$ sudo cat /etc/yum.repos.d/zabbix.repo
查看内容如下
[zabbix]
name=Zabbix Official Repository - $basearch
baseurl=http://repo.zabbix.com/zabbix/5.0/rhel/7/$basearch/
enabled=1
gpgcheck=1
gpgkey=file:///etc/pki/rpm-gpg/RPM-GPG-KEY-ZABBIX-A14FE591

[zabbix-frontend]
name=Zabbix Official Repository frontend - $basearch
baseurl=http://repo.zabbix.com/zabbix/5.0/rhel/7/$basearch/frontend
enabled=0
gpgcheck=1
gpgkey=file:///etc/pki/rpm-gpg/RPM-GPG-KEY-ZABBIX-A14FE591

[zabbix-debuginfo]
name=Zabbix Official Repository debuginfo - $basearch
baseurl=http://repo.zabbix.com/zabbix/5.0/rhel/7/$basearch/debuginfo/
enabled=0
gpgkey=file:///etc/pki/rpm-gpg/RPM-GPG-KEY-ZABBIX-A14FE591
gpgcheck=1

[zabbix-non-supported]
name=Zabbix Official Repository non-supported - $basearch
baseurl=http://repo.zabbix.com/non-supported/rhel/7/$basearch/
enabled=1
gpgkey=file:///etc/pki/rpm-gpg/RPM-GPG-KEY-ZABBIX
gpgcheck=1
(2)执行以下命令完成全局替换
[atguigu@hadoop102 ~]$ sudo sed -i 's/http:\/\/repo.zabbix.com/https:\/\/mirrors.aliyun.com\/zabbix/g' /etc/yum.repos.d/zabbix.repo
(3)查看修改之后的zabbix.repo文件
[atguigu@hadoop102 ~]$ sudo cat /etc/yum.repos.d/zabbix.repo
查看内容如下
[zabbix]
name=Zabbix Official Repository - $basearch
baseurl=https://mirrors.aliyun.com/zabbix/zabbix/5.0/rhel/7/$basearch/
enabled=1
gpgcheck=1
gpgkey=file:///etc/pki/rpm-gpg/RPM-GPG-KEY-ZABBIX-A14FE591

[zabbix-frontend]
name=Zabbix Official Repository frontend - $basearch
baseurl=https://mirrors.aliyun.com/zabbix/zabbix/5.0/rhel/7/$basearch/frontend
enabled=0
gpgcheck=1
gpgkey=file:///etc/pki/rpm-gpg/RPM-GPG-KEY-ZABBIX-A14FE591

[zabbix-debuginfo]
name=Zabbix Official Repository debuginfo - $basearch
baseurl=https://mirrors.aliyun.com/zabbix/zabbix/5.0/rhel/7/$basearch/debuginfo/
enabled=0
gpgkey=file:///etc/pki/rpm-gpg/RPM-GPG-KEY-ZABBIX-A14FE591
gpgcheck=1

[zabbix-non-supported]
name=Zabbix Official Repository non-supported - $basearch
baseurl=https://mirrors.aliyun.com/zabbix/non-supported/rhel/7/$basearch/
enabled=1
gpgkey=file:///etc/pki/rpm-gpg/RPM-GPG-KEY-ZABBIX
gpgcheck=1
2)启用zabbix-web仓库
打开/etc/yum.repos.d/zabbix.repo文件,做如下修改
[zabbix]
name=Zabbix Official Repository - $basearch
baseurl=https://mirrors.aliyun.com/zabbix/zabbix/5.0/rhel/7/$basearch/
enabled=1
gpgcheck=1
gpgkey=file:///etc/pki/rpm-gpg/RPM-GPG-KEY-ZABBIX-A14FE591

[zabbix-frontend]
name=Zabbix Official Repository frontend - $basearch
baseurl=https://mirrors.aliyun.com/zabbix/zabbix/5.0/rhel/7/$basearch/frontend
enabled=1
gpgcheck=1
gpgkey=file:///etc/pki/rpm-gpg/RPM-GPG-KEY-ZABBIX-A14FE591

[zabbix-debuginfo]
name=Zabbix Official Repository debuginfo - $basearch
baseurl=https://mirrors.aliyun.com/zabbix/zabbix/5.0/rhel/7/$basearch/debuginfo/
enabled=0
gpgkey=file:///etc/pki/rpm-gpg/RPM-GPG-KEY-ZABBIX-A14FE591
gpgcheck=1

[zabbix-non-supported]
name=Zabbix Official Repository non-supported - $basearch
baseurl=https://mirrors.aliyun.com/zabbix/non-supported/rhel/7/$basearch/
enabled=1
gpgkey=file:///etc/pki/rpm-gpg/RPM-GPG-KEY-ZABBIX
gpgcheck=1
2.4 安装Zabbix
在hadoop102、hadoop103、hadoop104三台节点分别执行以下安装命令
[atguigu@hadoop102 ~]$ sudo yum install -y zabbix-server-mysql zabbix-agent zabbix-web-mysql-scl zabbix-apache-conf-scl

[atguigu@hadoop103 ~]$ sudo yum install -y zabbix-agent

[atguigu@hadoop104 ~]$ sudo yum install -y zabbix-agent
2.5 配置Zabbix
2.5.1 创建zabbix数据库
[atguigu@hadoop102 ~]$ mysql -uroot -p000000 -e"create database zabbix character set utf8 collate utf8_bin"
2.5.2 导入Zabbix建表语句
[atguigu@hadoop102 ~]$ zcat /usr/share/doc/zabbix-server-mysql-5.0.9/create.sql.gz | mysql -uroot -p000000 zabbix
2.5.3 配置Zabbix_Server(hadoop102)
修改zabbix-server配置文件
[atguigu@hadoop102 ~]$ sudo vim /etc/zabbix/zabbix_server.conf

DBHost=hadoop102
DBName=zabbix
DBUser=root
DBPassword=000000
2.5.4 配置Zabbix_Agent(三台节点)
修改zabbix-agent配置文件
[atguigu@hadoop102 ~]$ sudo vim /etc/zabbix/zabbix_agentd.conf
修改如下内容:
Server=hadoop102
#ServerActive=127.0.0.1
#Hostname=Zabbix server
2.5.5 配置Zabbix_Web时区
修改/etc/opt/rh/rh-php72/php-fpm.d/zabbix.conf文件
[atguigu@hadoop102 ~]$ sudo vim /etc/opt/rh/rh-php72/php-fpm.d/zabbix.conf
修改如下内容:
[zabbix]
user = apache
group = apache

listen = /var/opt/rh/rh-php72/run/php-fpm/zabbix.sock
listen.acl_users = apache
listen.allowed_clients = 127.0.0.1

pm = dynamic
pm.max_children = 50
pm.start_servers = 5
pm.min_spare_servers = 5
pm.max_spare_servers = 35

php_value[session.save_handler] = files
php_value[session.save_path]    = /var/opt/rh/rh-php72/lib/php/session/

php_value[max_execution_time] = 300
php_value[memory_limit] = 128M
php_value[post_max_size] = 16M
php_value[upload_max_filesize] = 2M
php_value[max_input_time] = 300
php_value[max_input_vars] = 10000
php_value[date.timezone] = Asia/Shanghai
2.6 启动停止Zabbix
2.6.1 启动Zabbix
[atguigu@hadoop102 ~]$ sudo systemctl start zabbix-server zabbix-agent httpd rh-php72-php-fpm
[atguigu@hadoop102 ~]$ sudo systemctl enable zabbix-server zabbix-agent httpd rh-php72-php-fpm

[atguigu@hadoop103 ~]$ sudo systemctl start zabbix-agent
[atguigu@hadoop103 ~]$ sudo systemctl enable zabbix-agent

[atguigu@hadoop104 ~]$ sudo systemctl start zabbix-agent
[atguigu@hadoop104 ~]$ sudo systemctl enable zabbix-agent
2.6.2 停止Zabbix
[atguigu@hadoop102 ~]$ sudo systemctl stop zabbix-server zabbix-agent httpd rh-php72-php-fpm
[atguigu@hadoop102 ~]$ sudo systemctl disable zabbix-server zabbix-agent httpd rh-php72-php-fpm

[atguigu@hadoop103 ~]$ sudo systemctl stop zabbix-agent
[atguigu@hadoop103 ~]$ sudo systemctl disable zabbix-agent

[atguigu@hadoop104 ~]$ sudo systemctl stop zabbix-agent
[atguigu@hadoop104 ~]$ sudo systemctl disable zabbix-agent
2.6.3 连接Zabbix_Web数据库
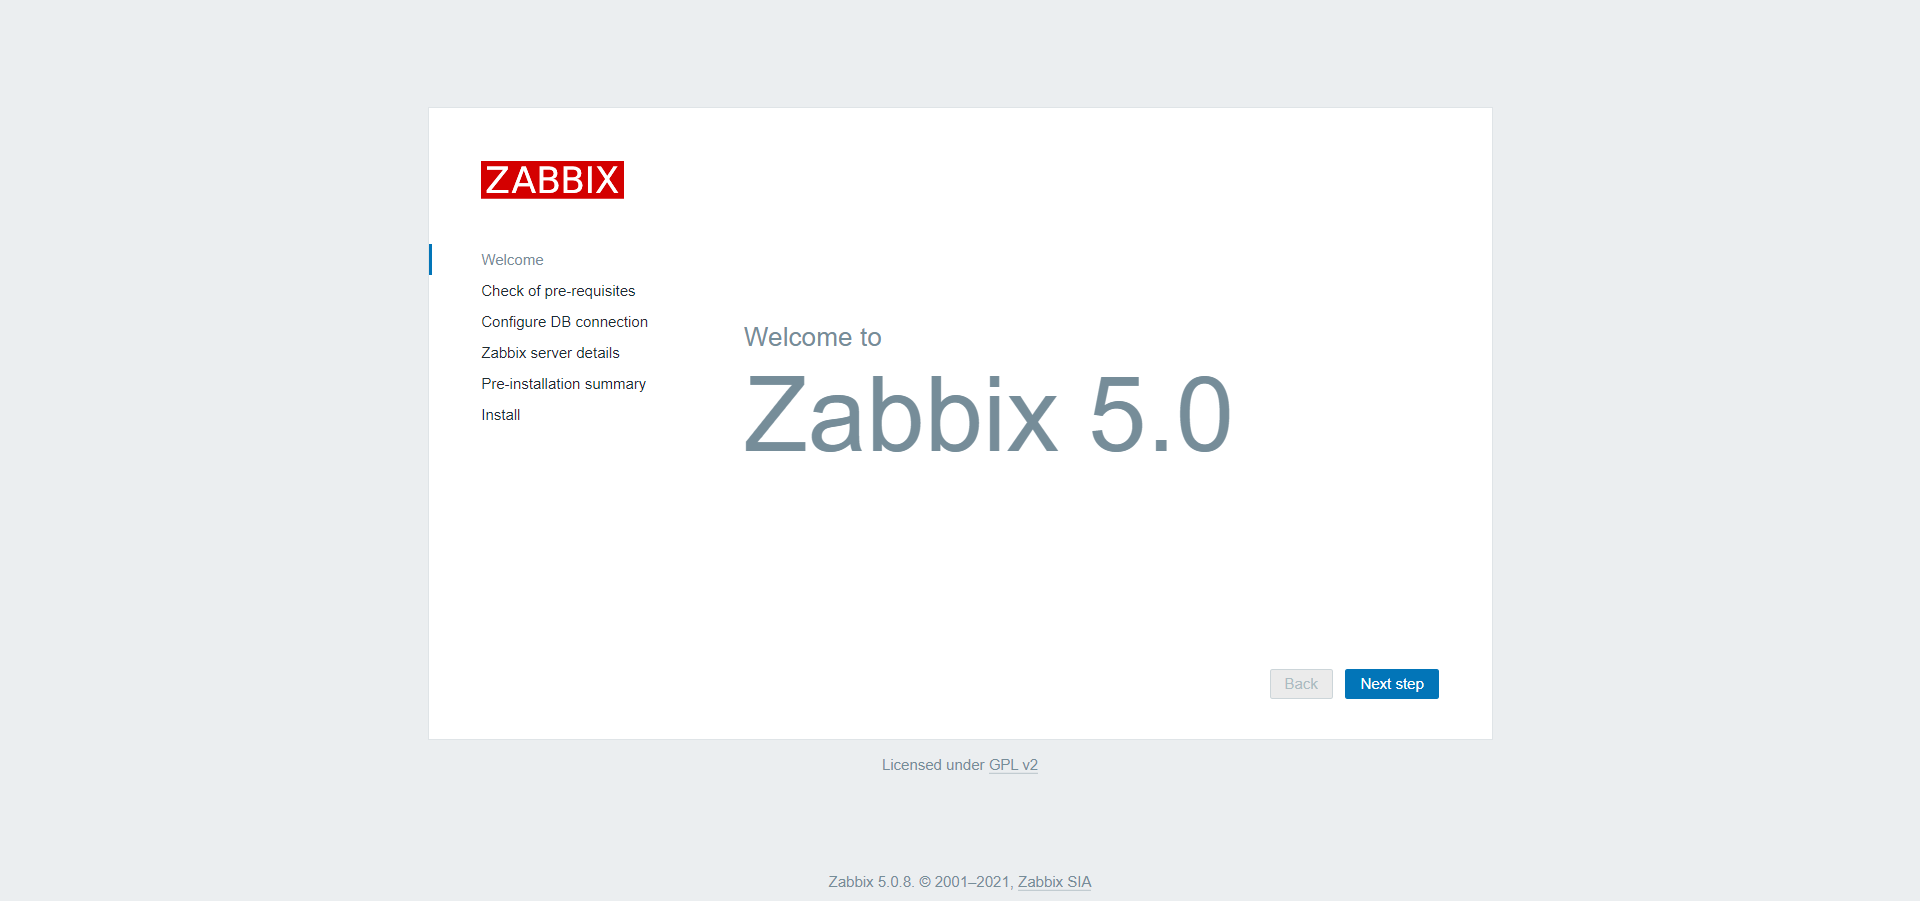
1)浏览器访问http://hadoop102/zabbix/
2)检查配置
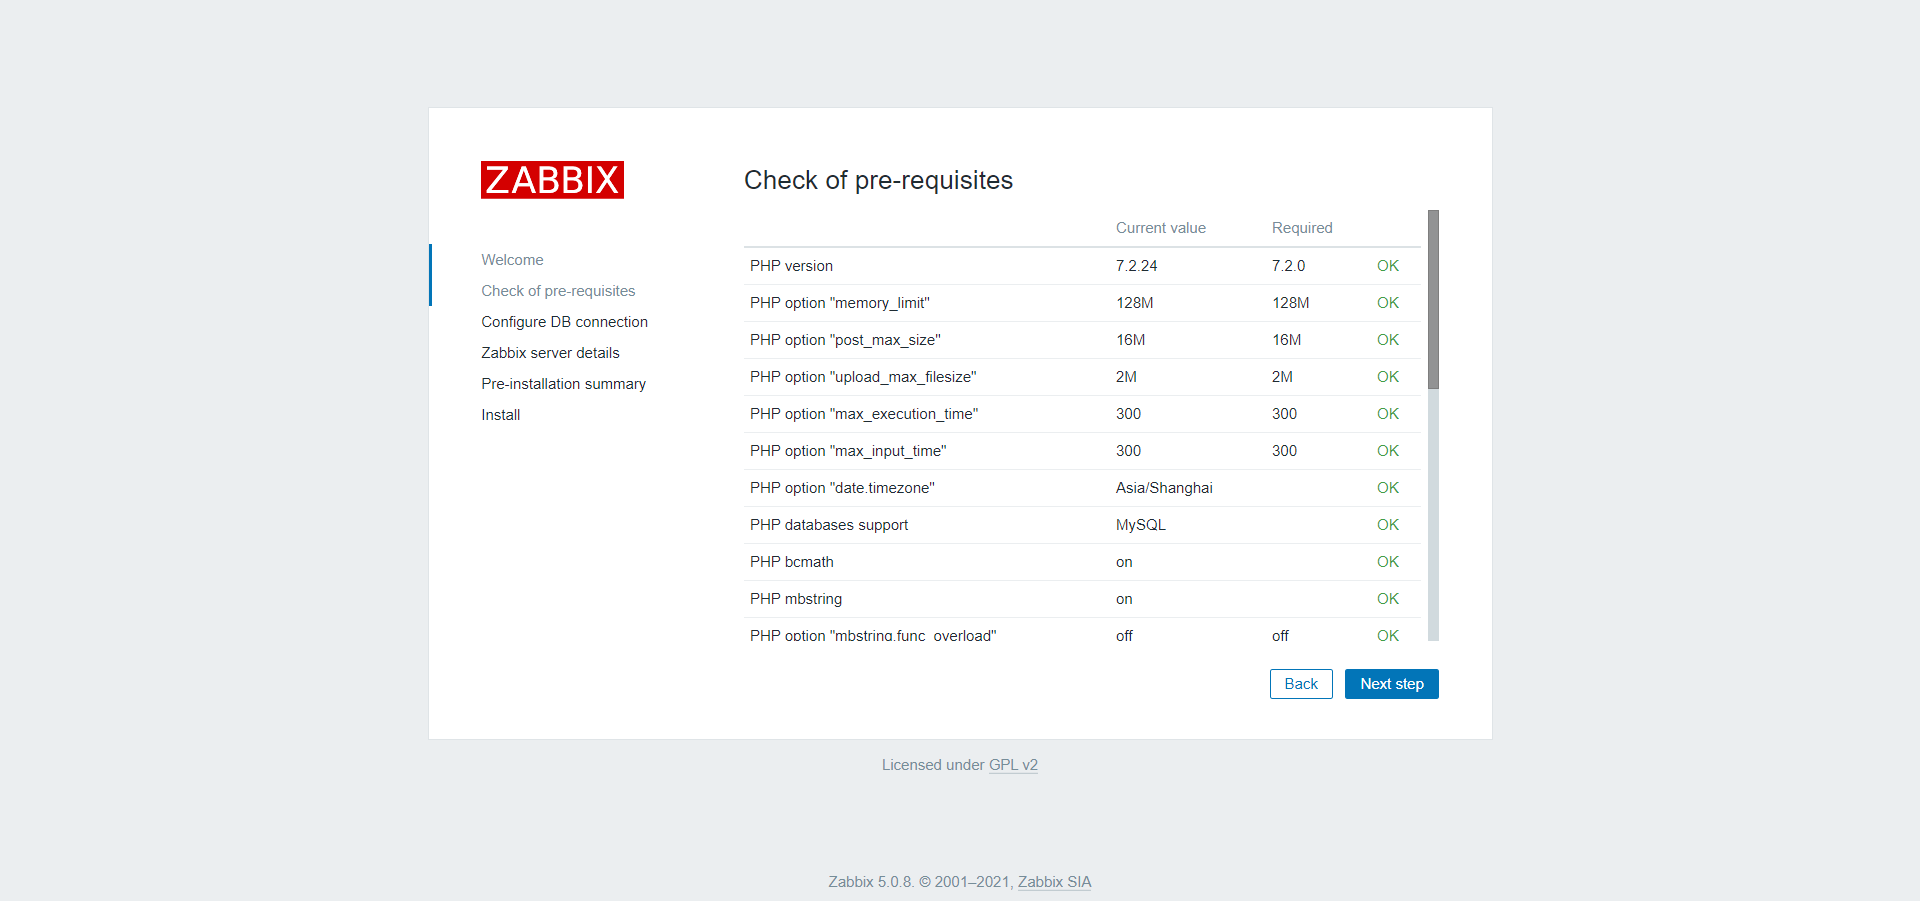
3)配置数据库
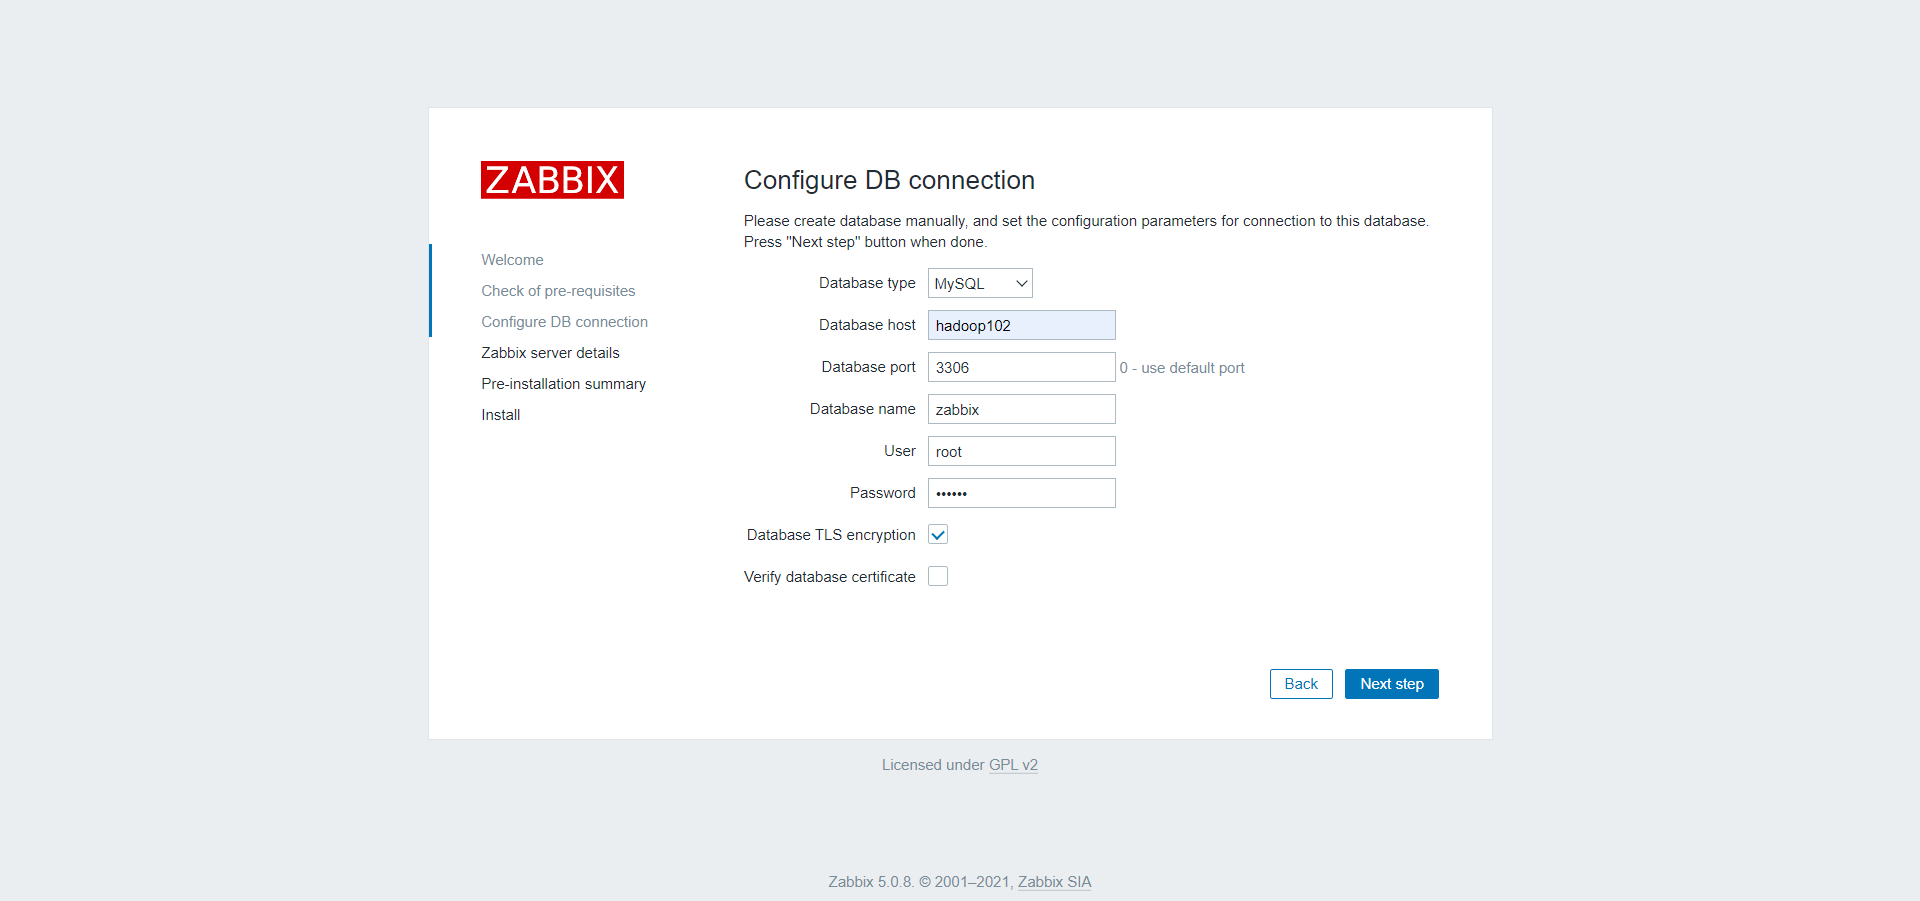
4)配置zabbix-server
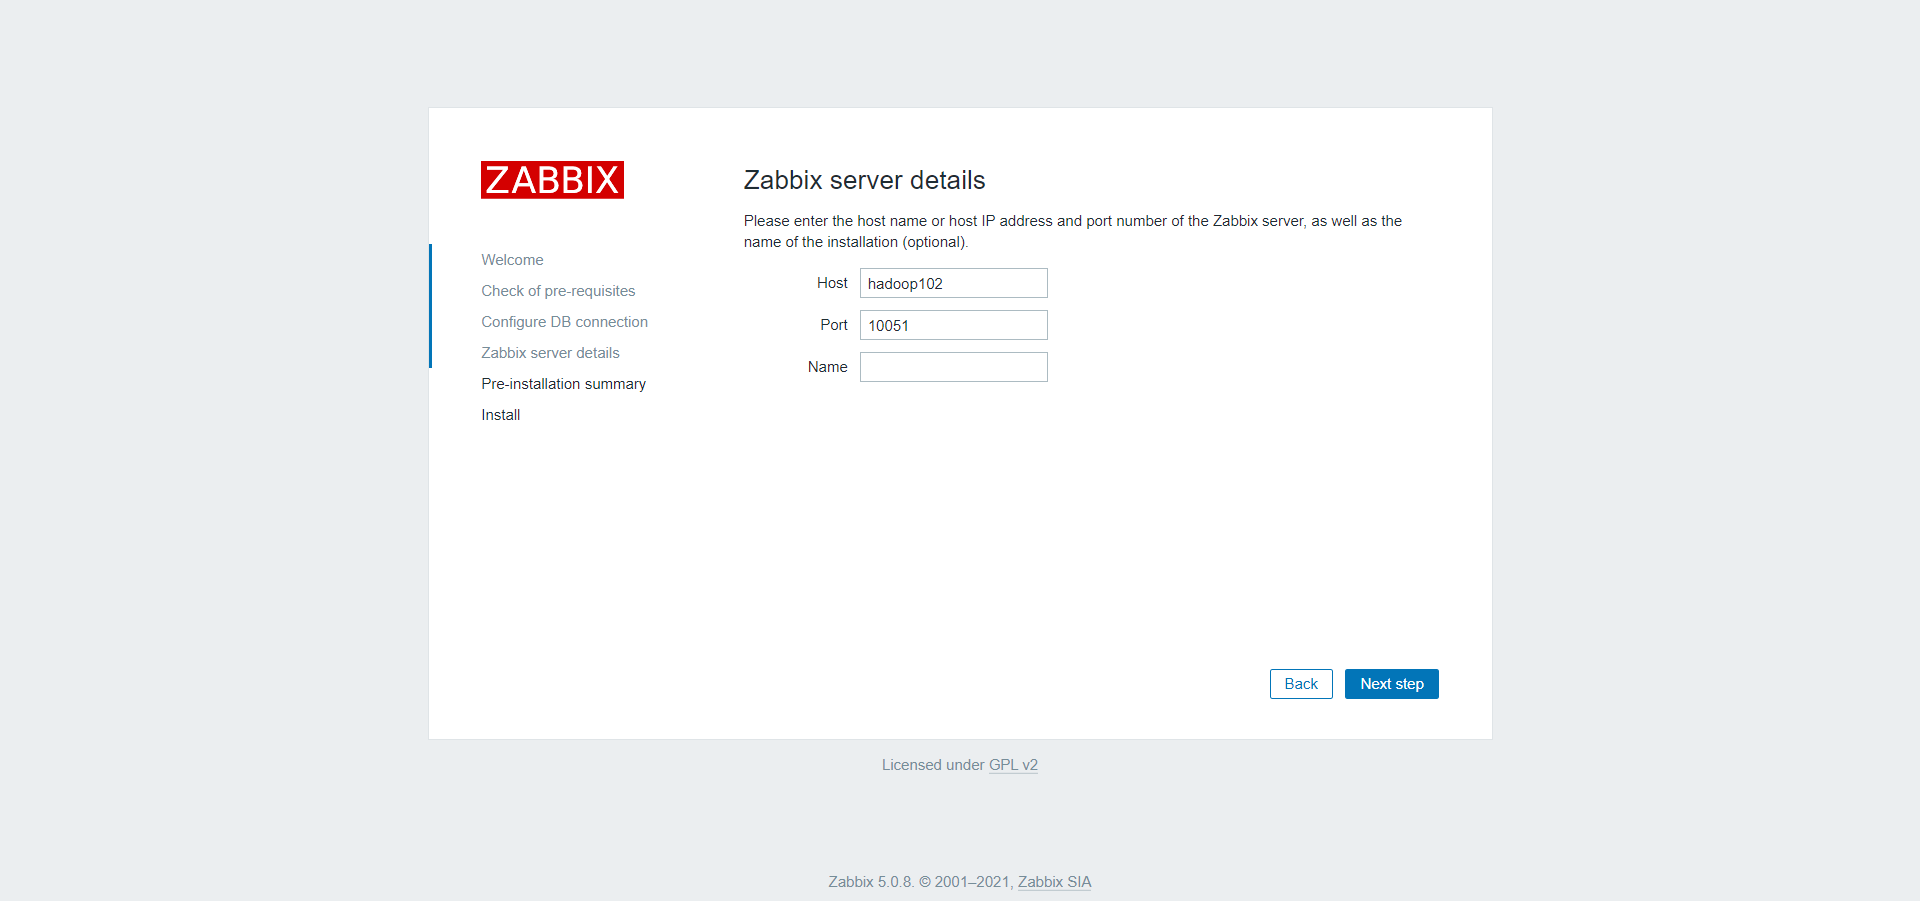
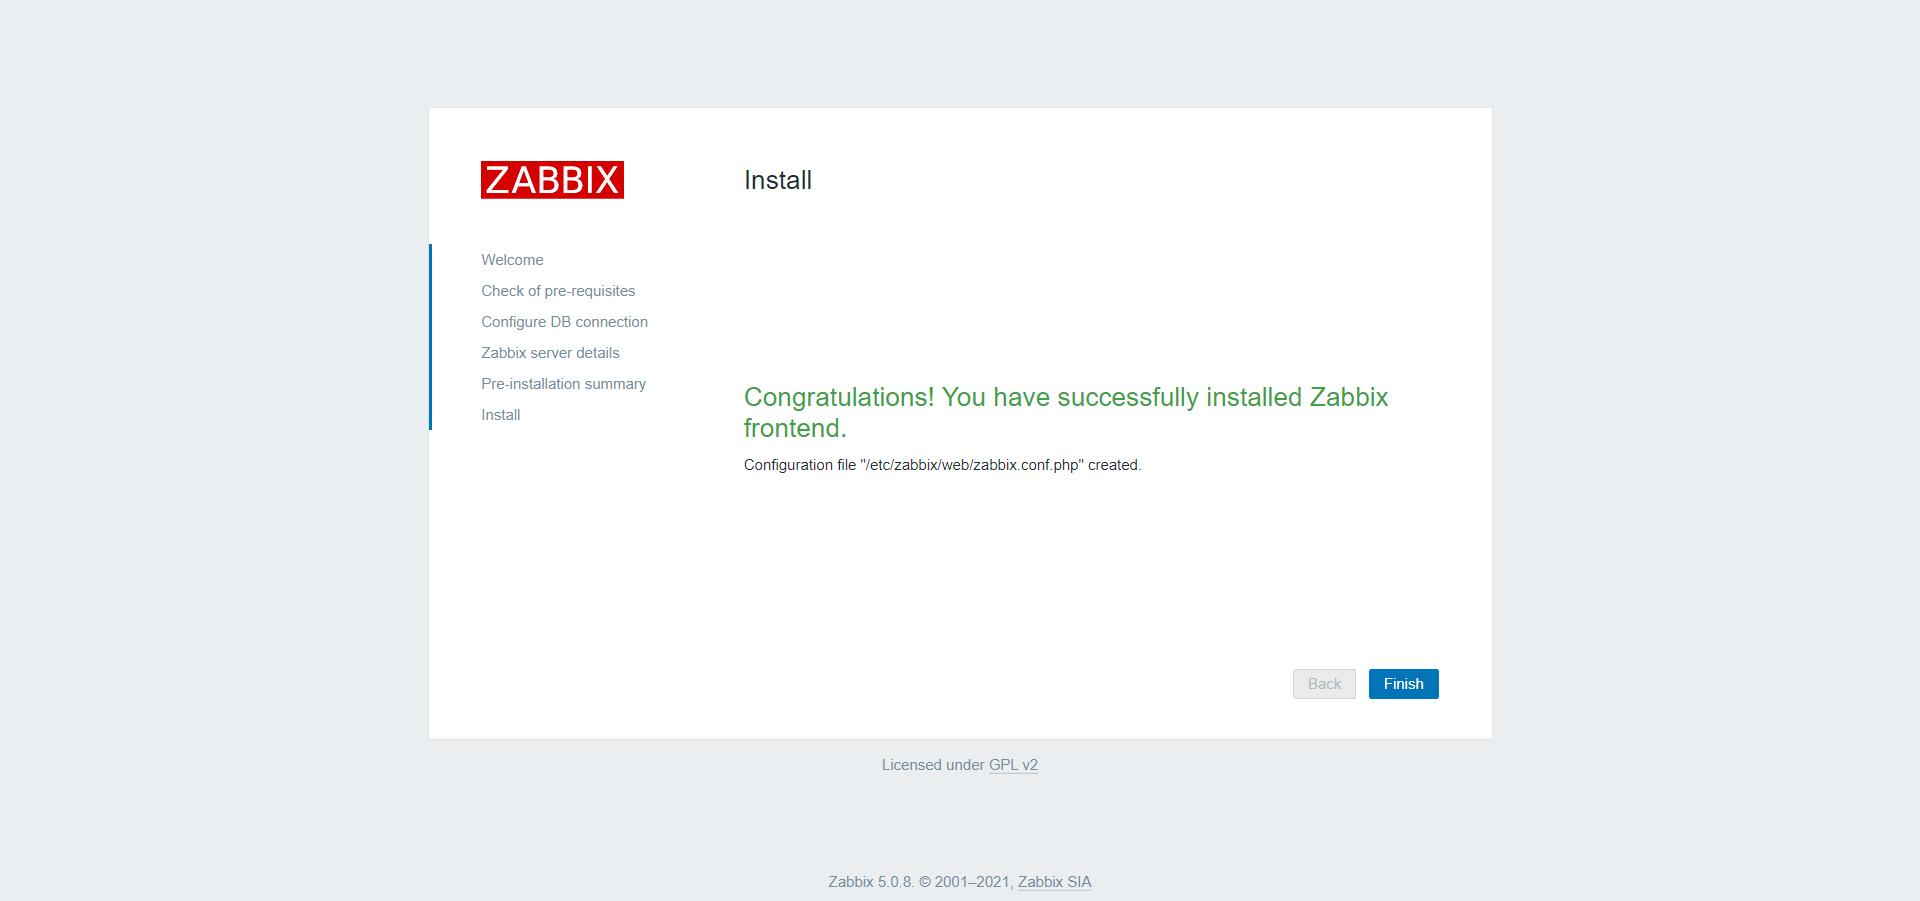
2.6.4 登录Zabbix
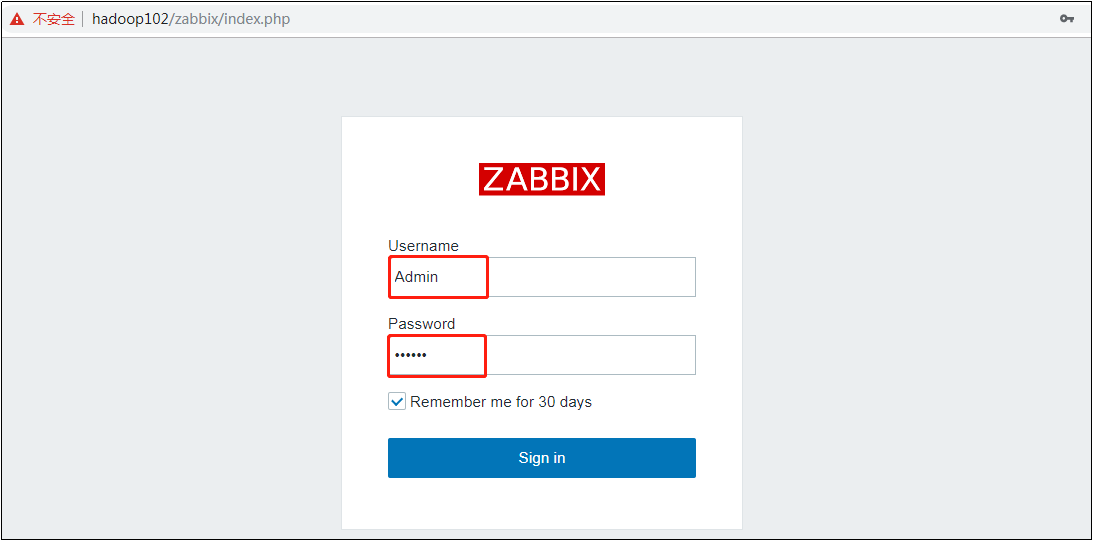
1)用户名密码如下
用户名:Admin 密码:zabbix
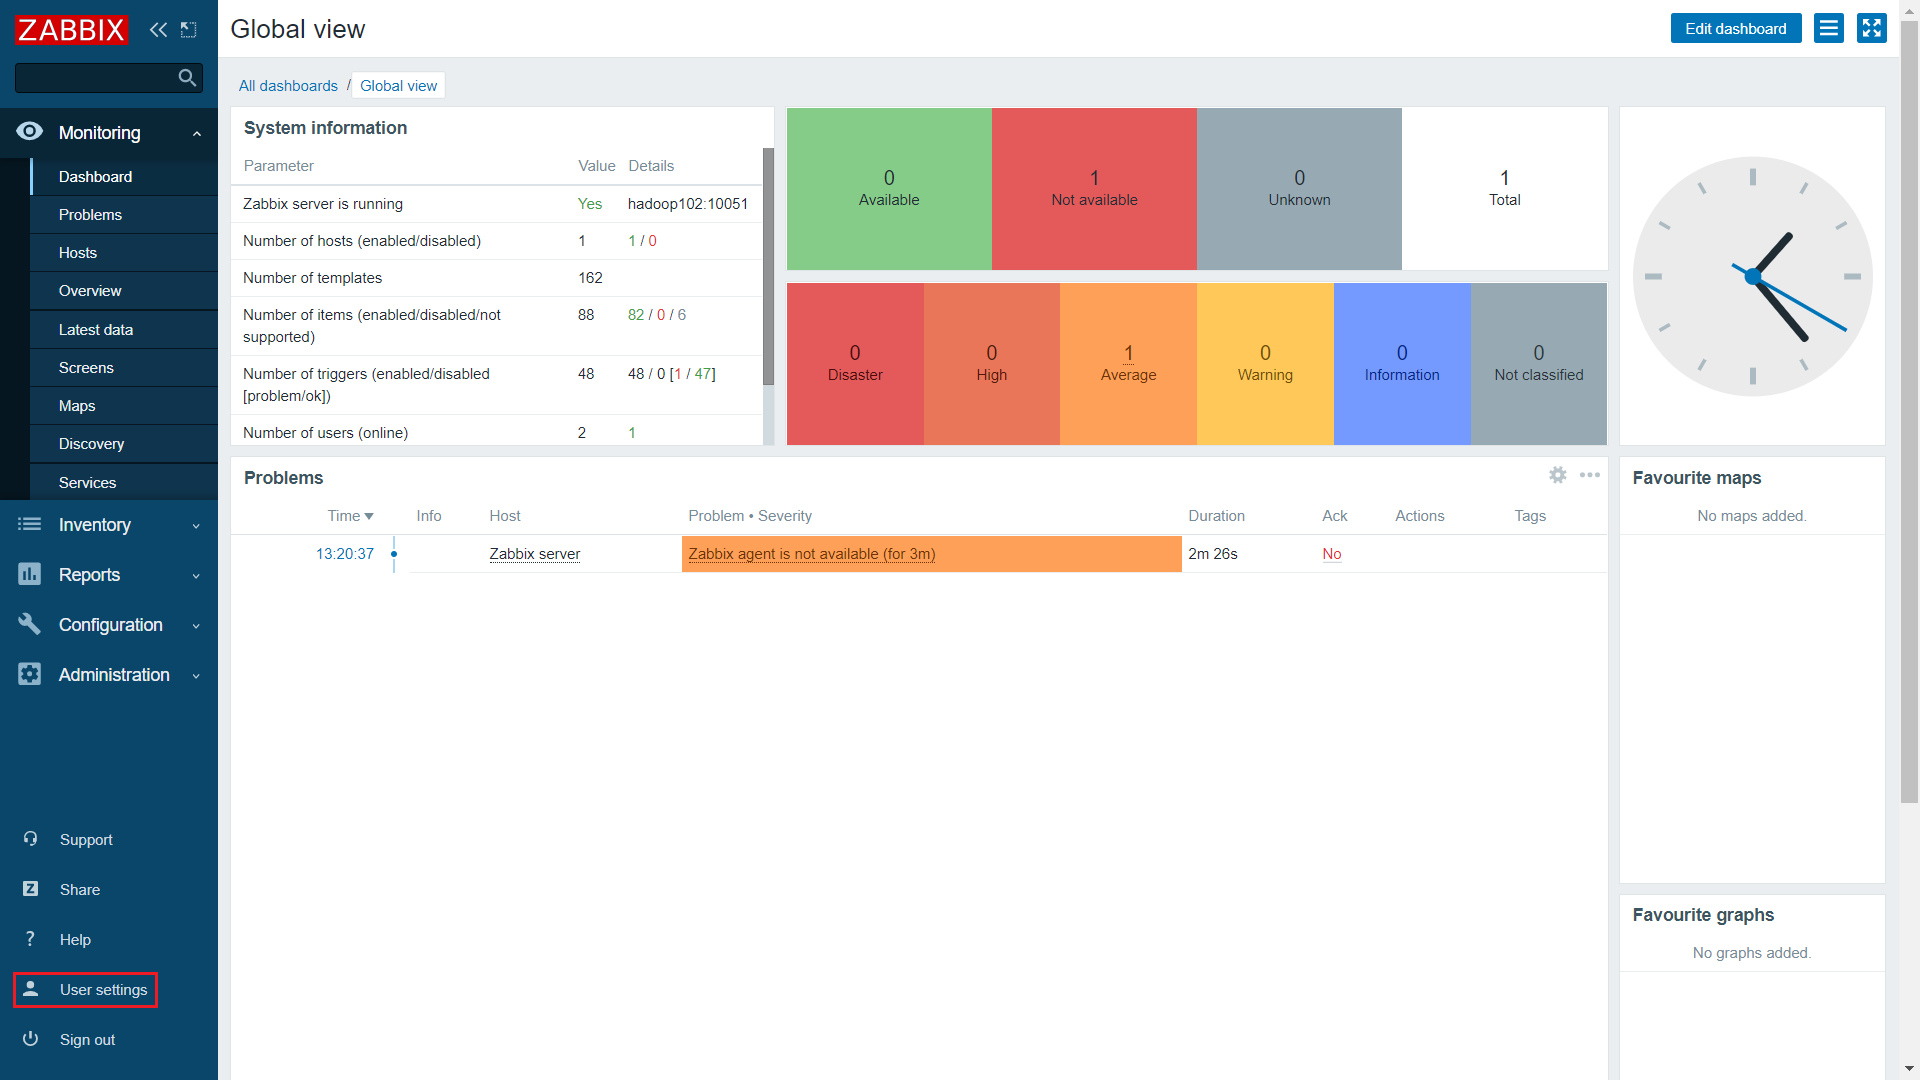
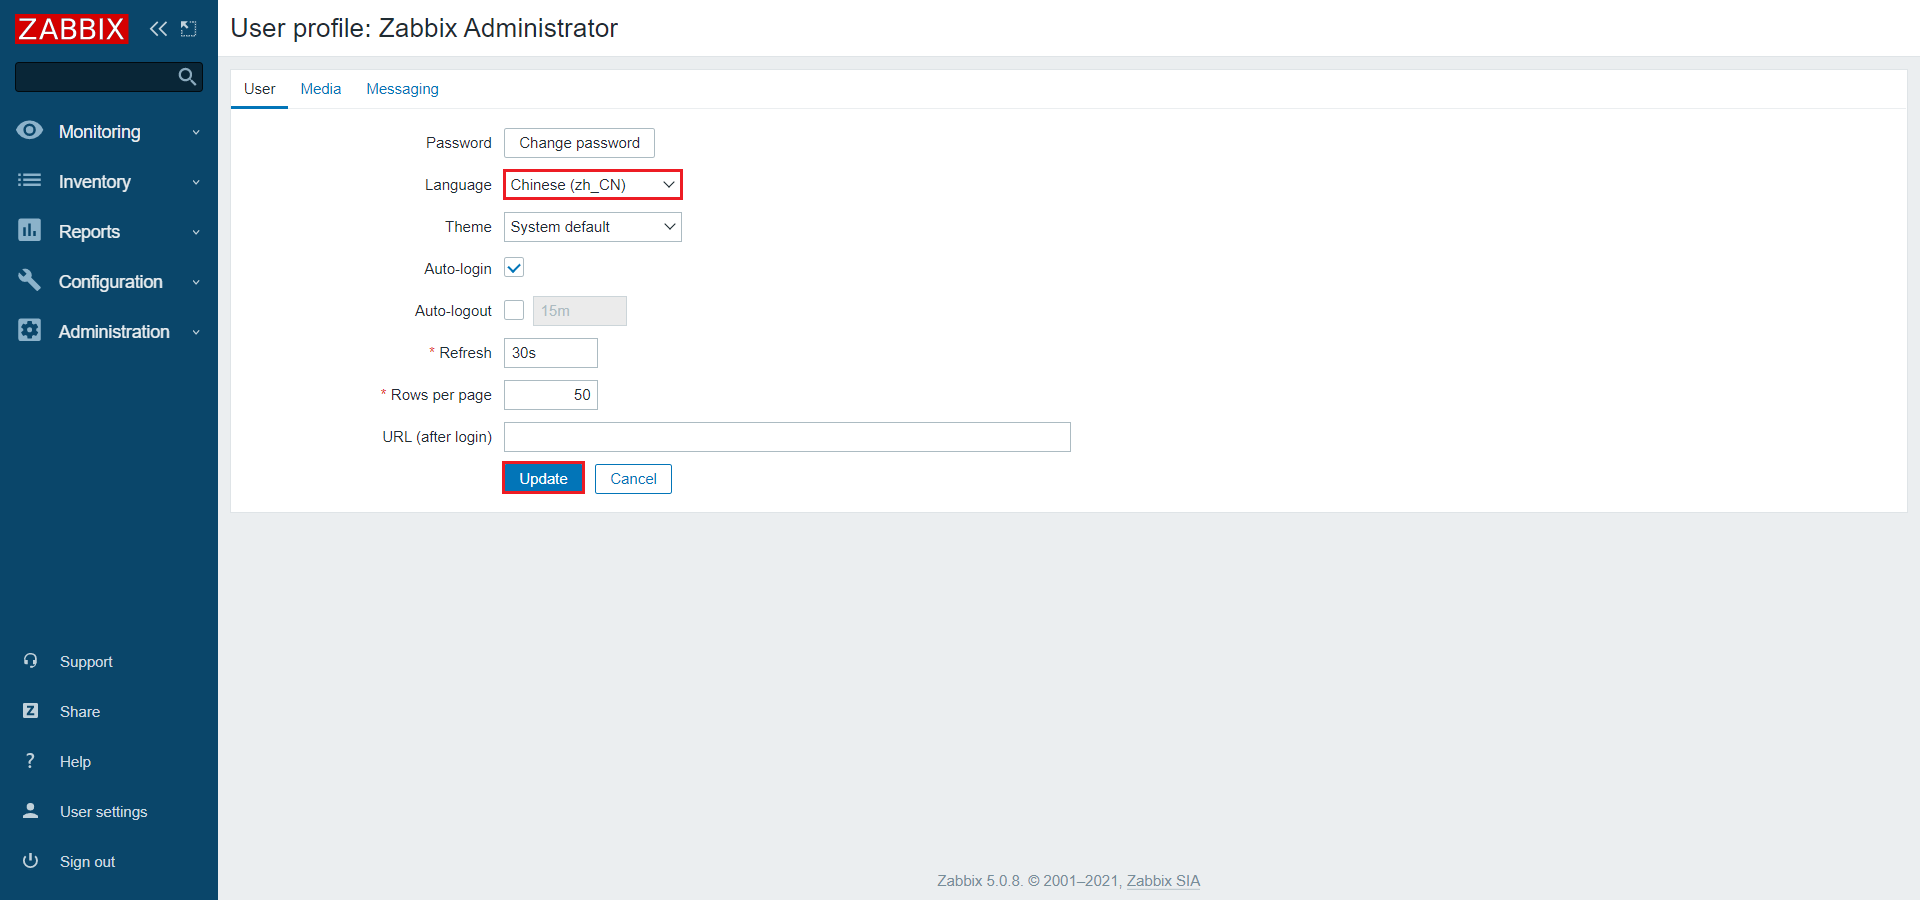
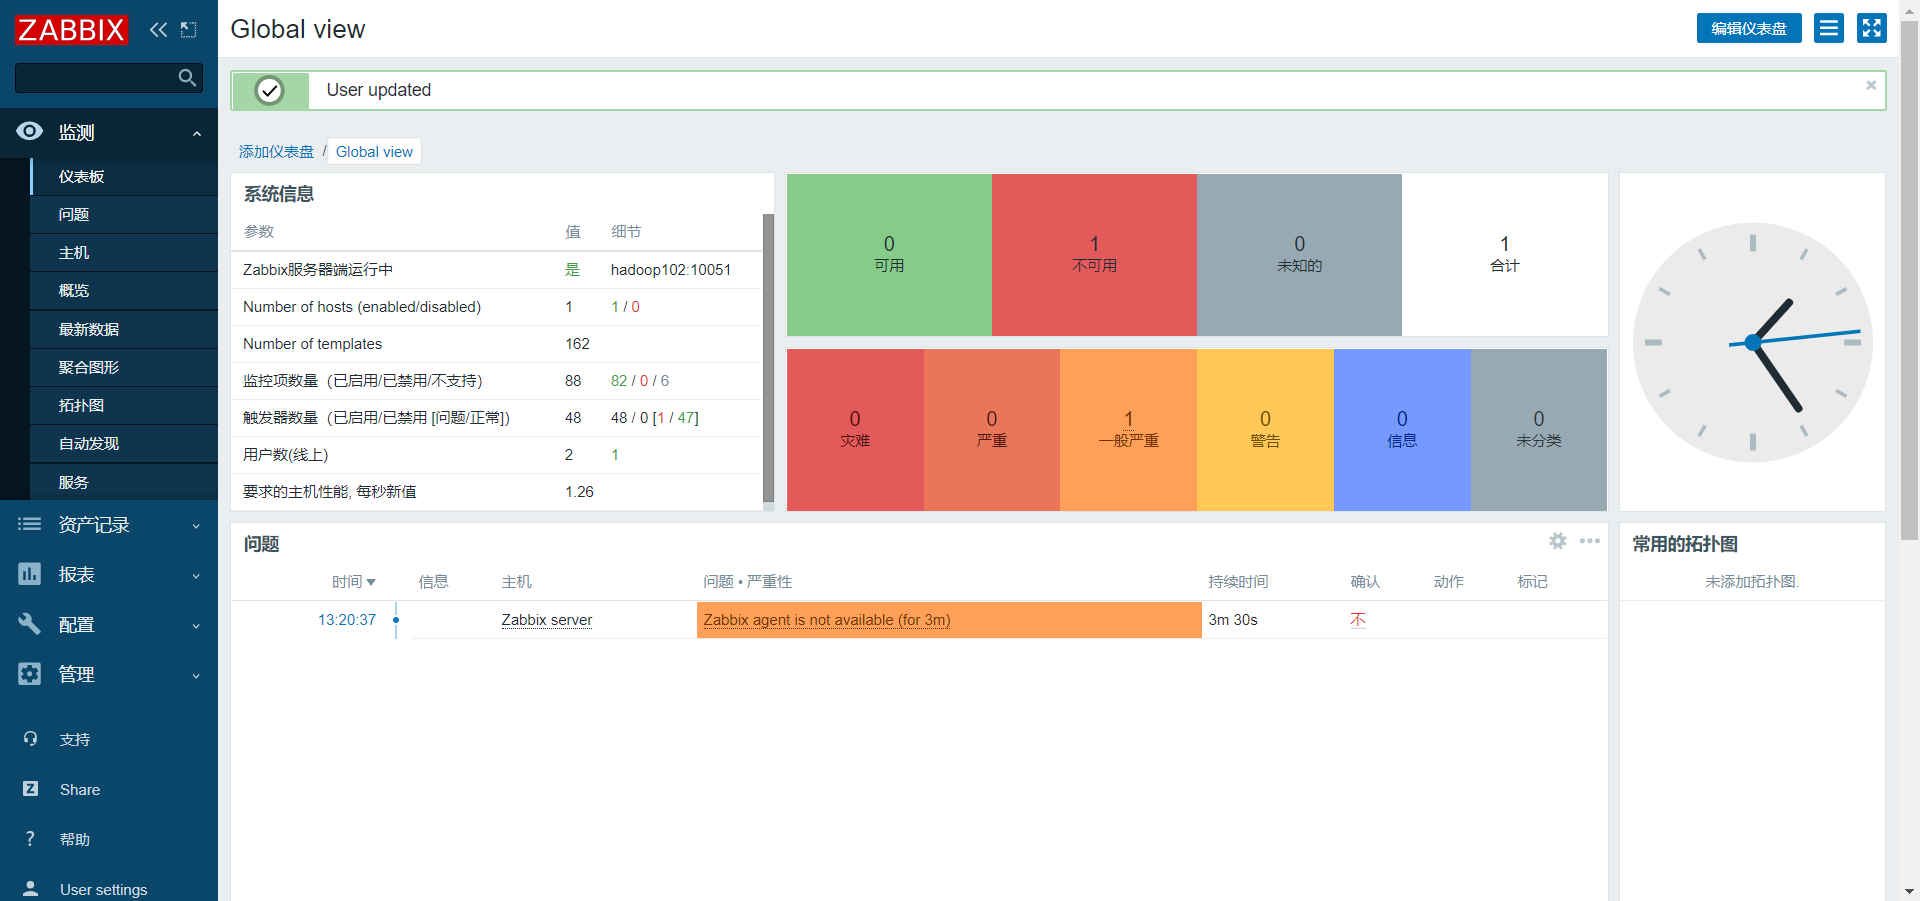
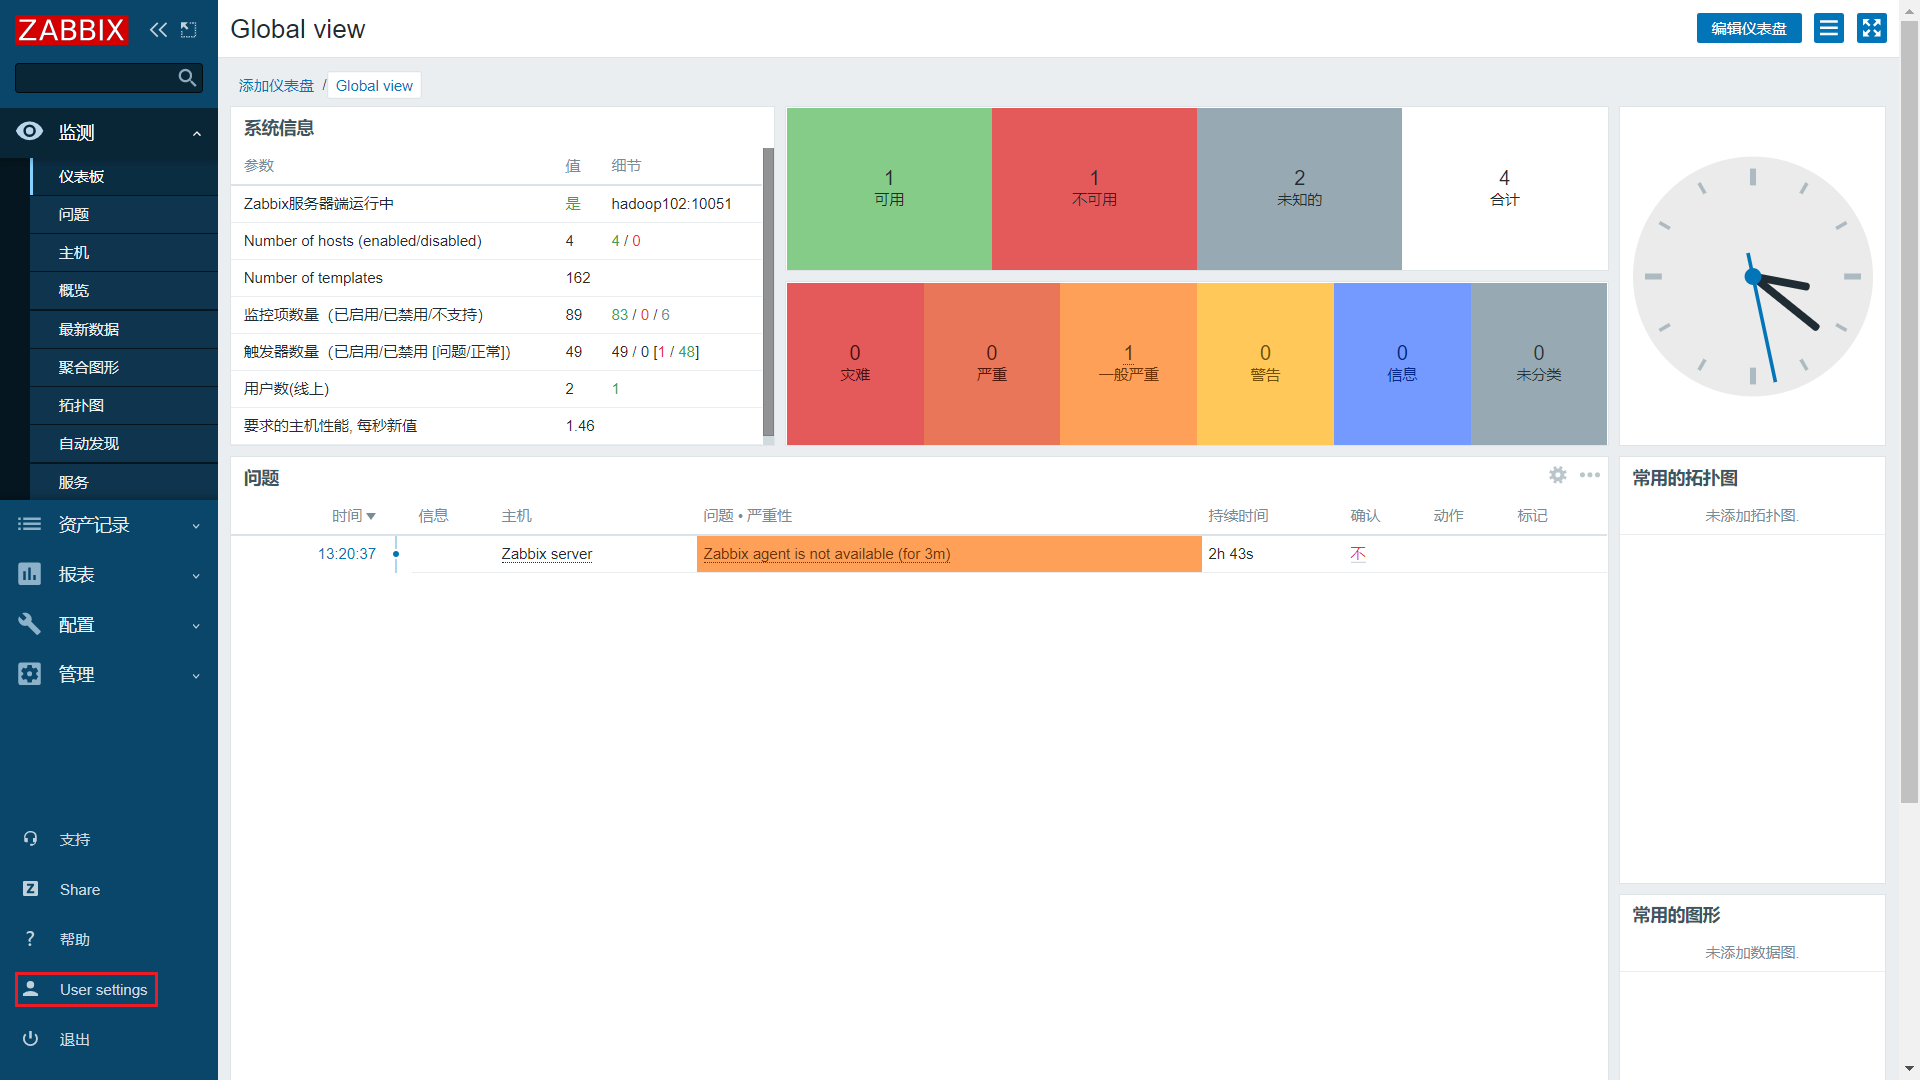
2)点击User Settings,语言设成中文
第3章 Zabbix使用
3.1 Zabbix术语
3.1.1 主机(Host)
一台你想监控的网络设备,用IP或域名表示。
3.1.2 监控项(Item)
你想要接收的主机的特定数据,一个度量数据。
3.1.3 触发器(Trigger)
一个被用于定义问题阈值和“评估”监控项接收到的数据的逻辑表达式。
3.1.4 动作(Action)
一个对事件做出反应的预定义的操作,比如邮件通知。
3.2 Zabbix实战
3.2.1 创建Host
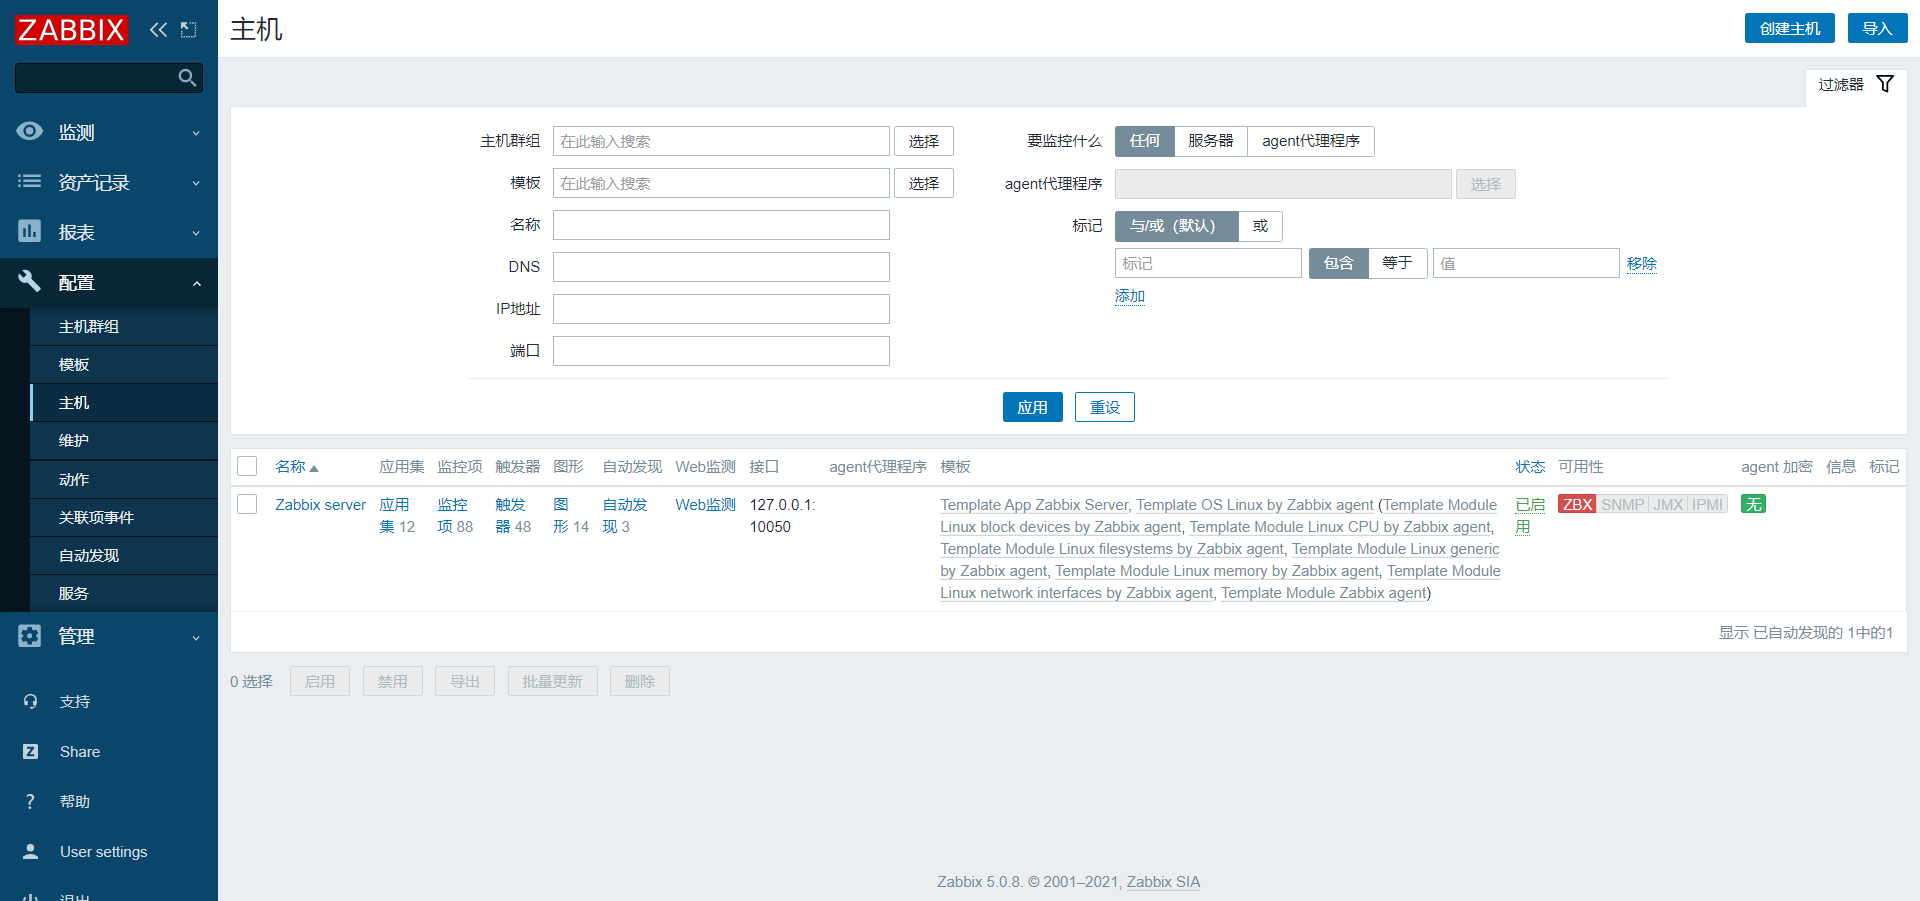
1)点击配置/主机/创建主机
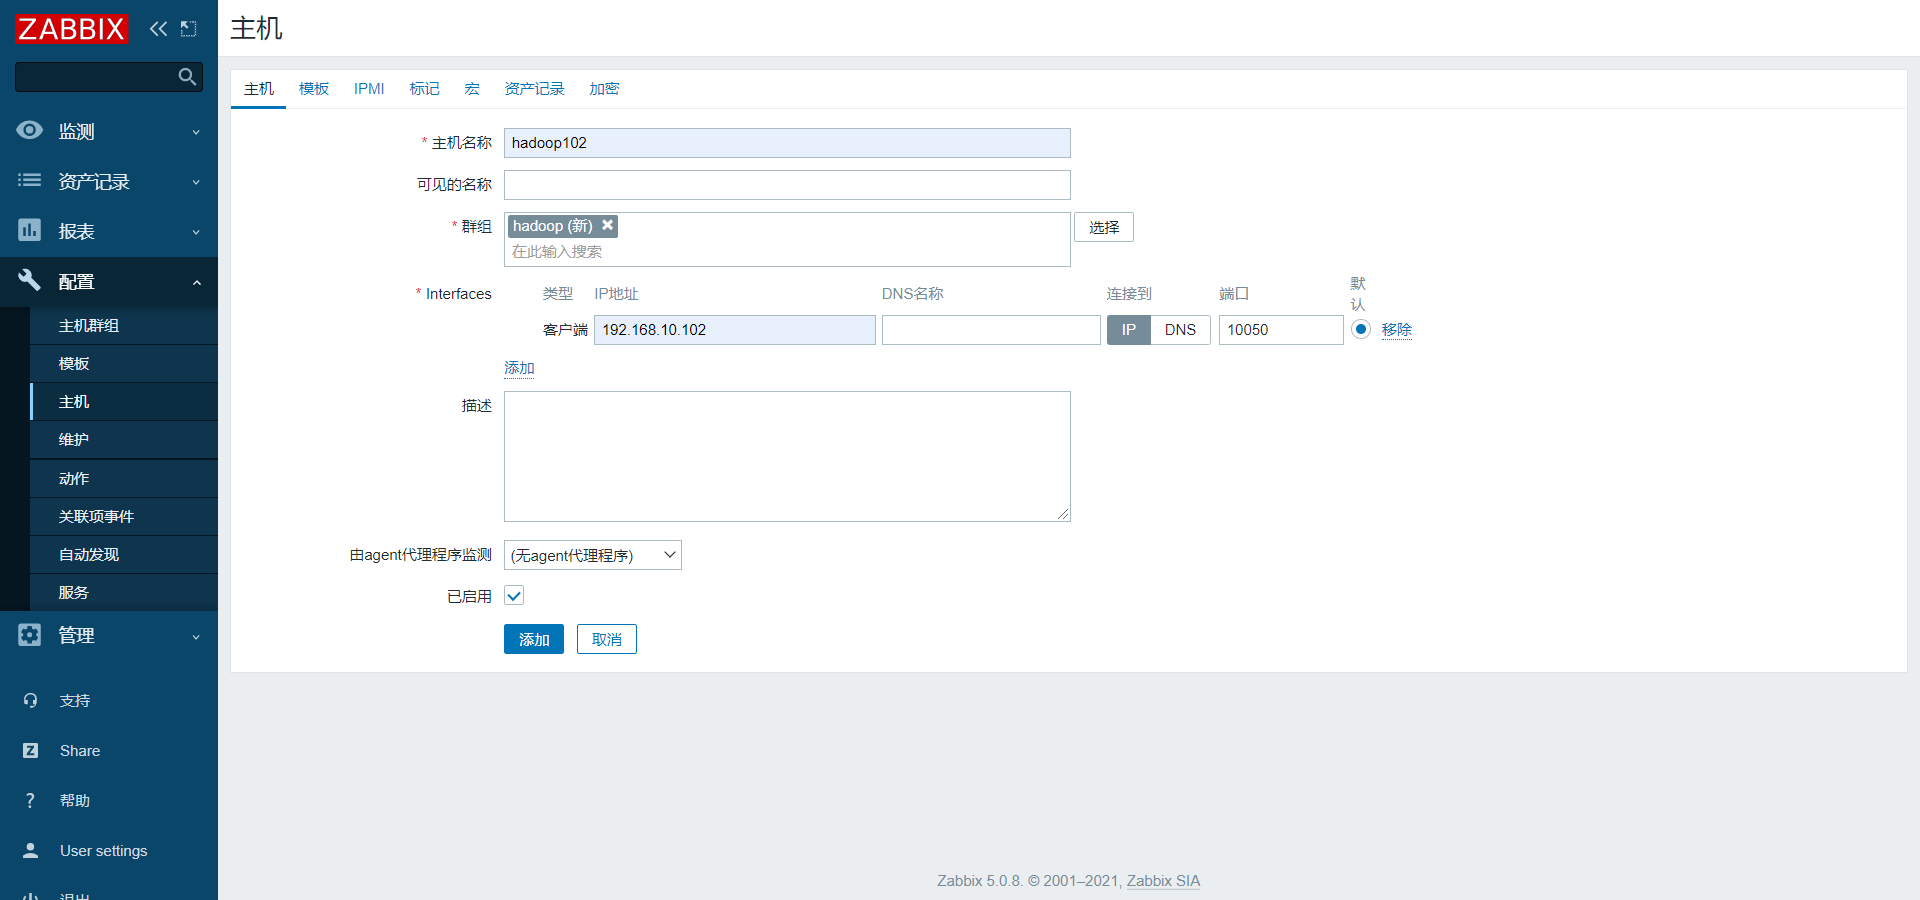
2)配置主机(Host)
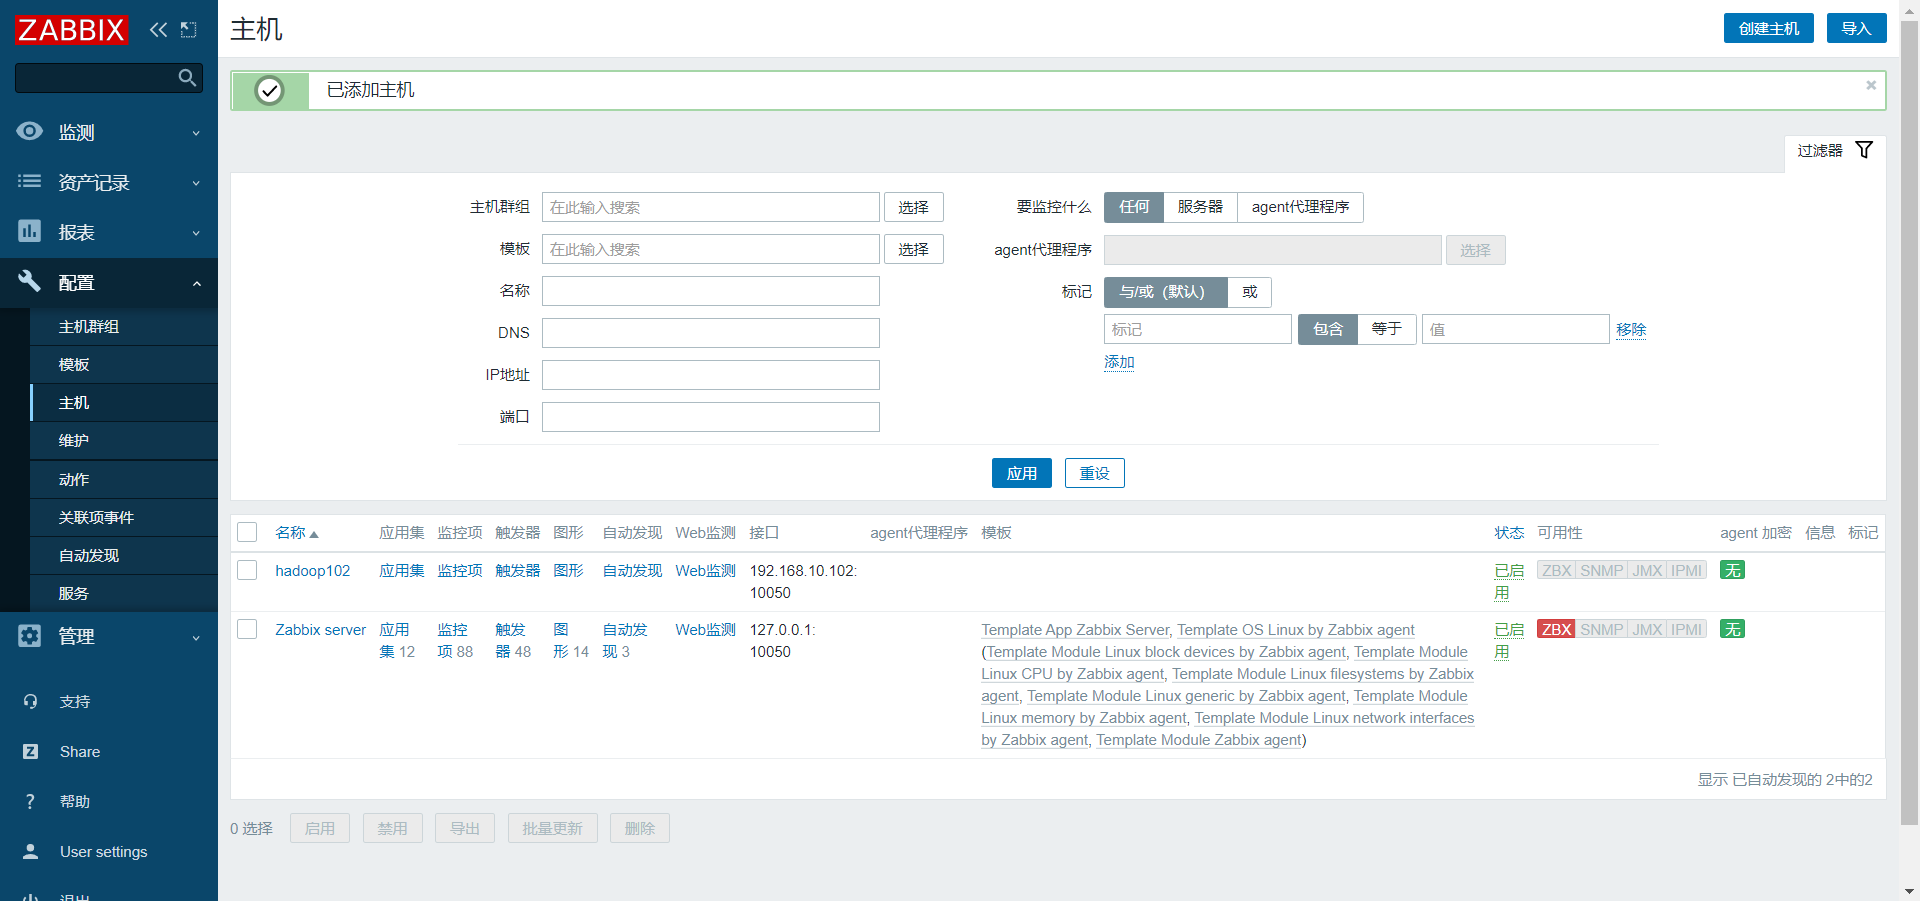
3)查看新增(Host)
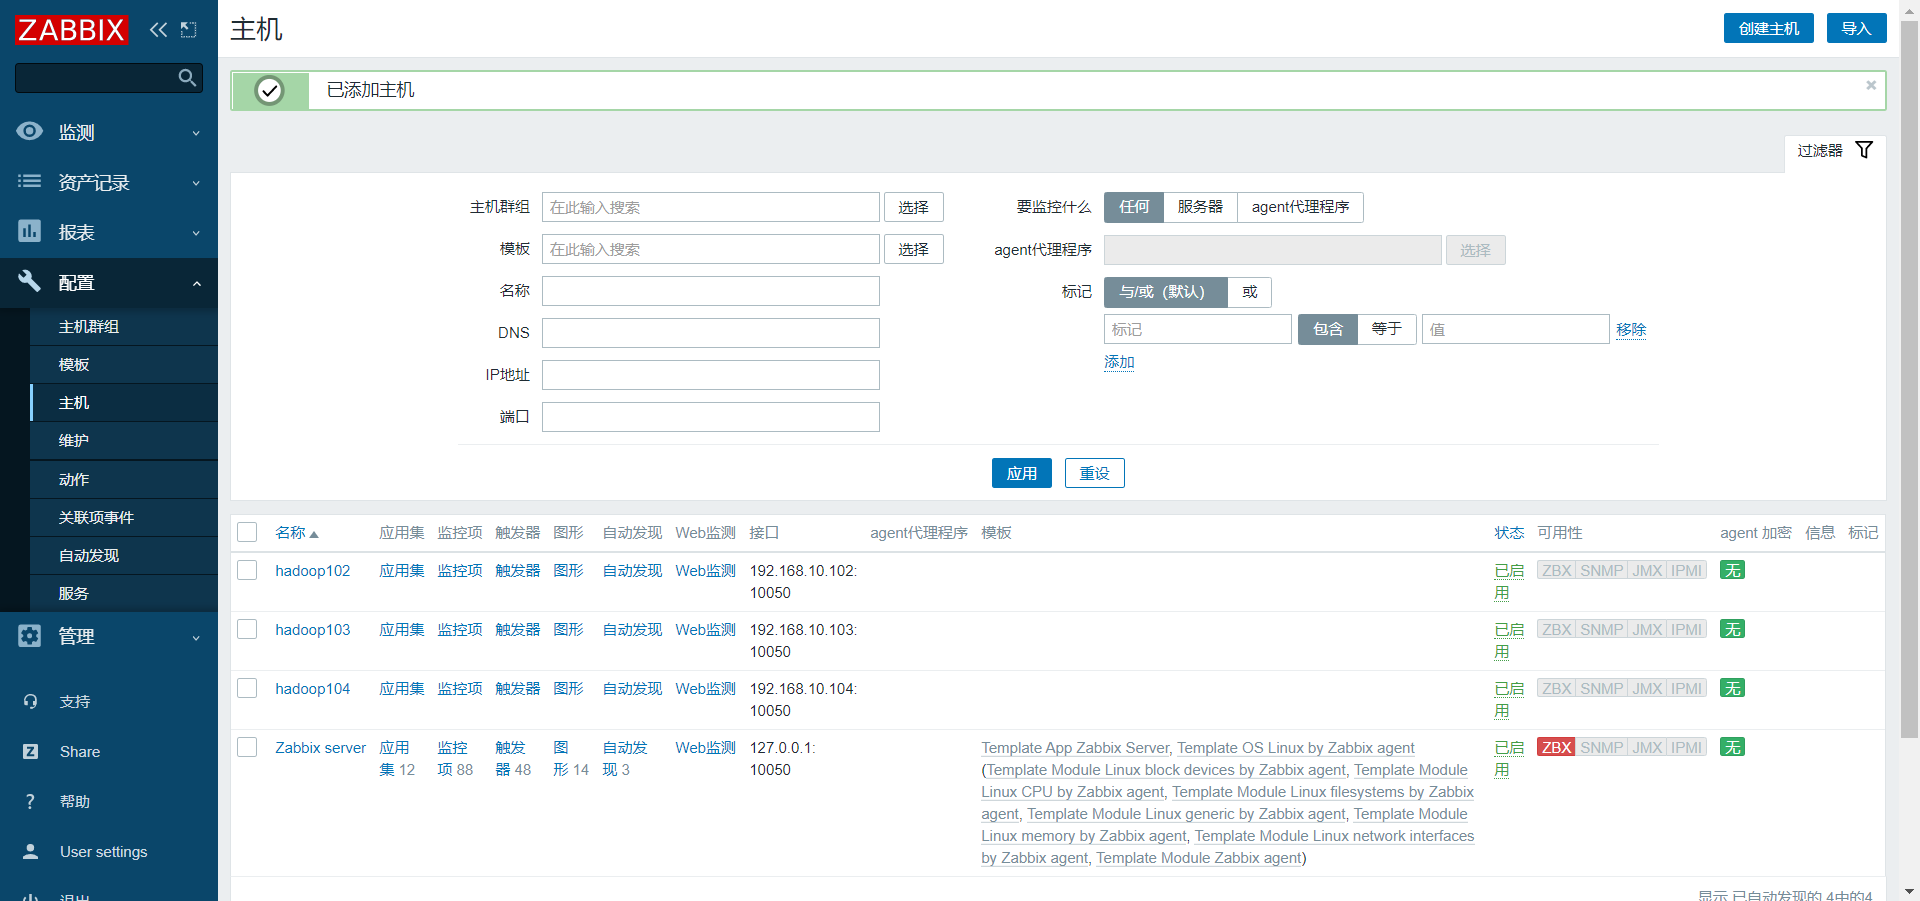
4)重复以上步骤,再创建hadoop103、hadoop104主机。
3.2.2 创建监控项(Items)
1)点击监控项(Items)
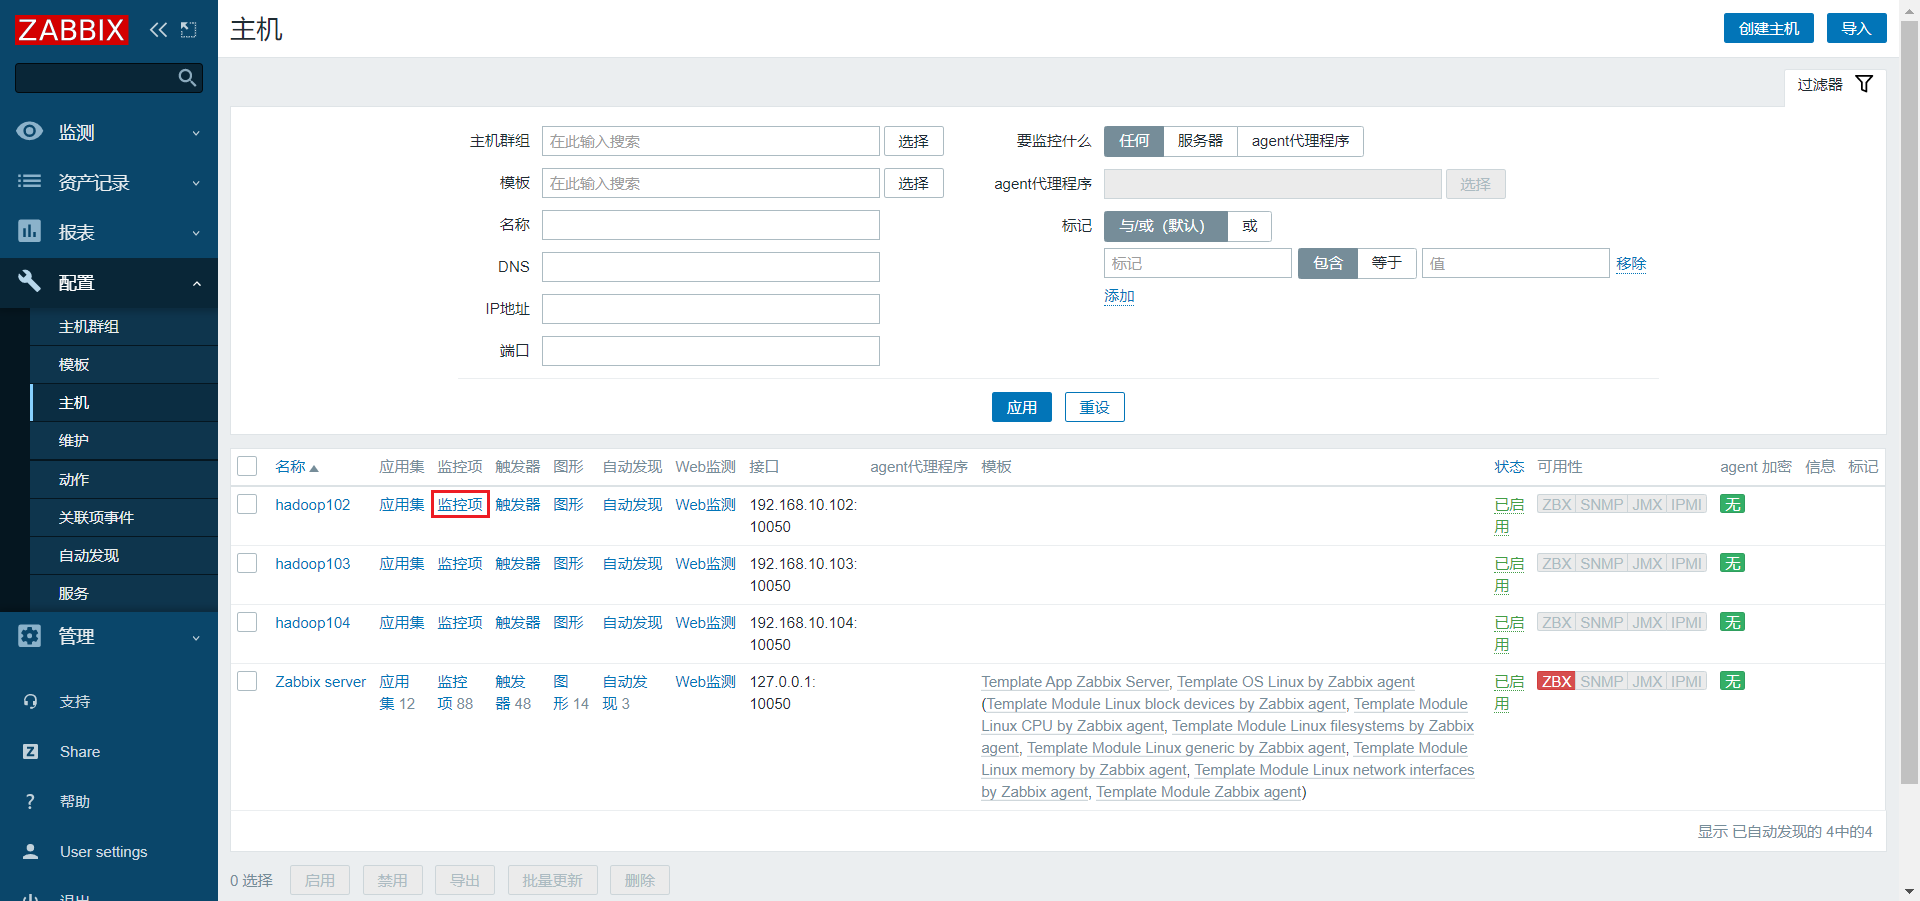
2)点击创建监控项(Create Item)
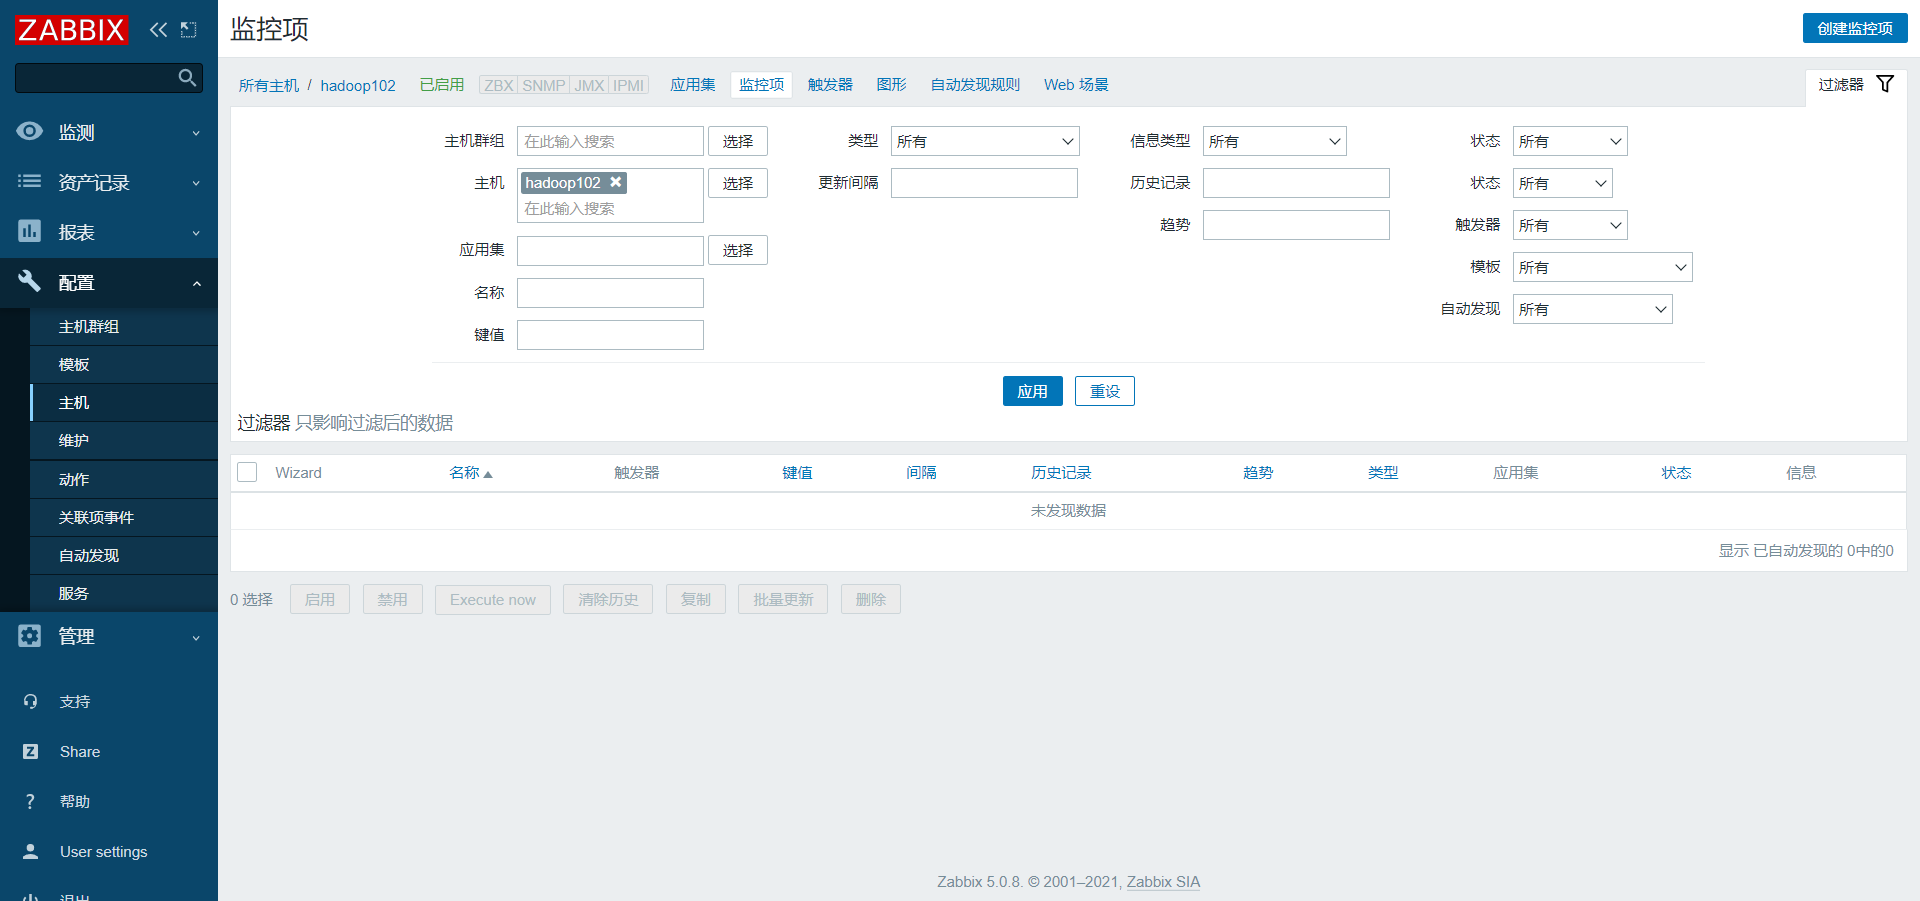
3)配置监控项(Item)
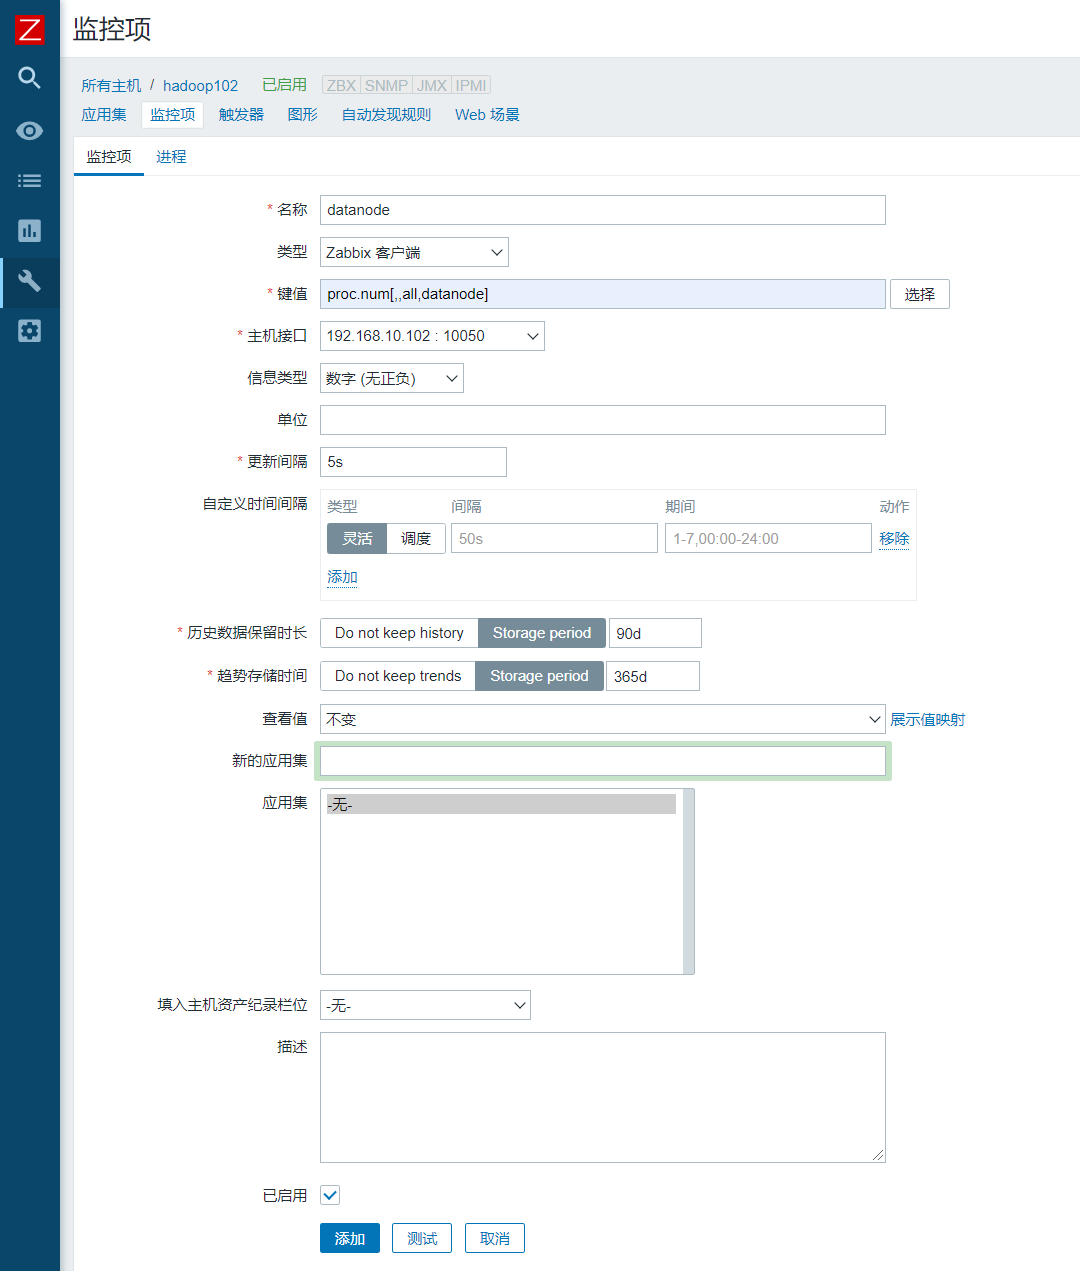
4)查看创建的监控项
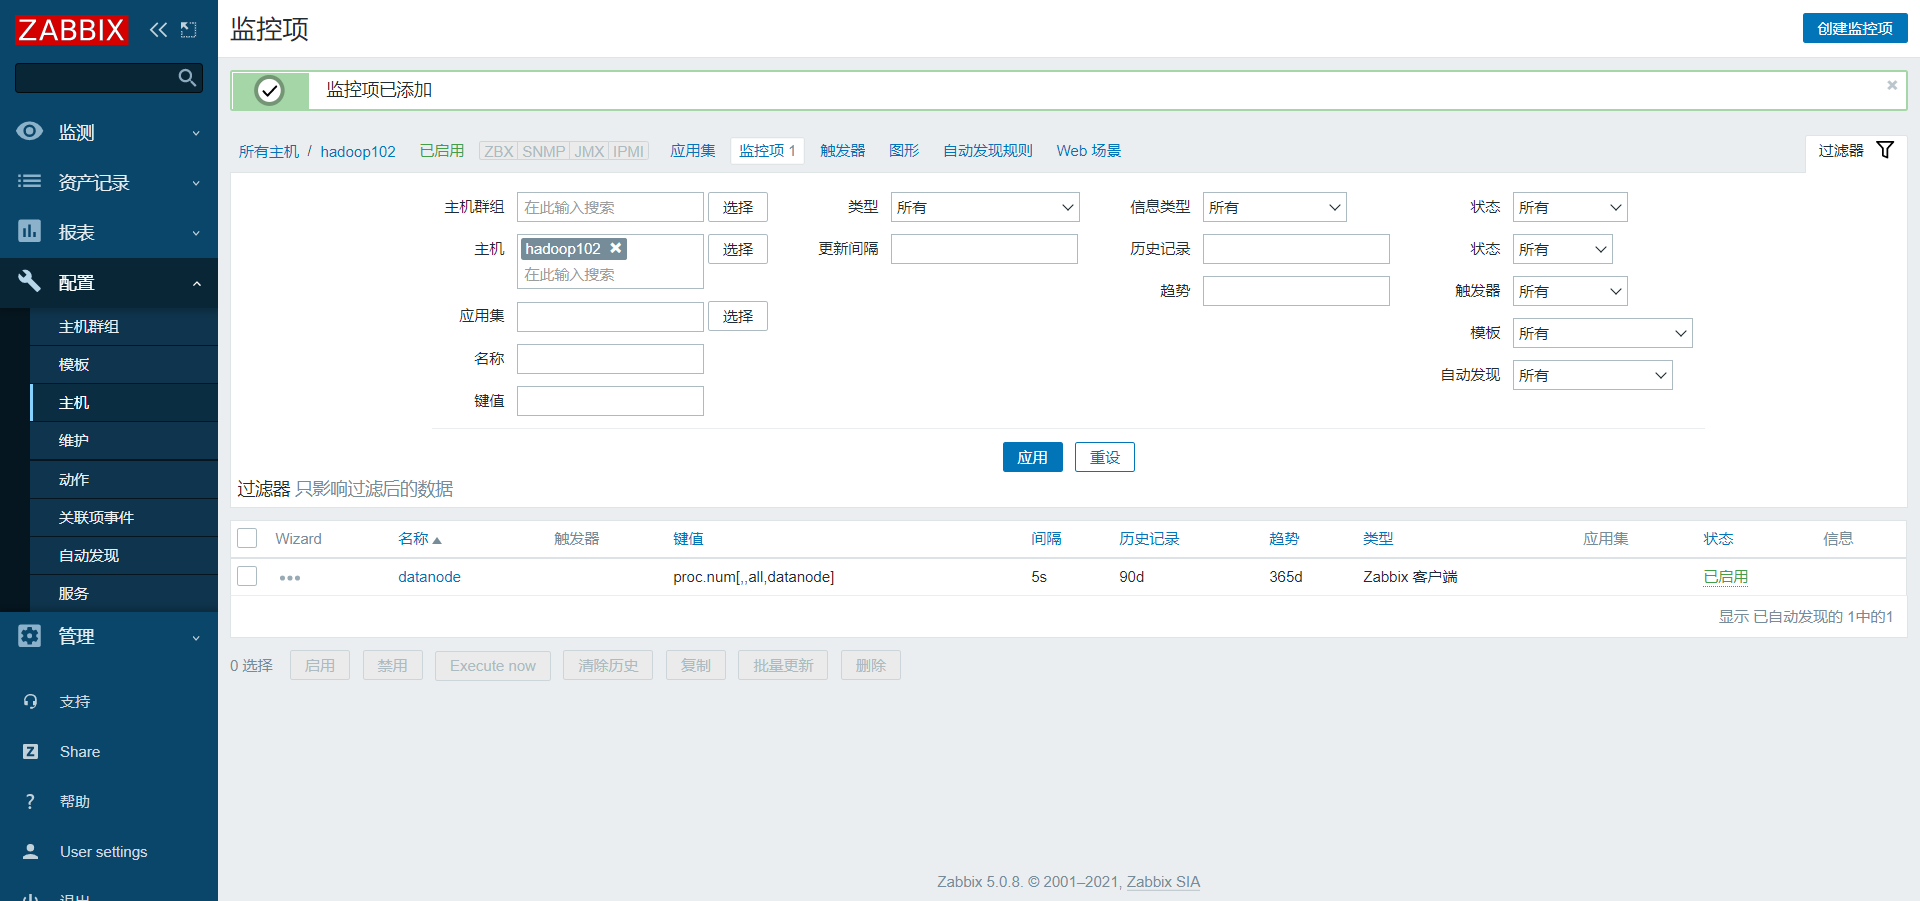
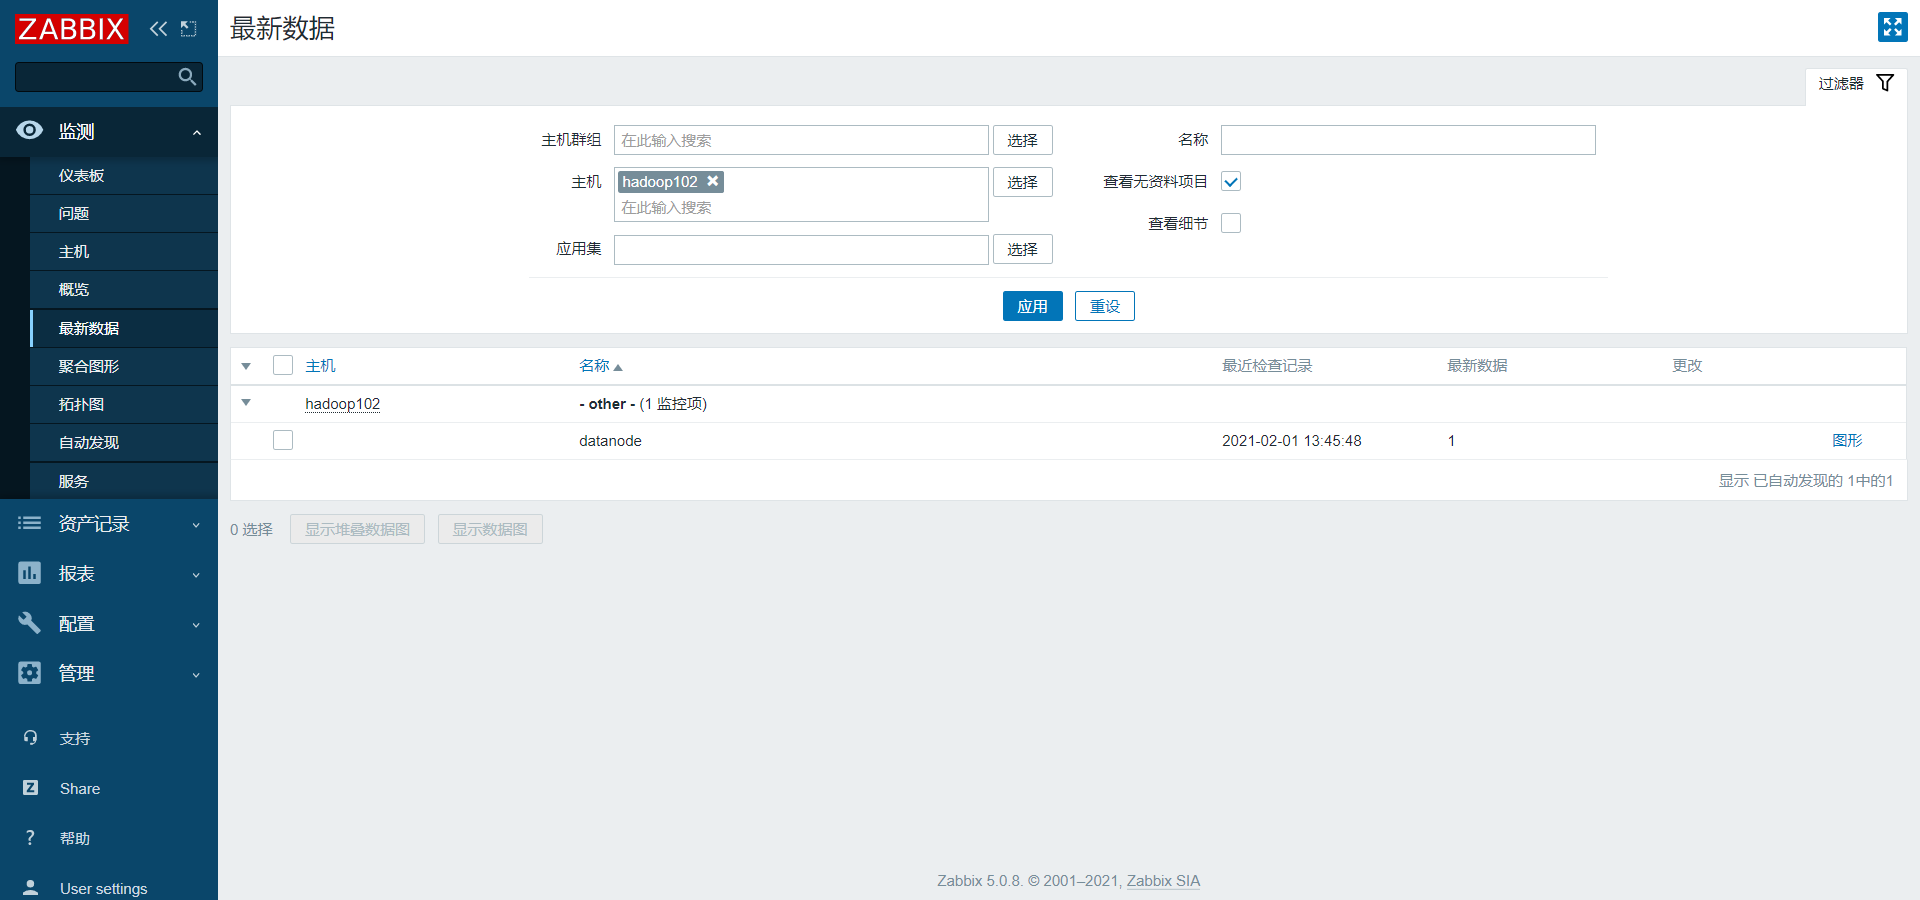
5)查看监控项最新数据
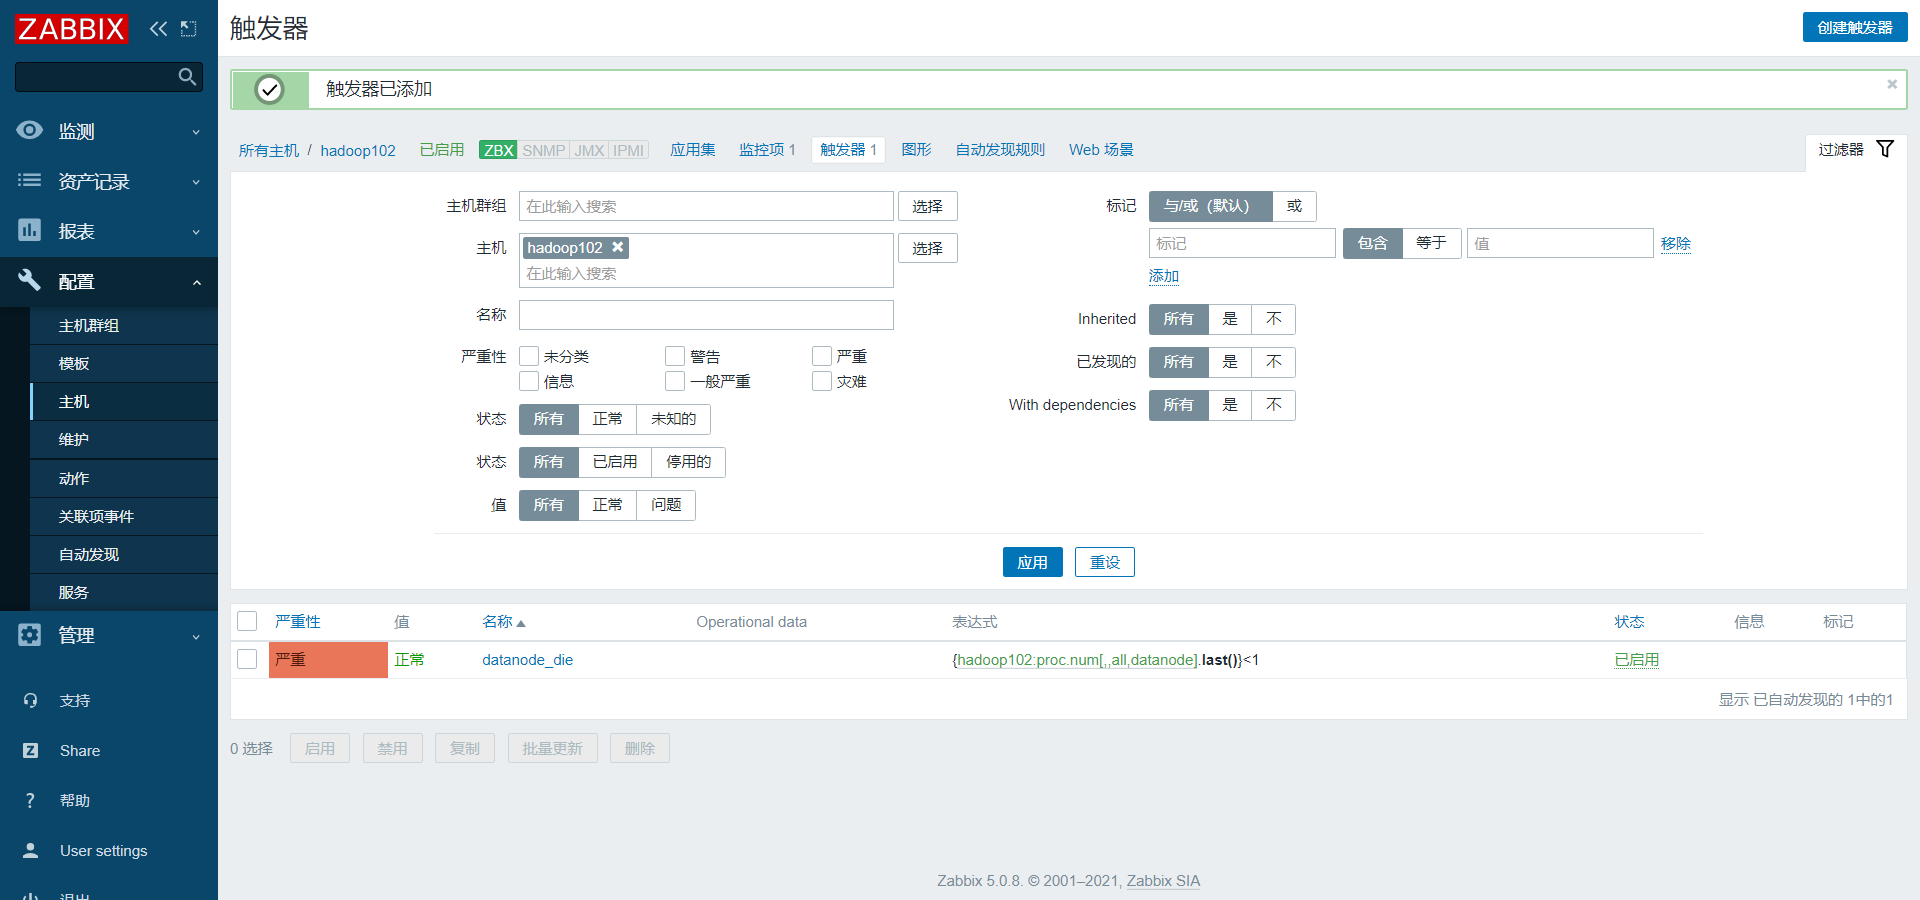
3.2.3 创建触发器(Trigger)
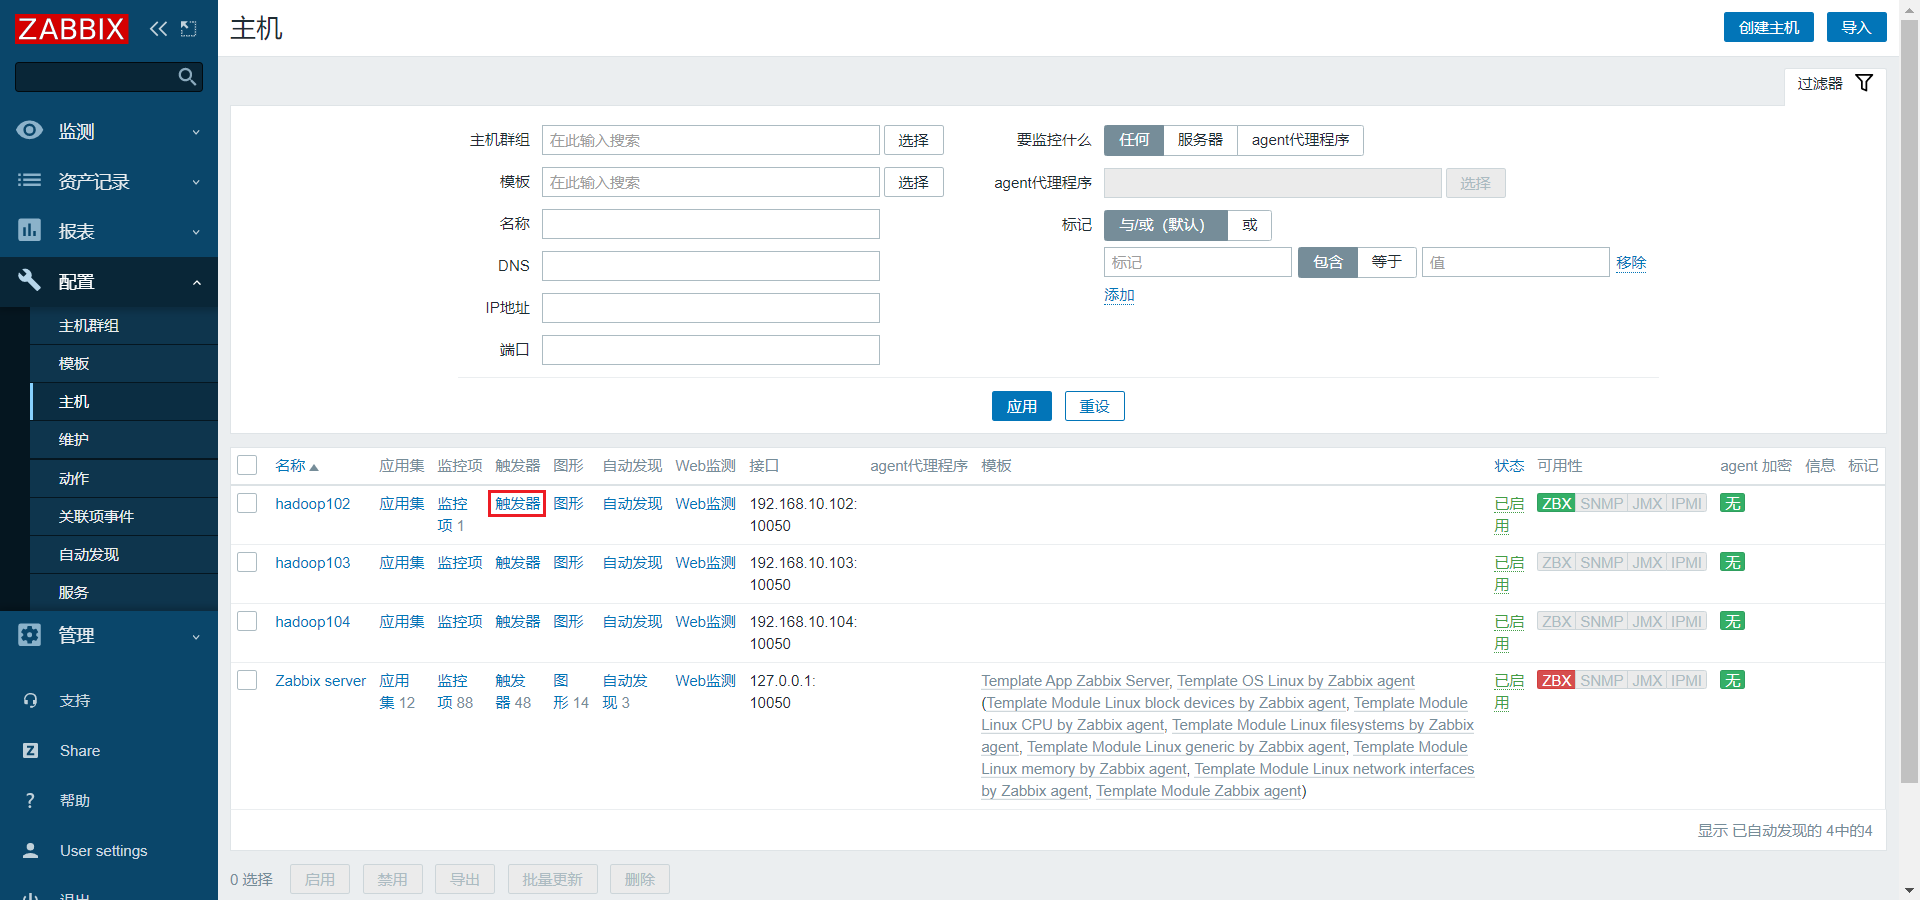
1)点击配置/主机/触发器
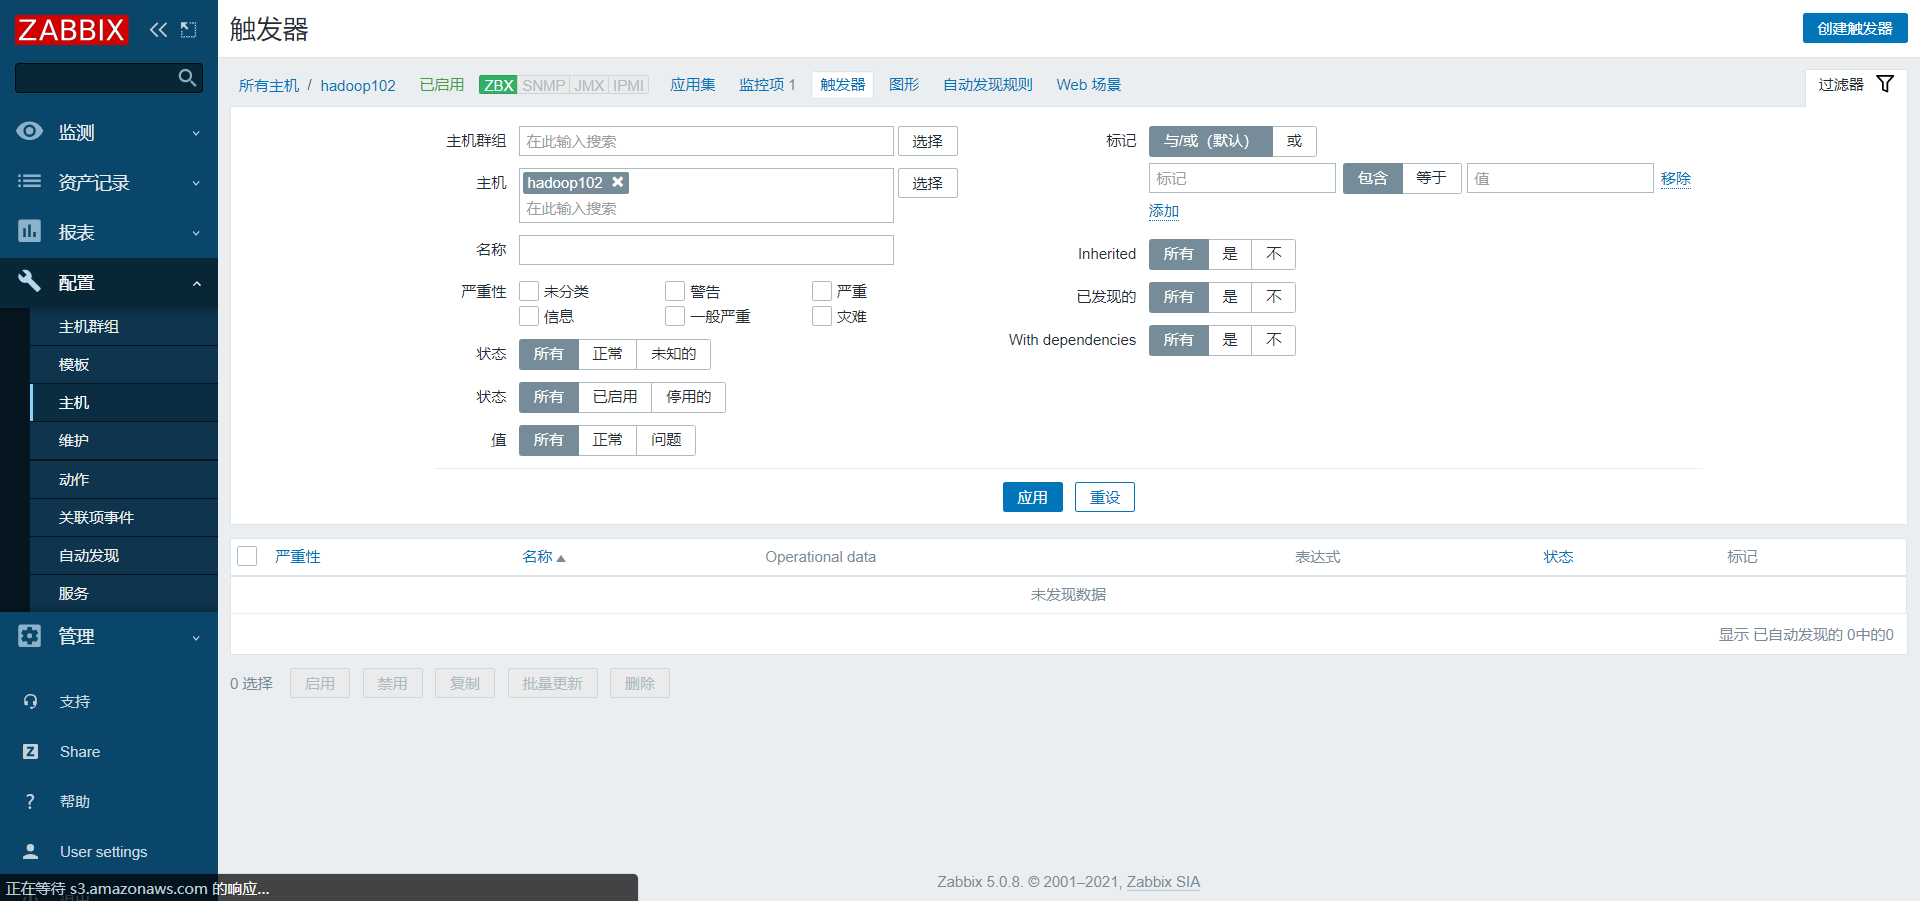
2)点击创建触发器
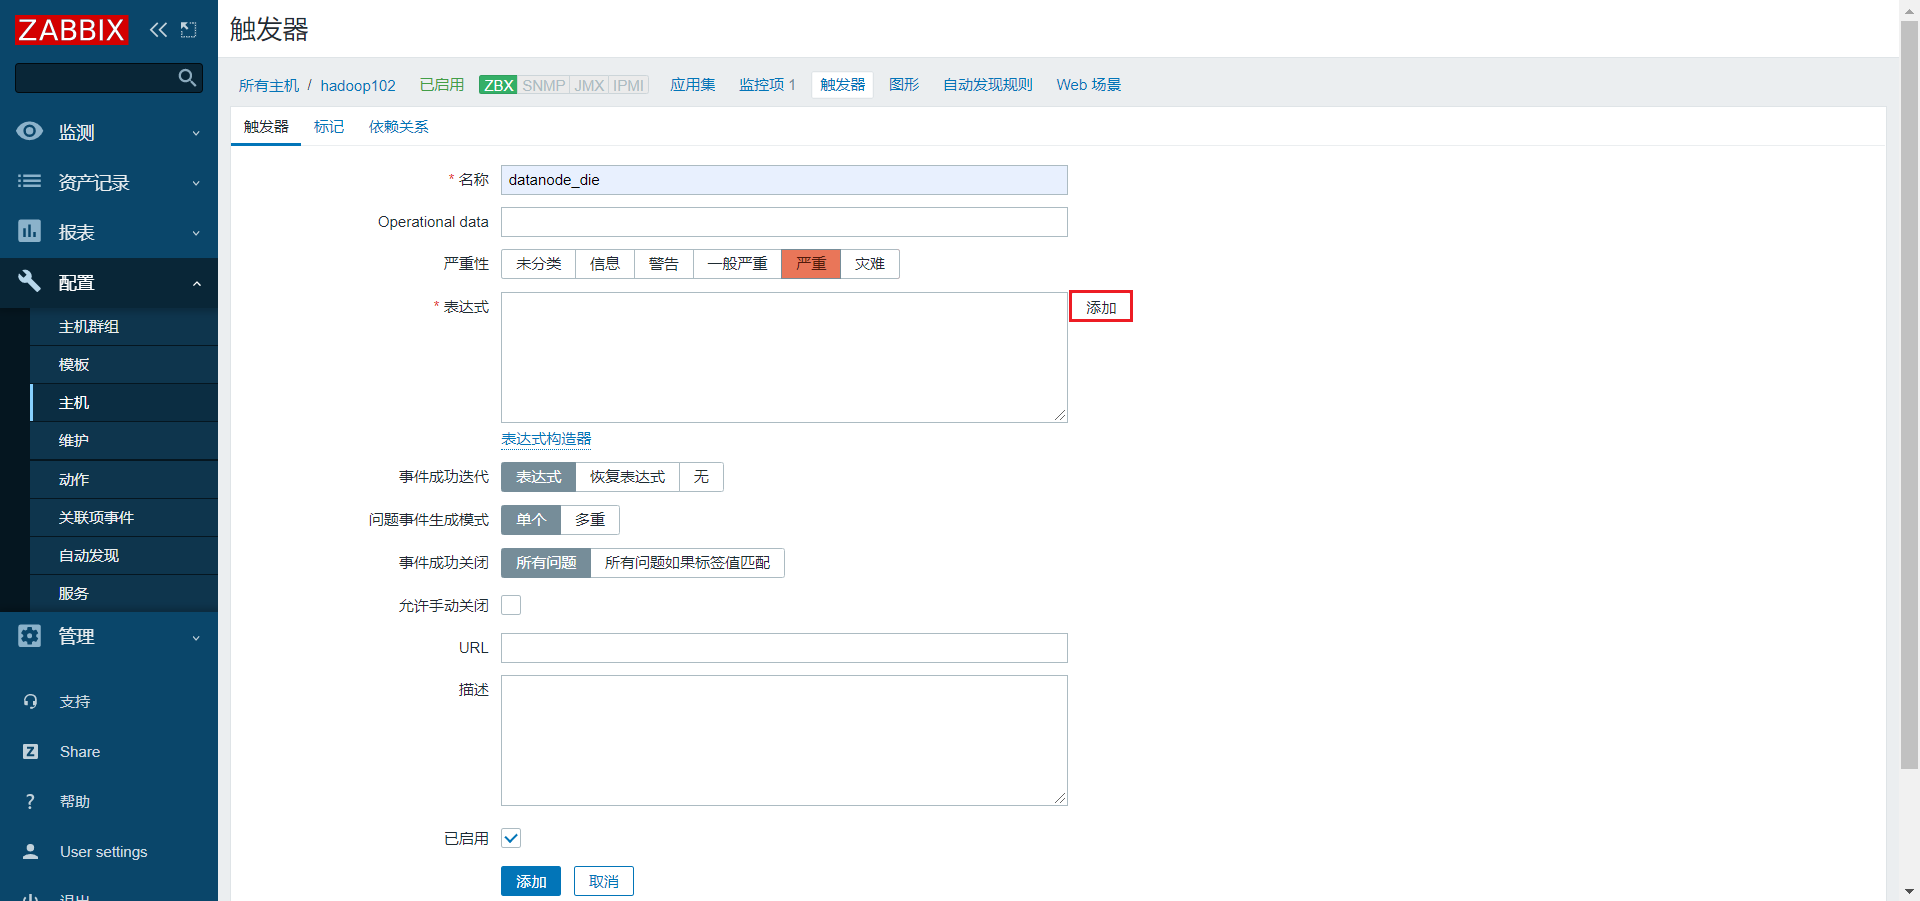
3)编辑触发器

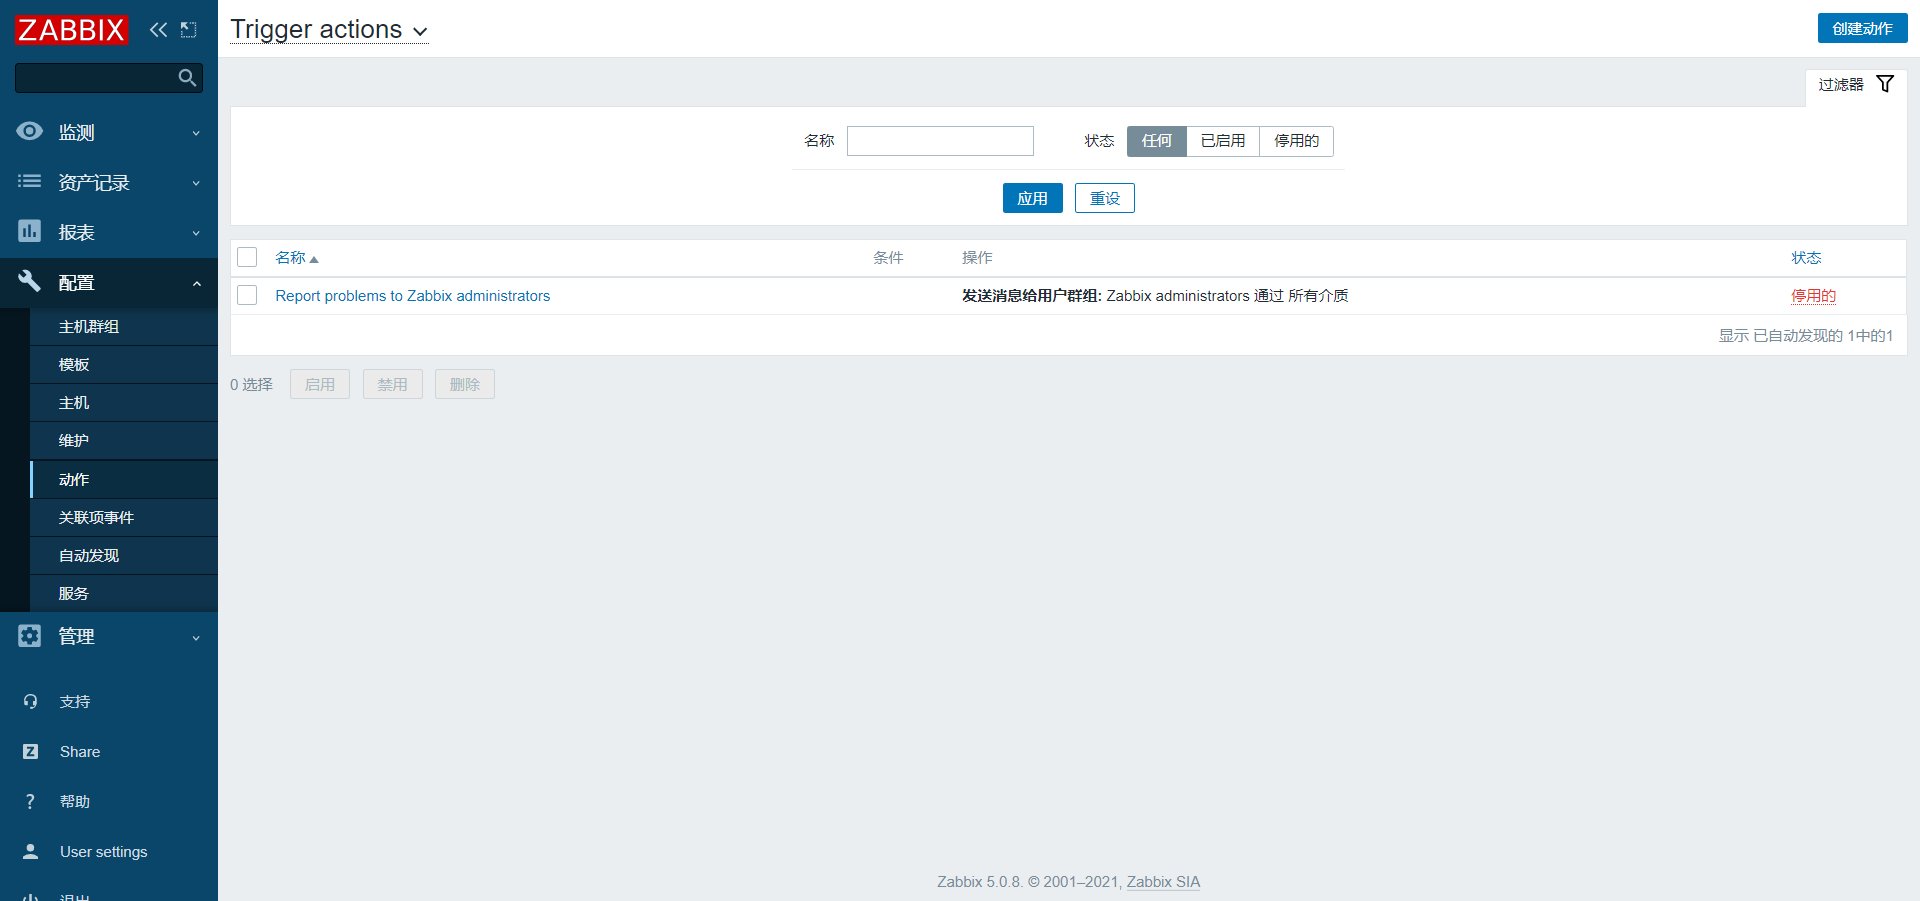
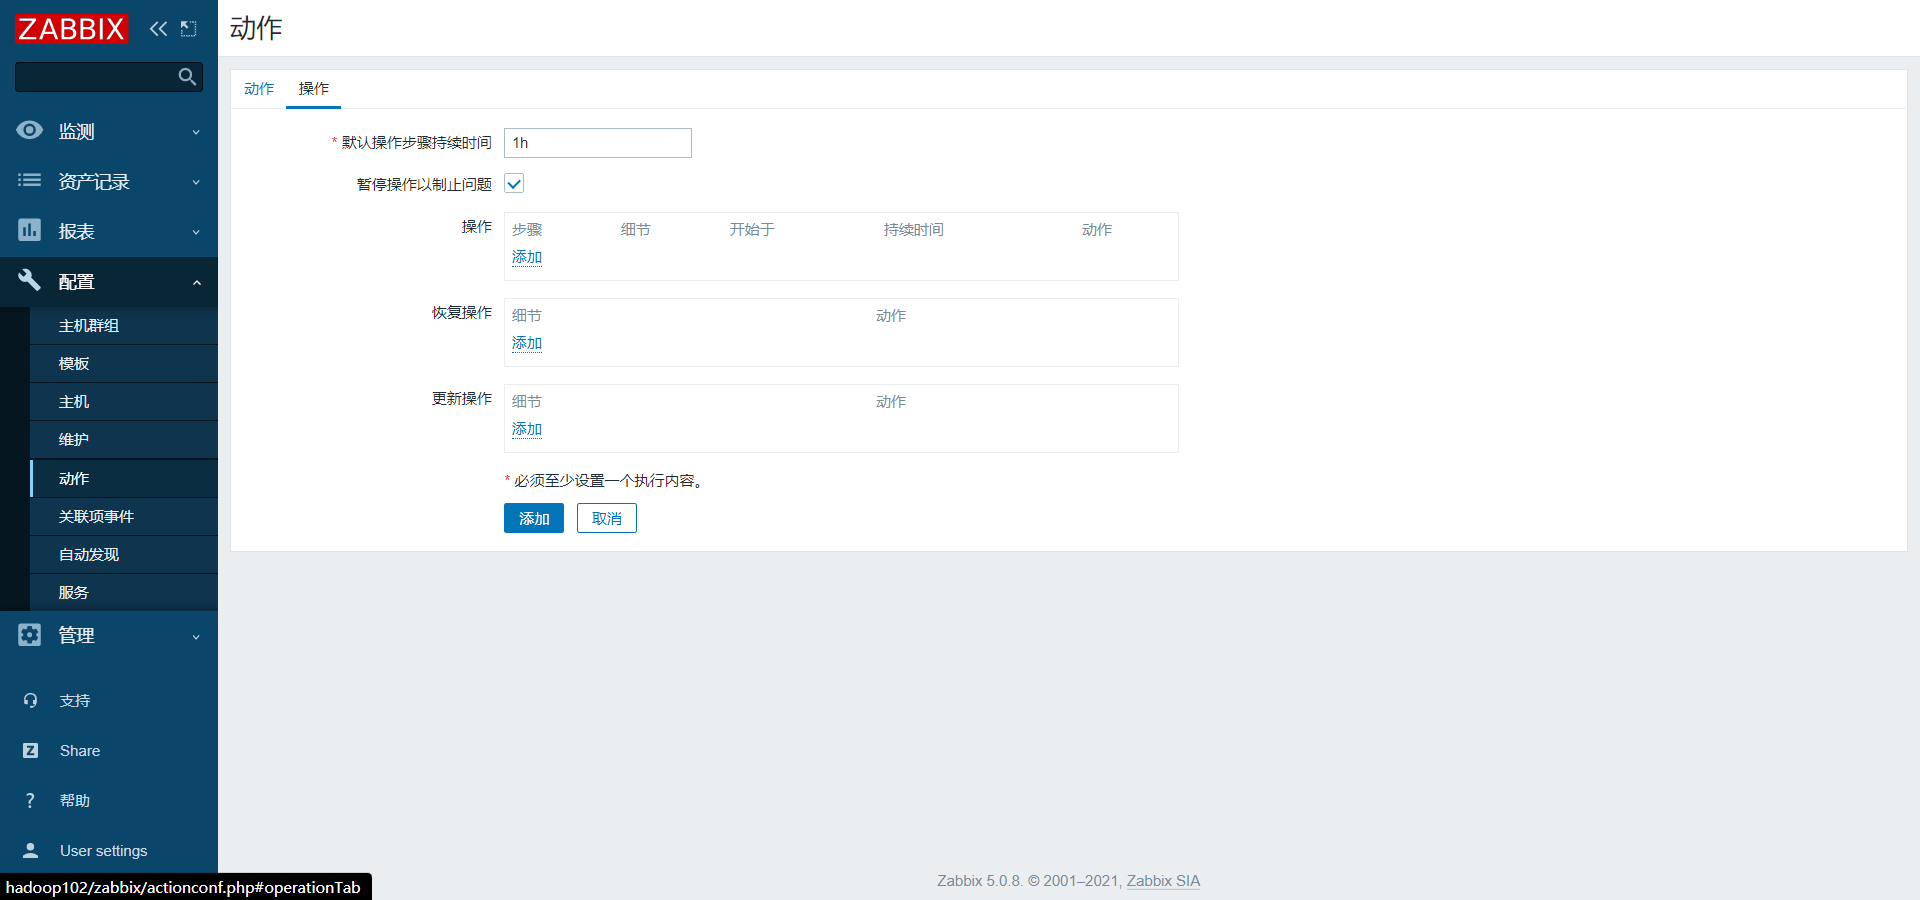
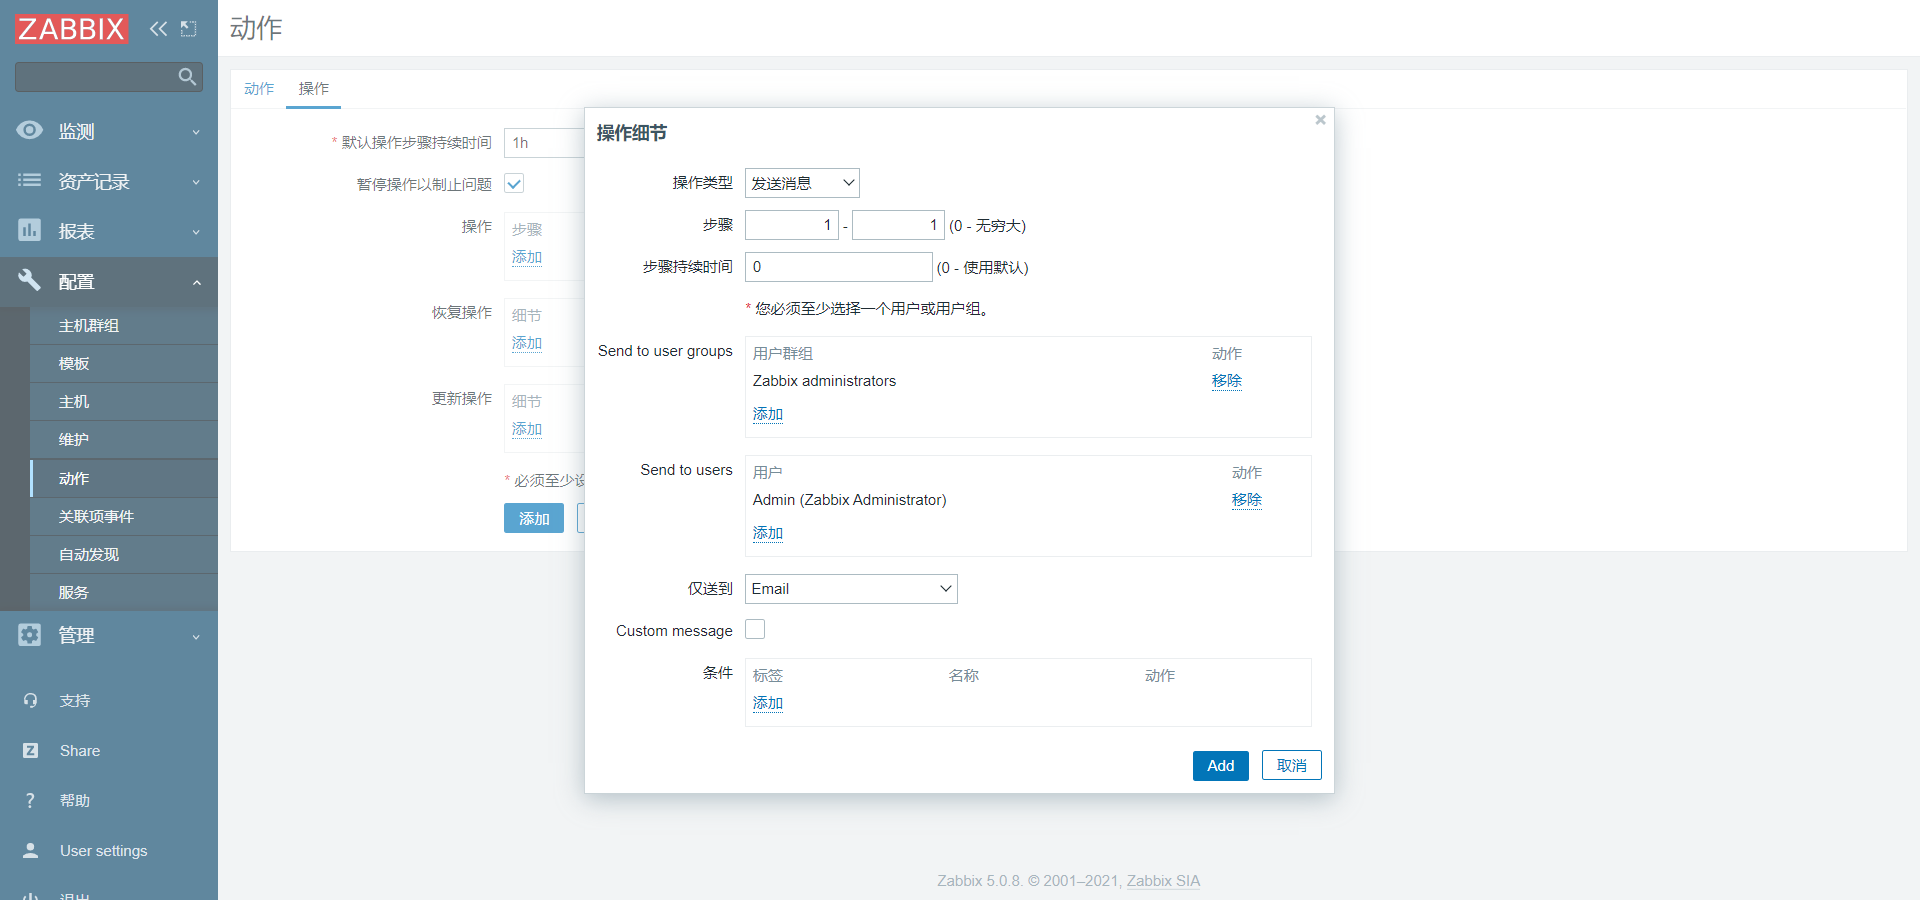
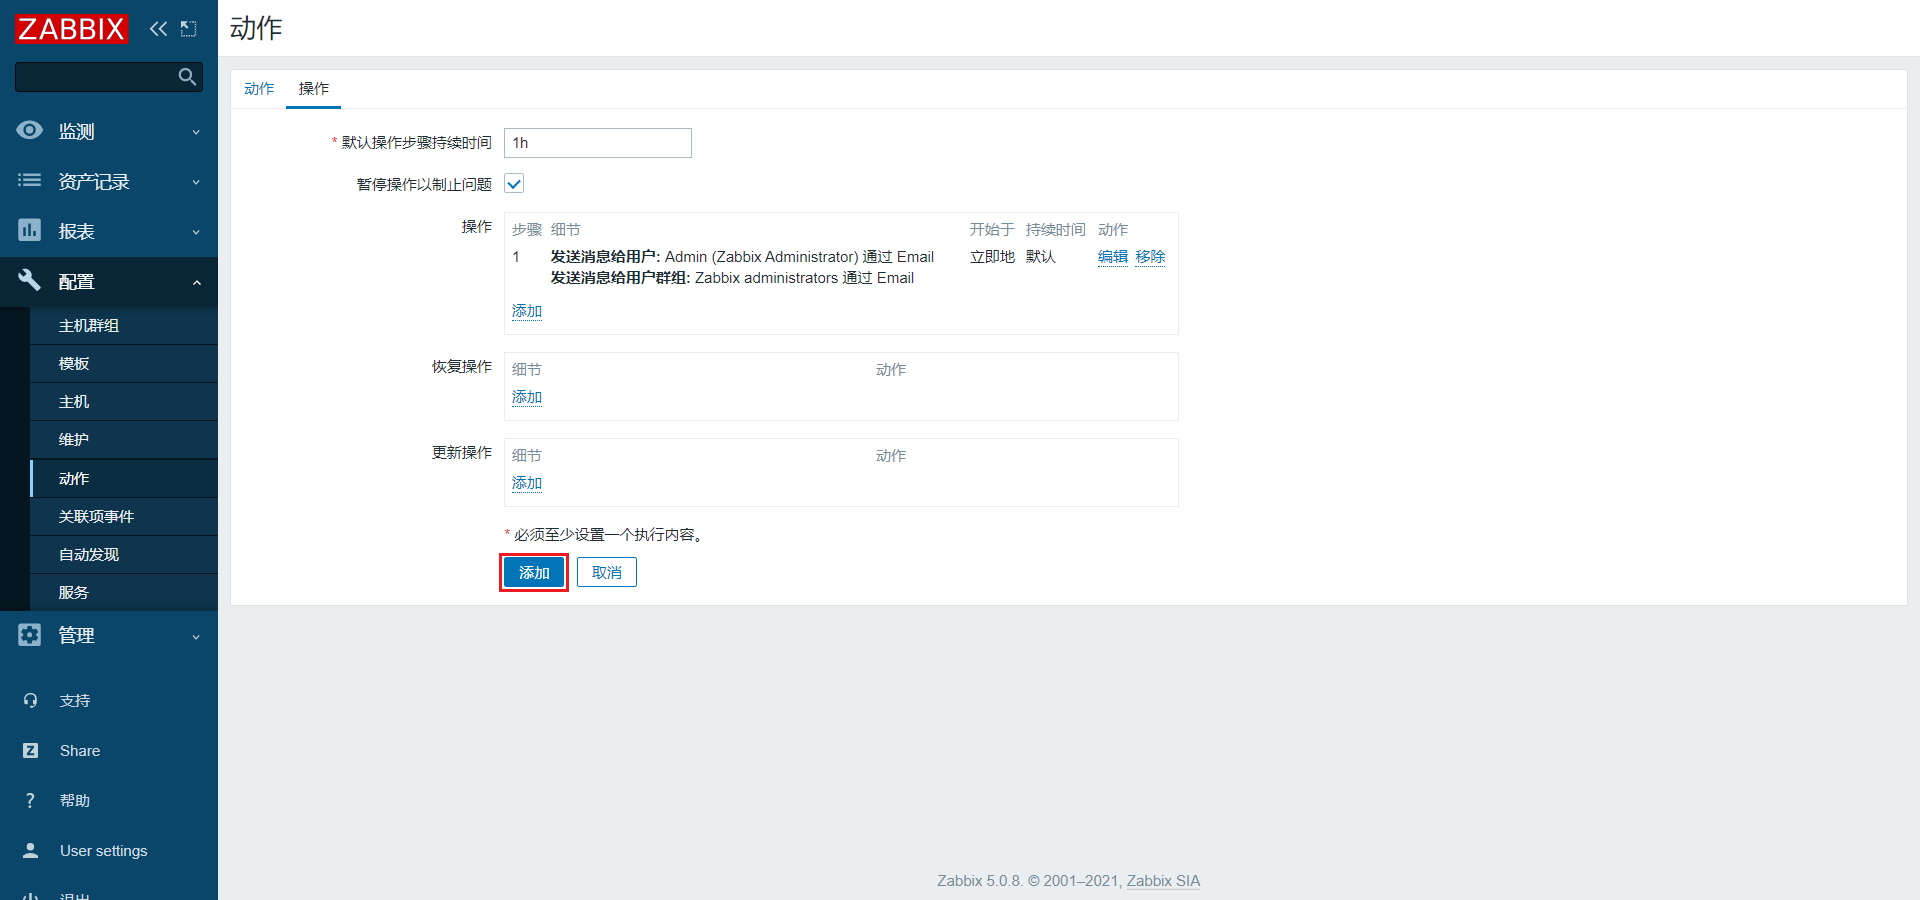
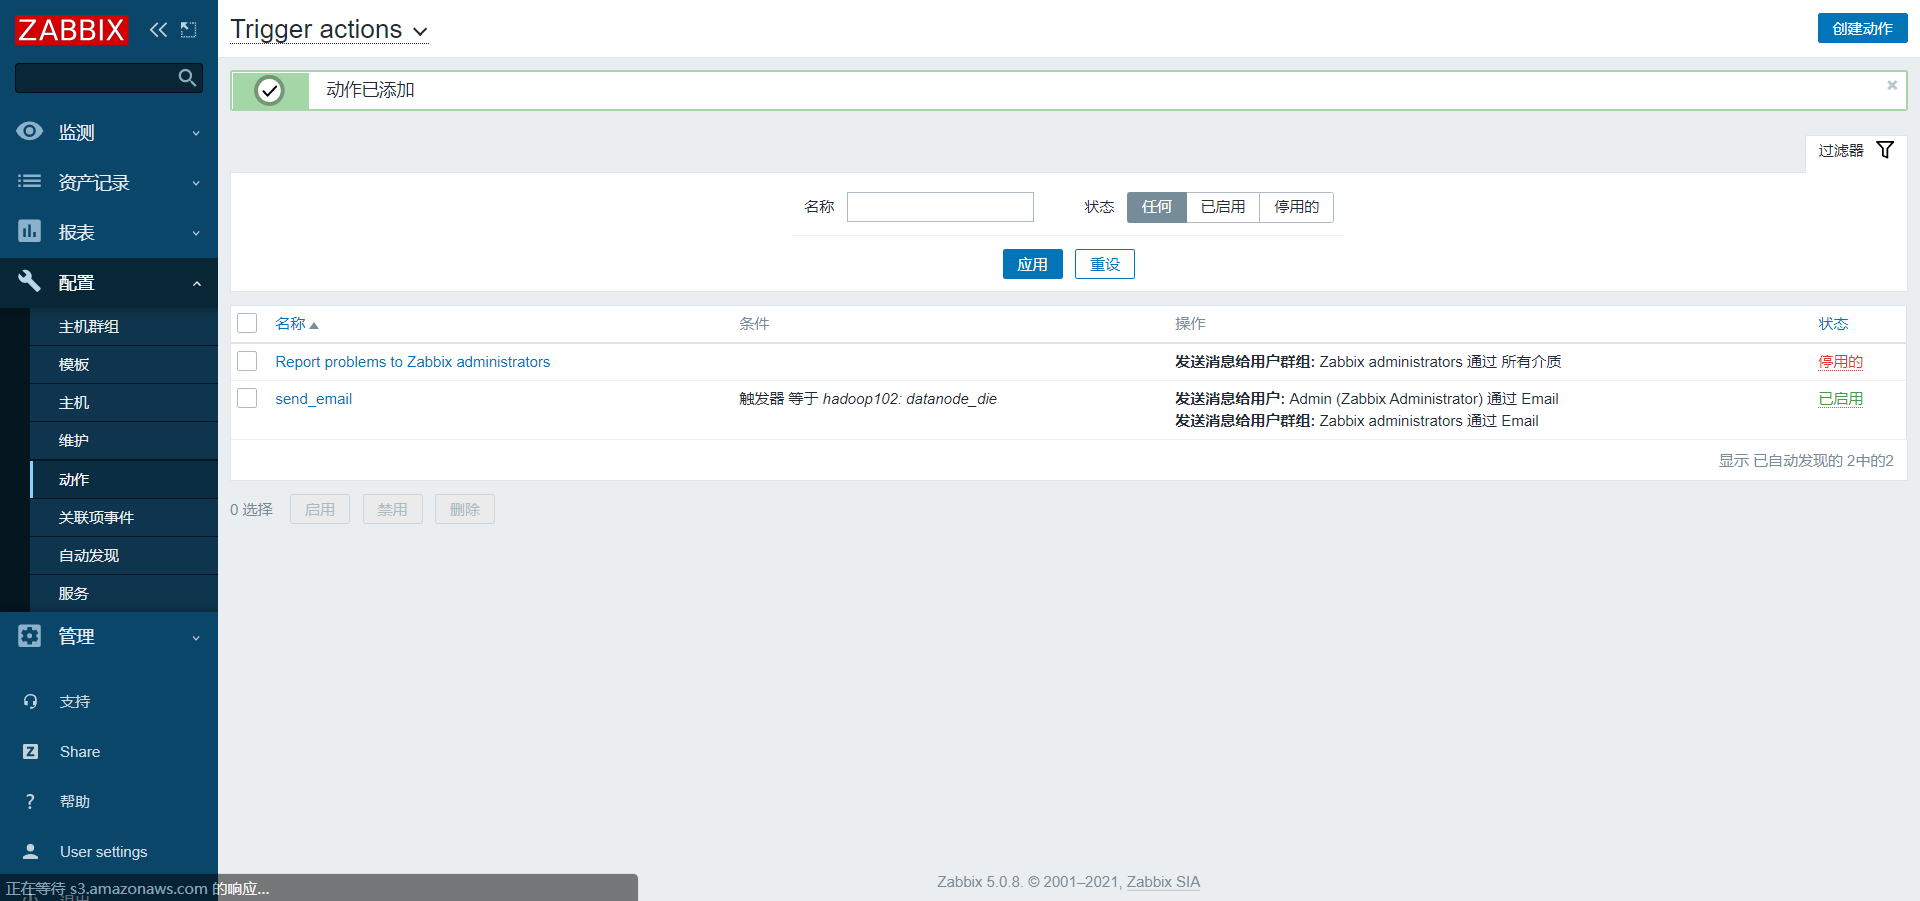
3.2.4 创建动作(Action)
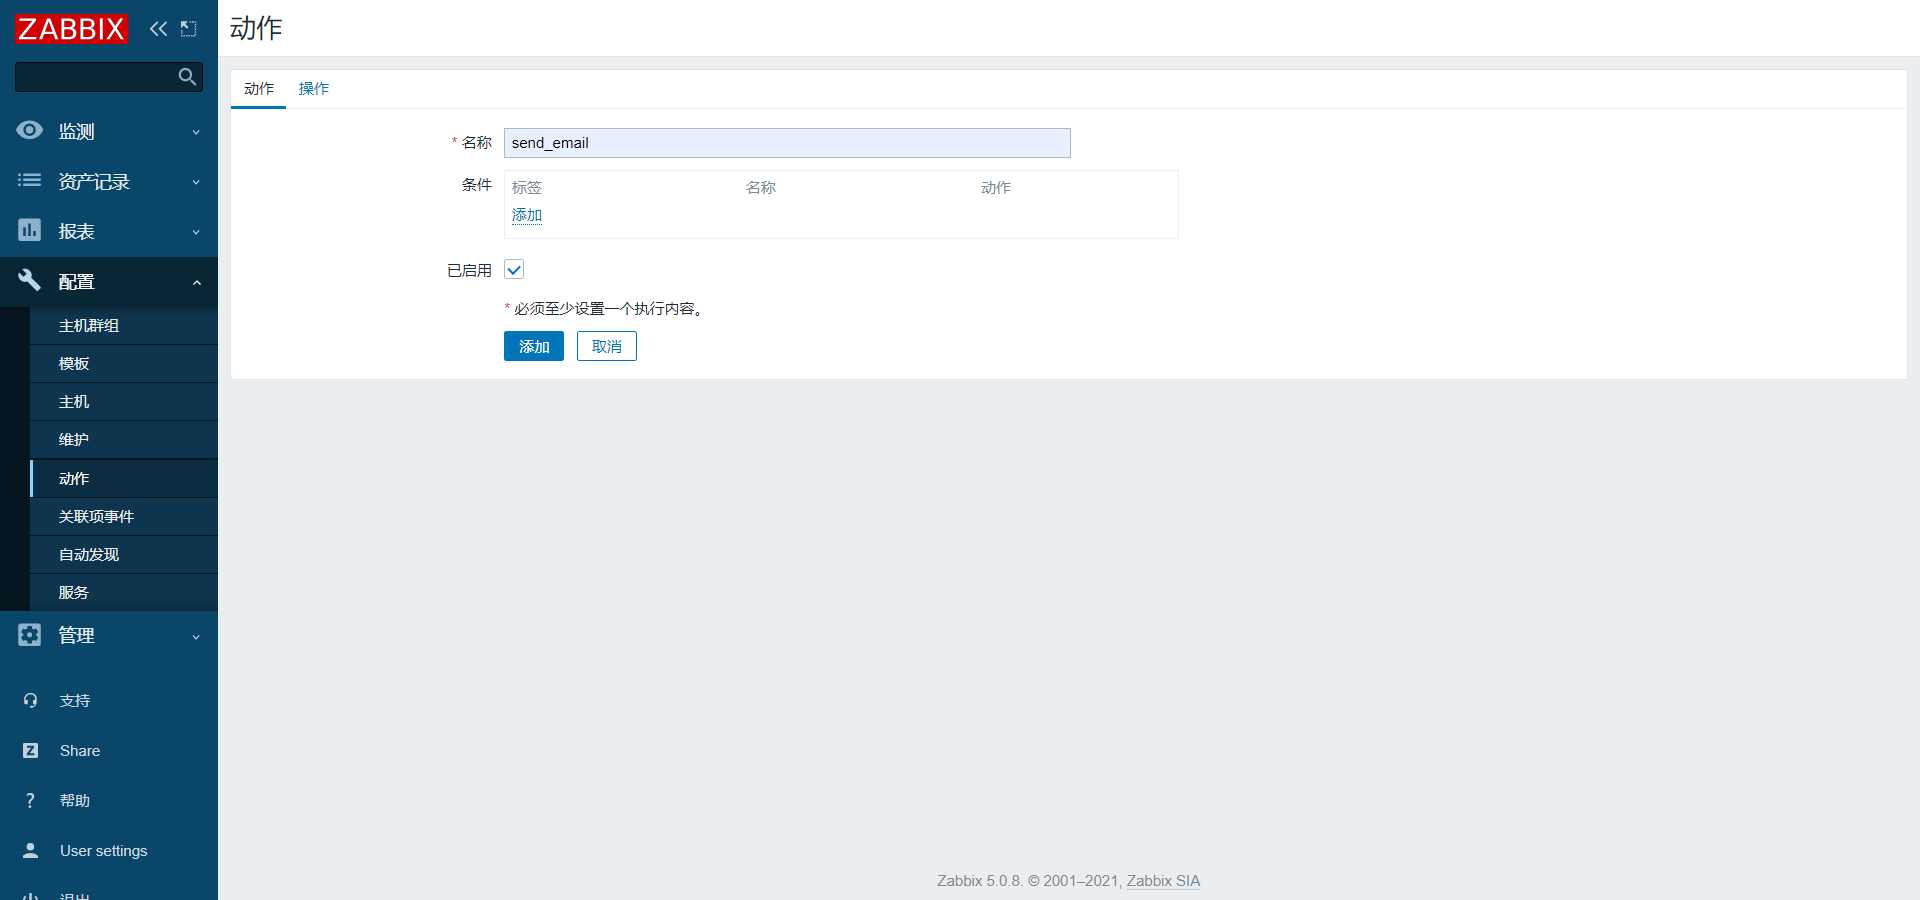
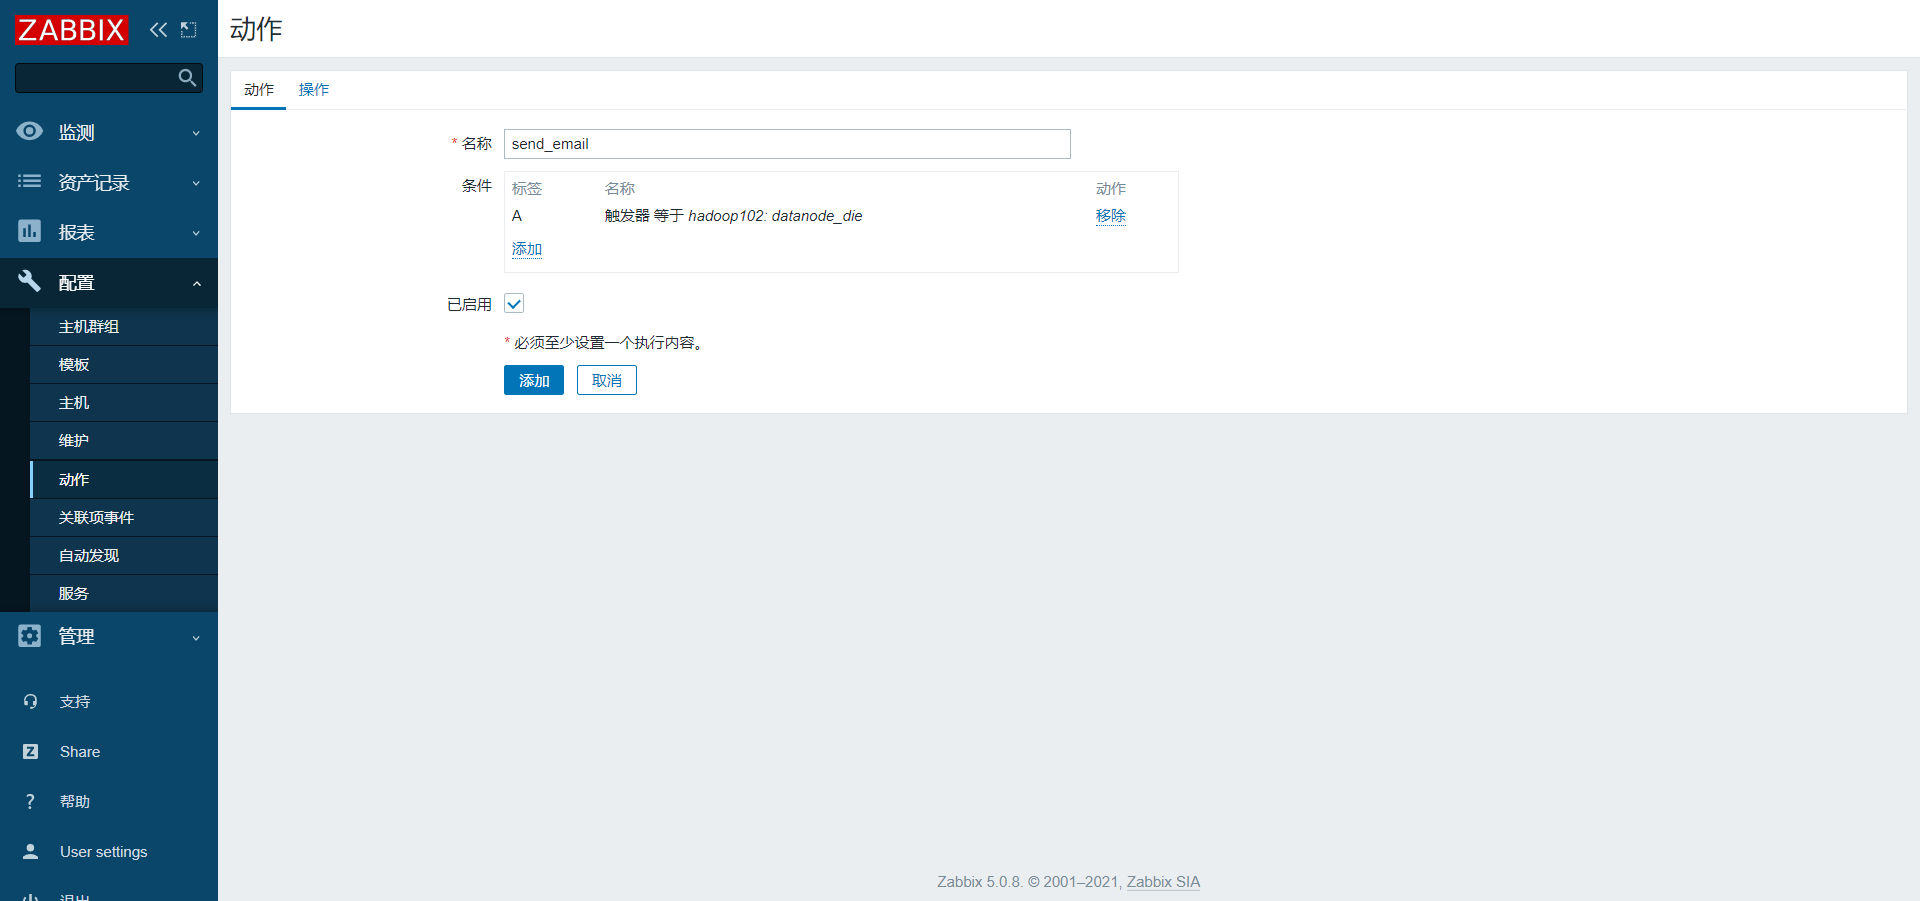
1)点击配置/动作/创建动作
2)编辑动作(Action)

3.2.5 申请邮箱
邮件报警,可以采用126、163、qq等邮箱。下面以126邮箱为例。
1)申请注册一个126邮箱
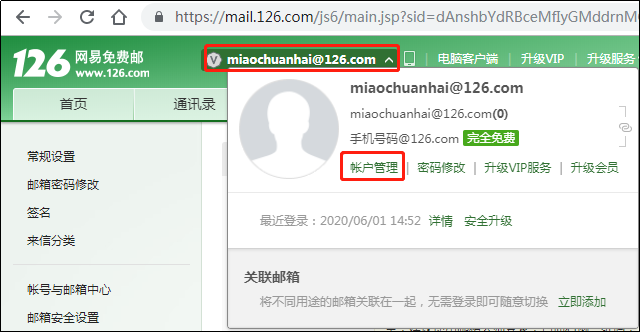
2)点击邮箱账号=》账号管理
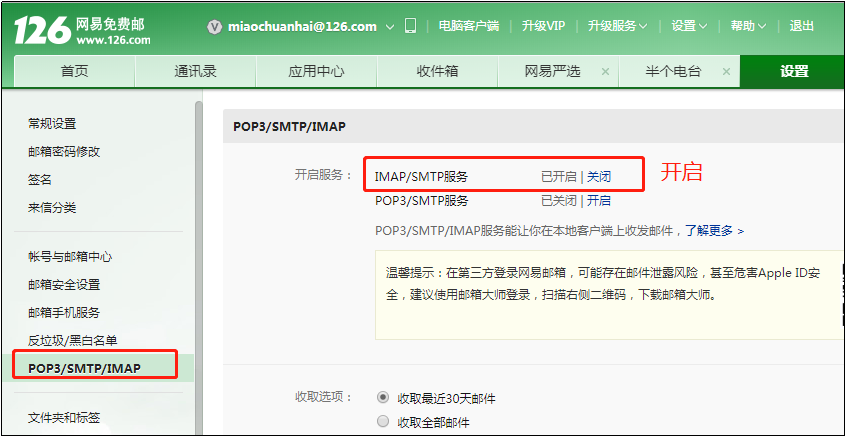
3)开启SMTP服务
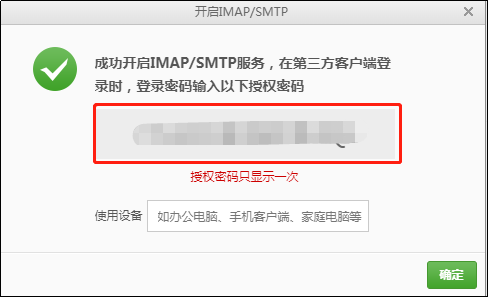
4)一定要记住授权码
3.2.6 创建报警媒介类型(Media type)
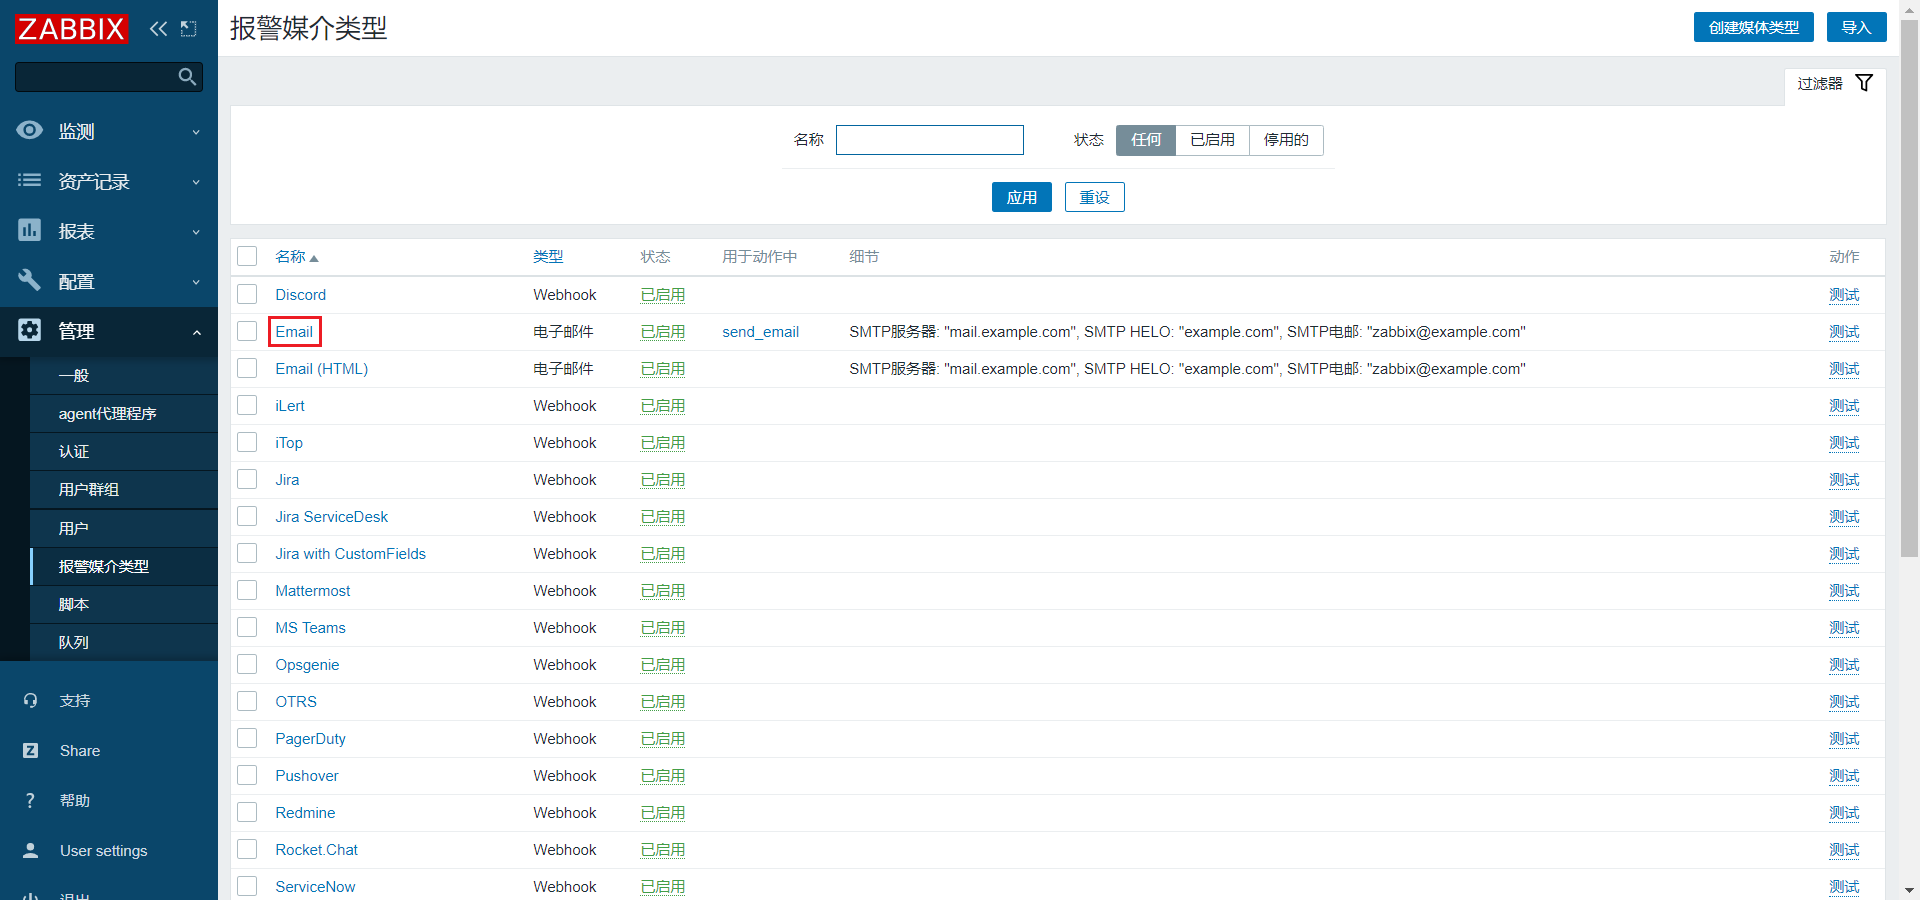
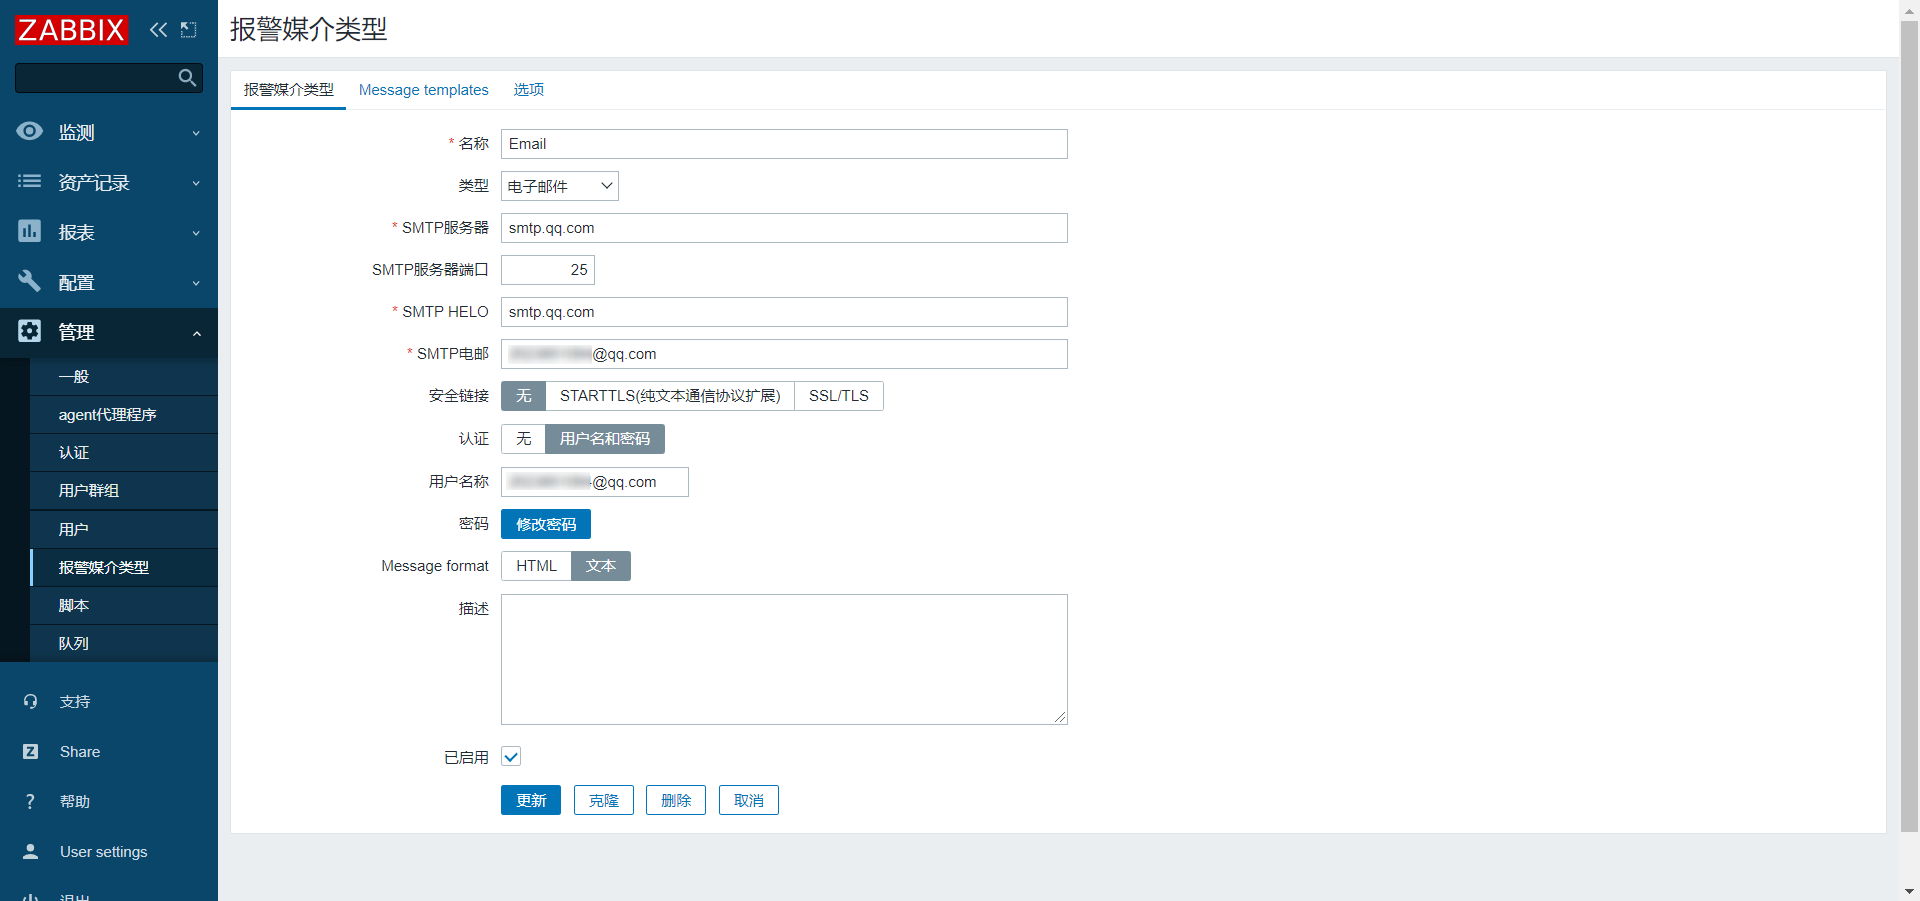
1)点击管理/报警媒介类型/Email
2)编辑Email
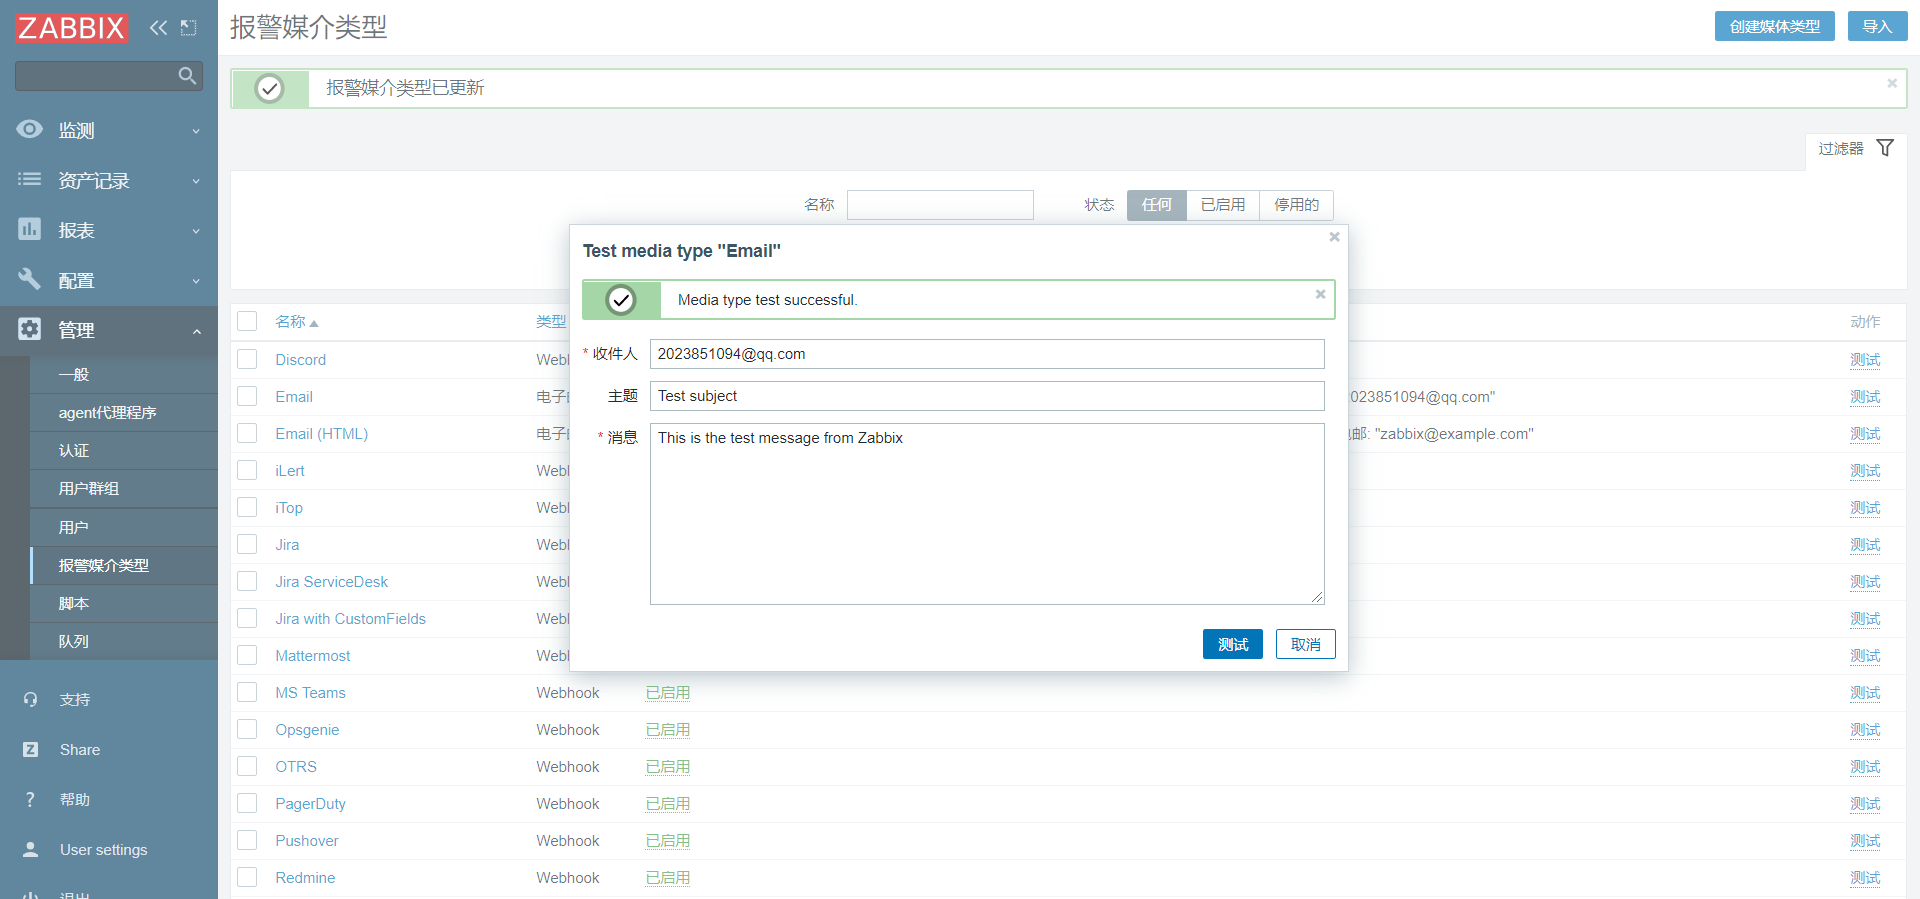
3)测试Email
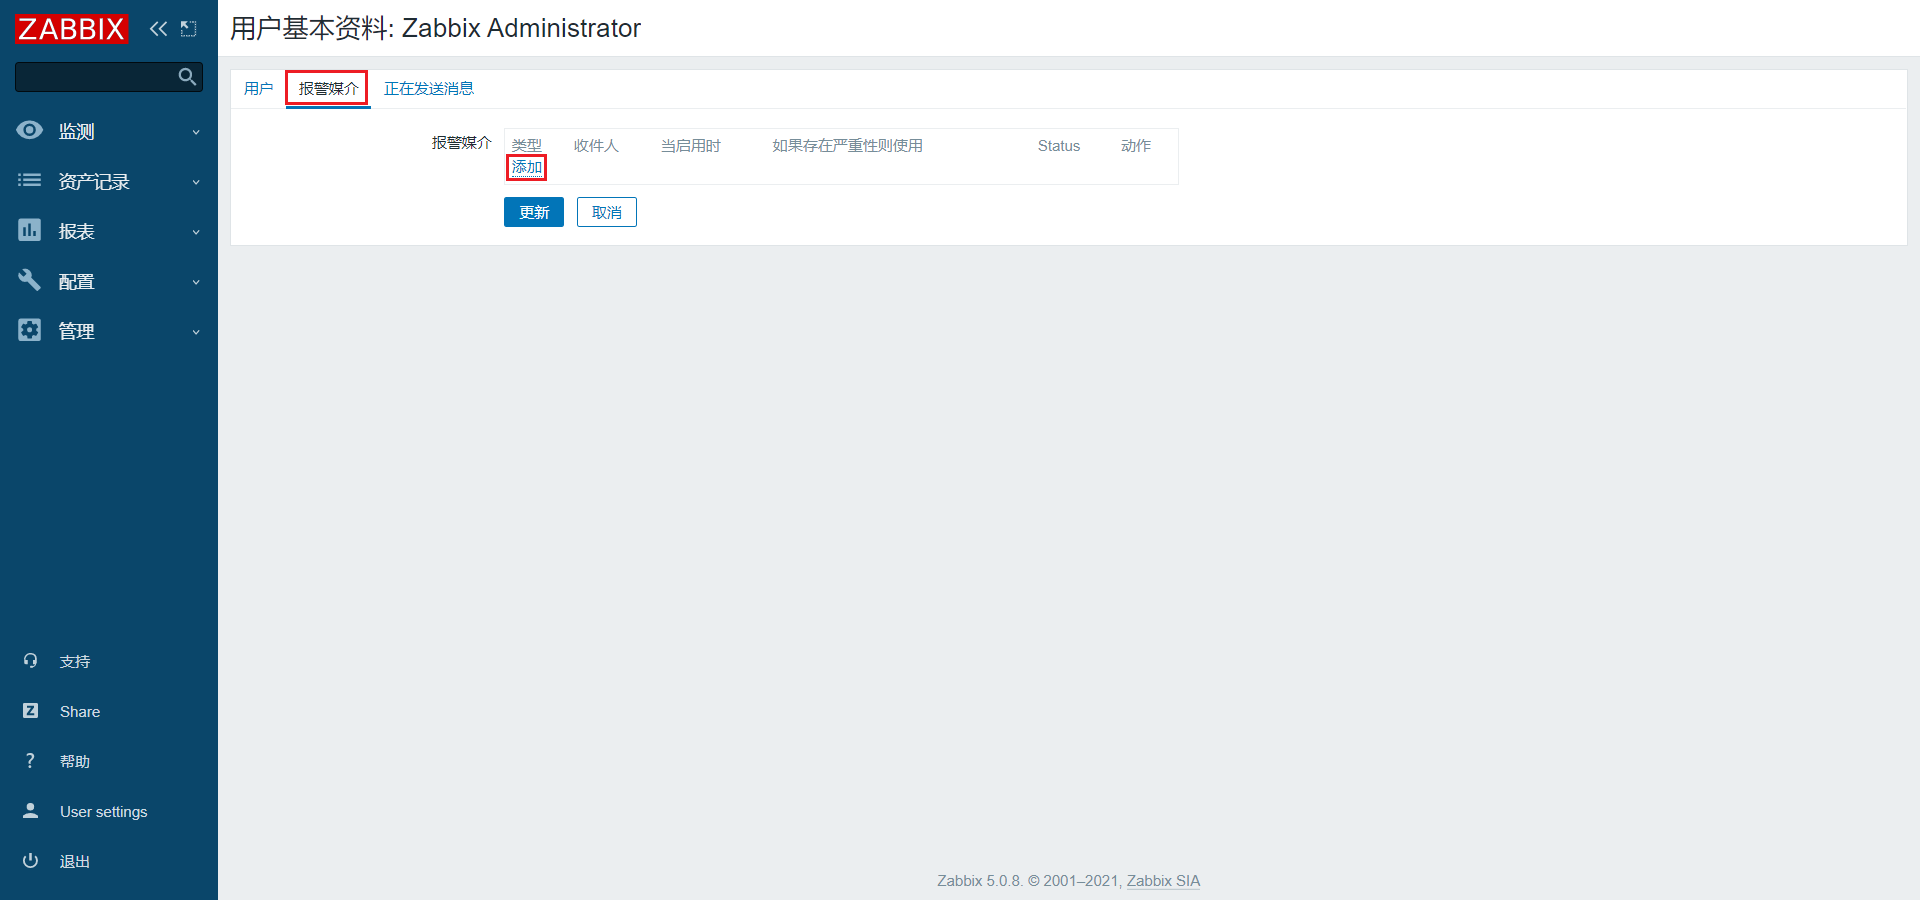
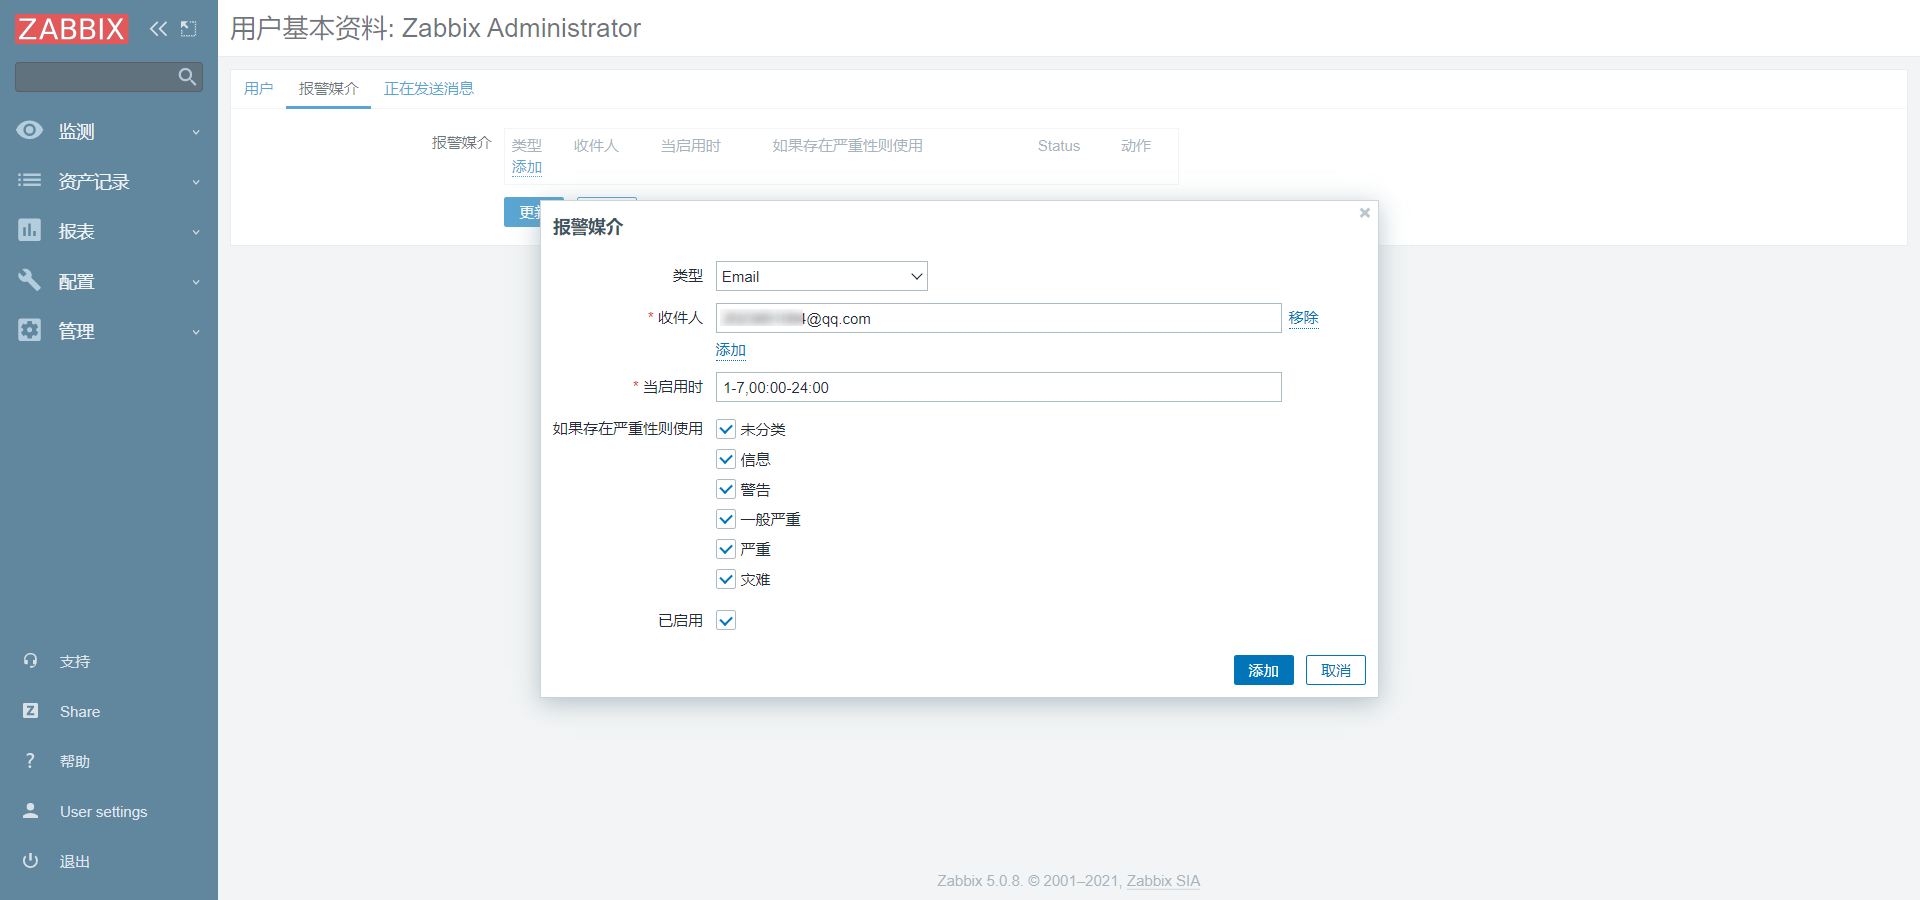
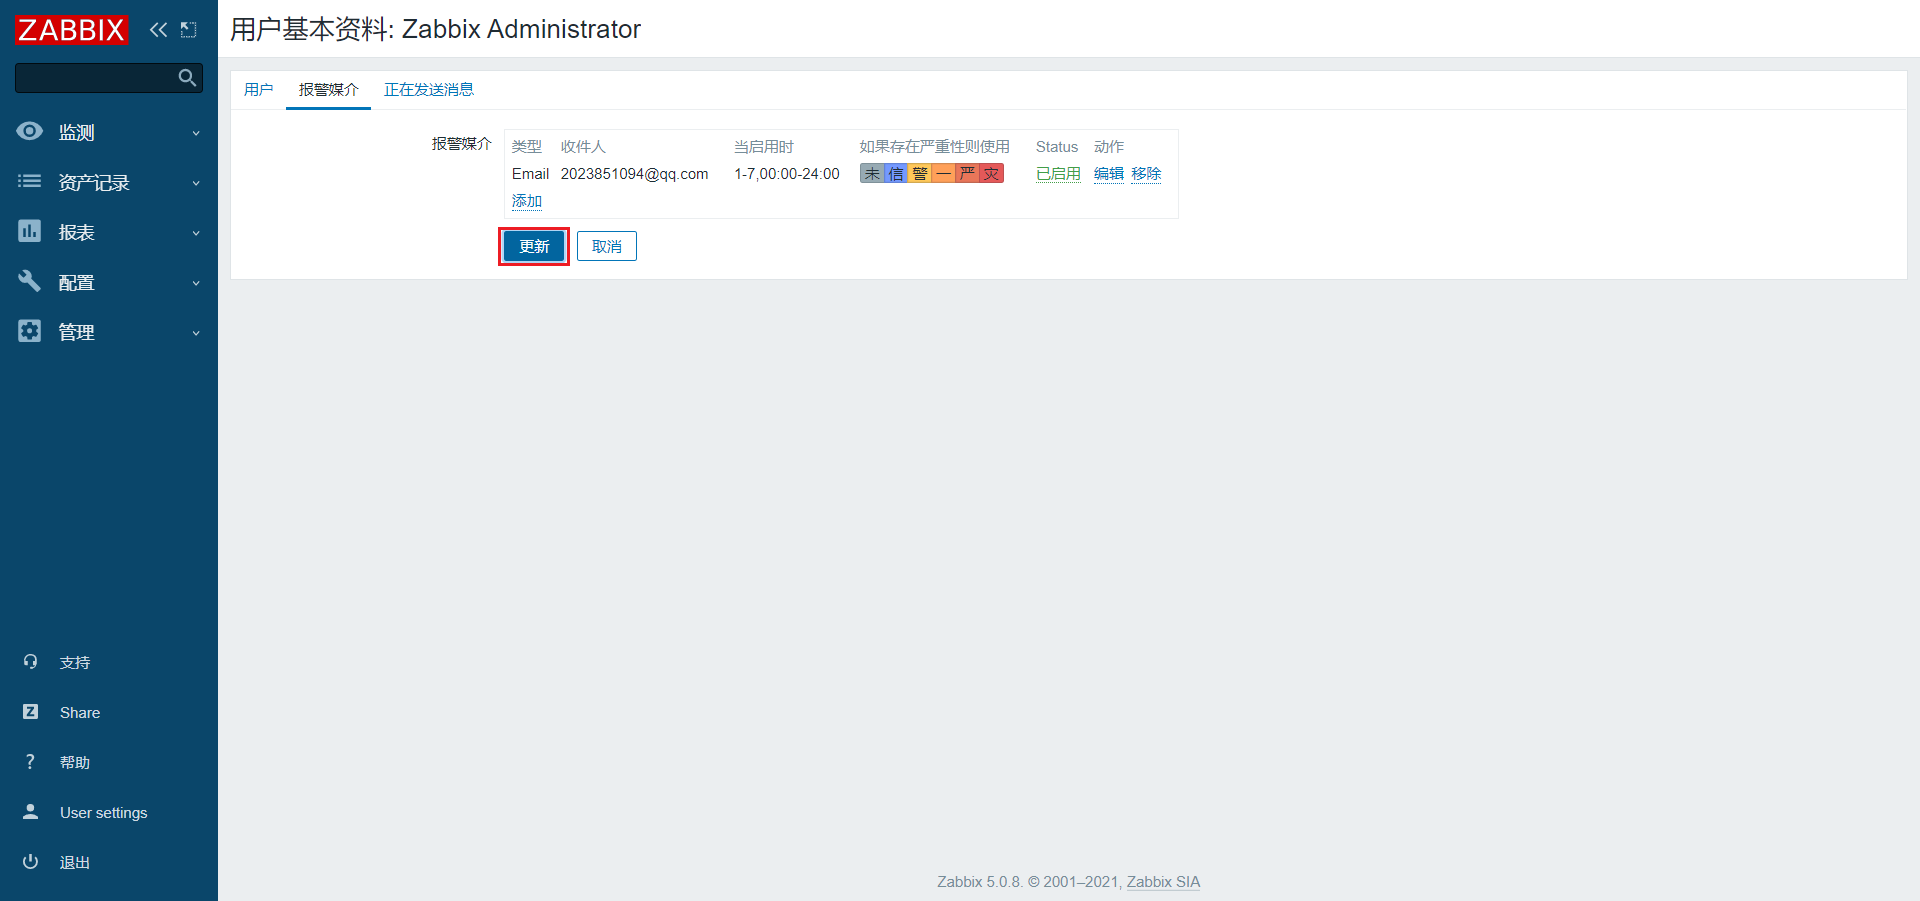
4)Email绑定收件人
3.2.7 测试
1)关闭集群中的HDFS,会有如下效果
[atguigu@hadoop102 hadoop-3.1.3]$ sbin/stop-dfs.sh
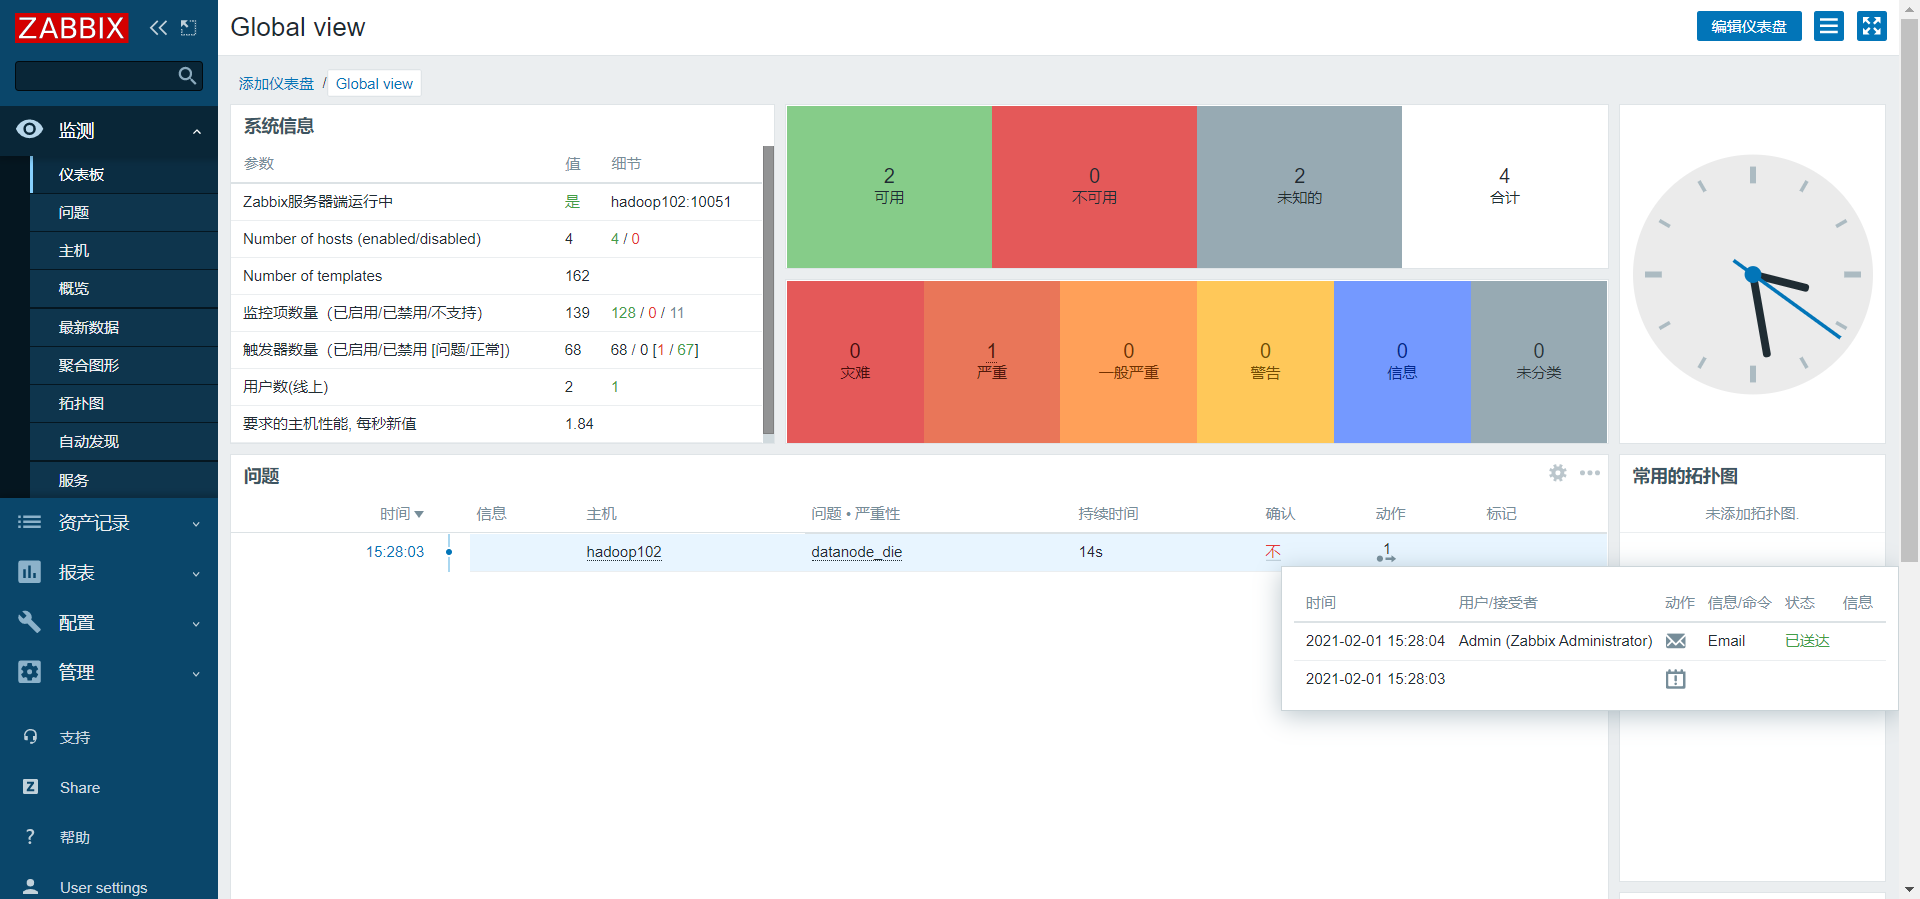
2)查看仪表盘故障信息
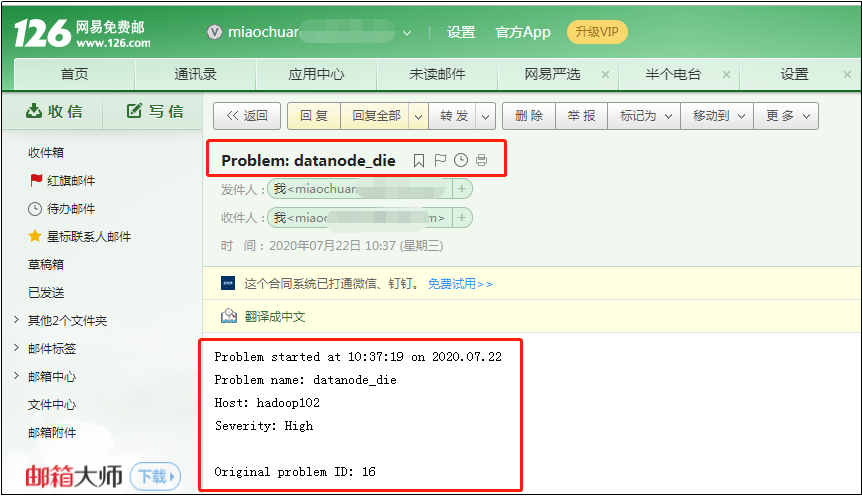
3)查看邮件,接收故障信息
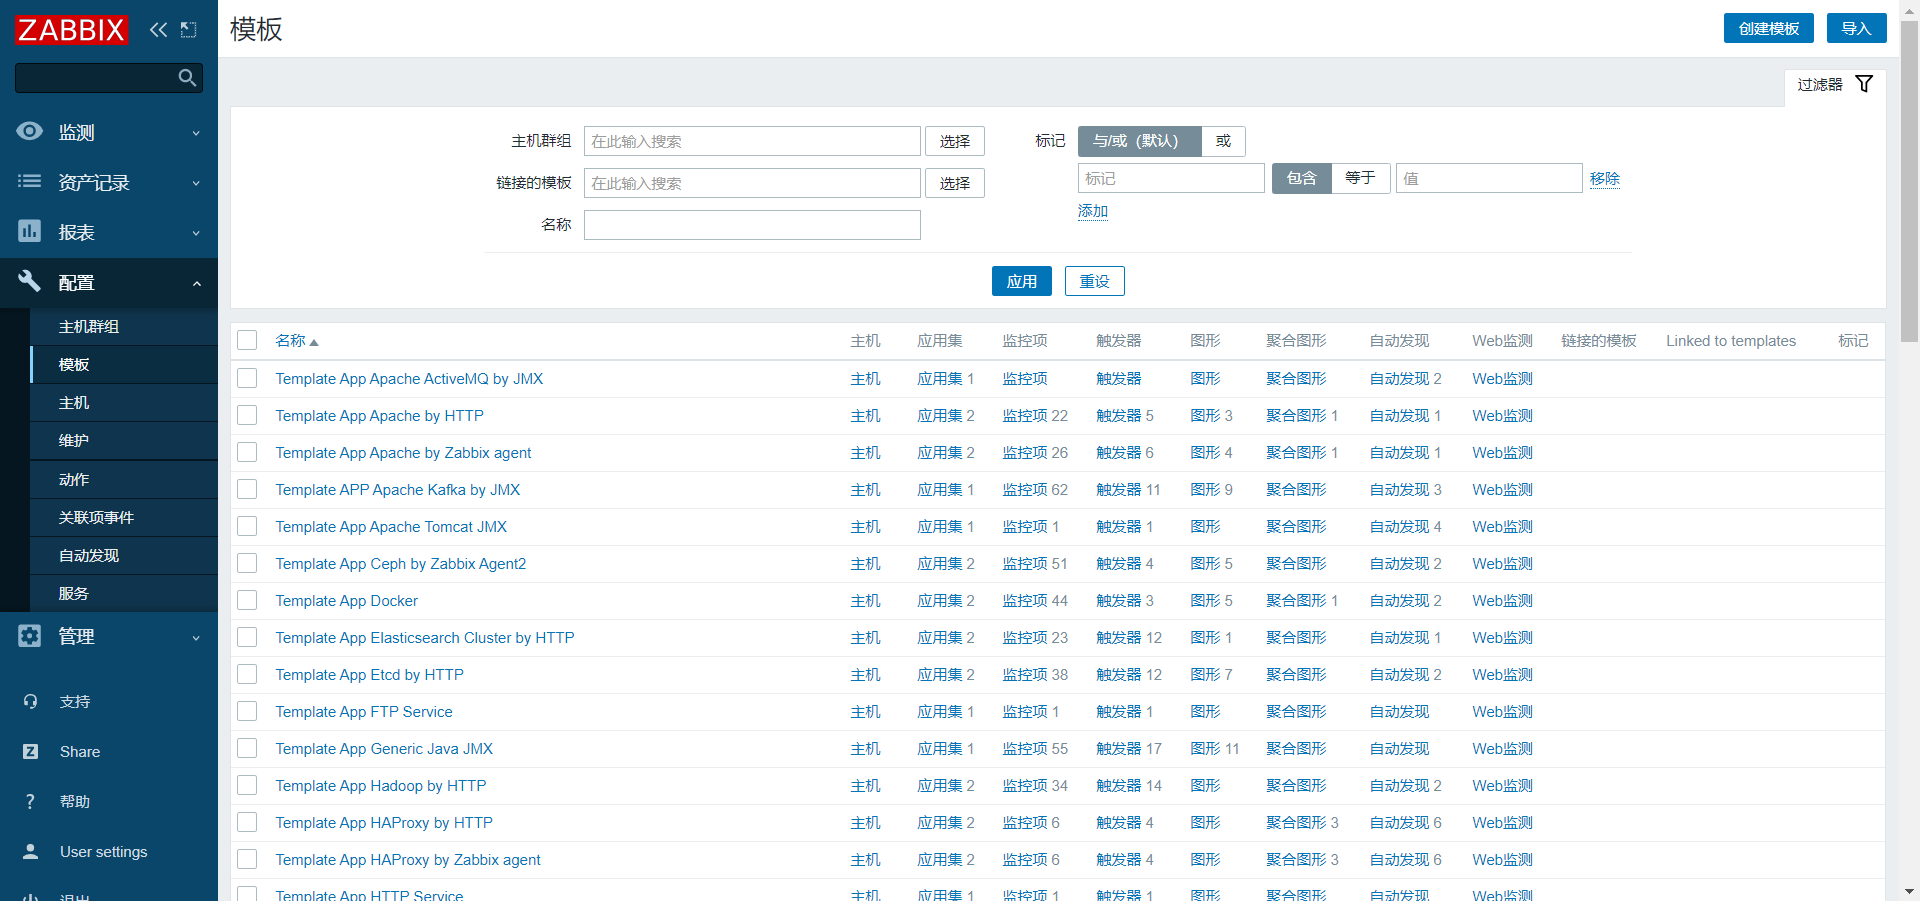
3.3 创建模板
1)点击配置/模板/创建模板
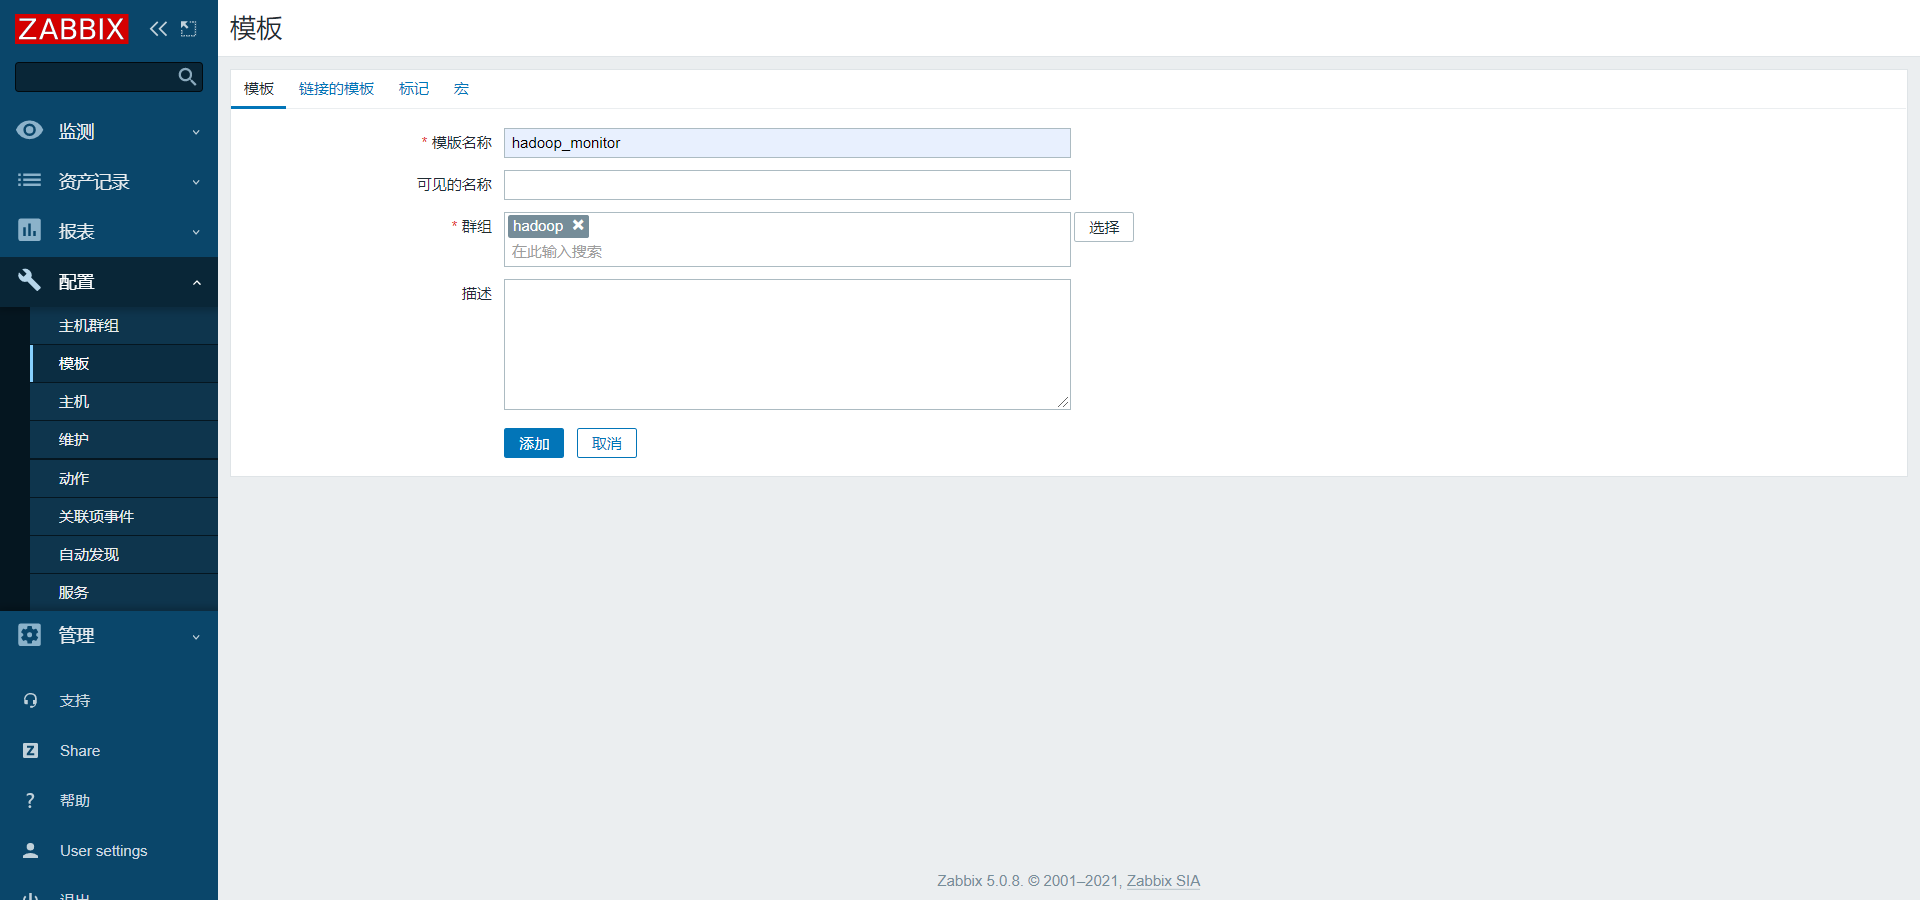
2)配置模板名称/群组
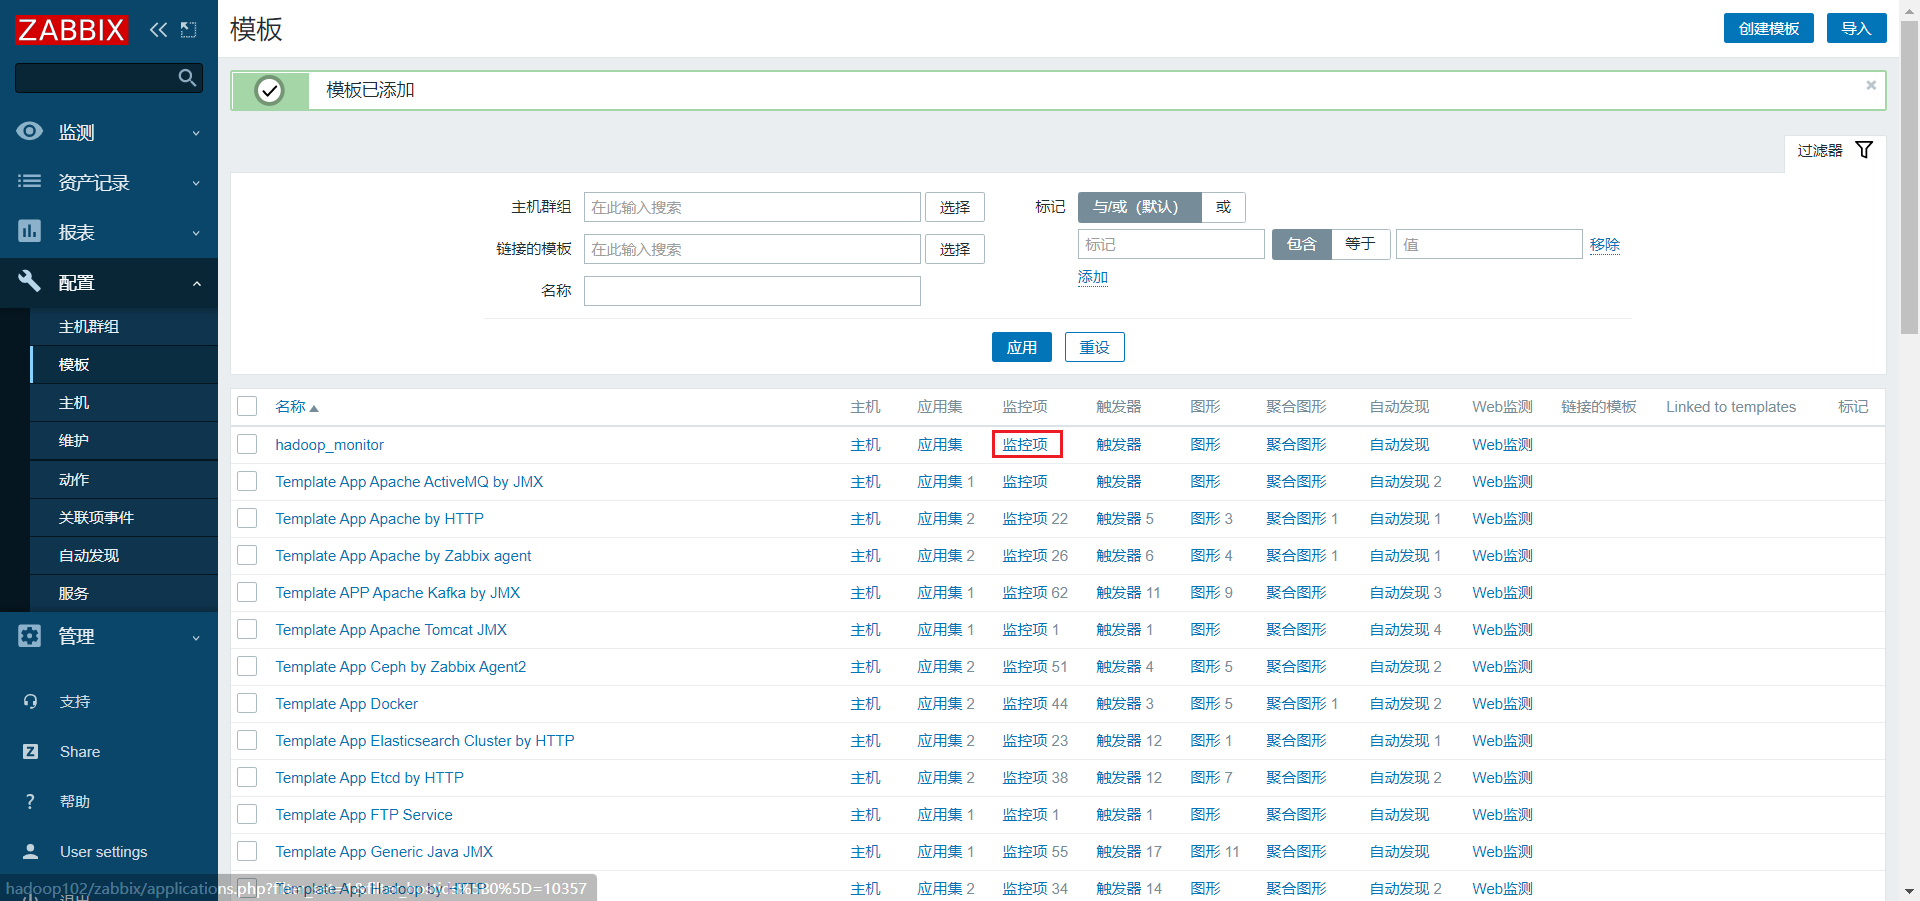
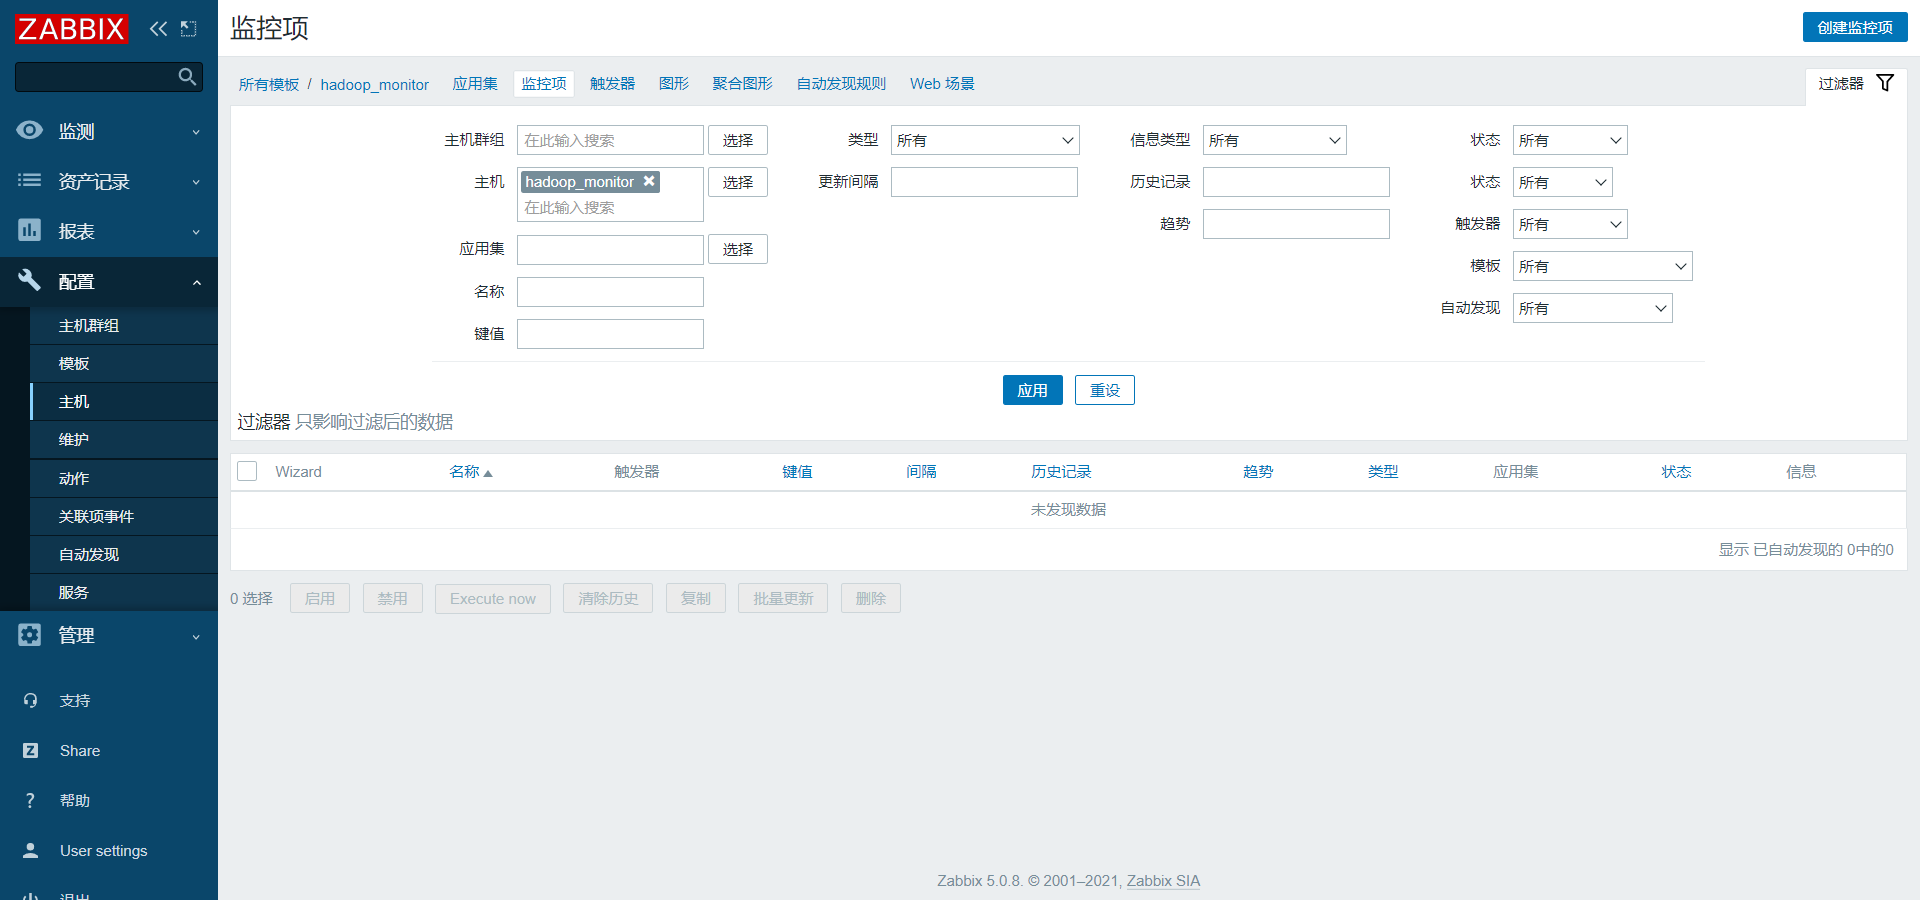
3)配置监控项
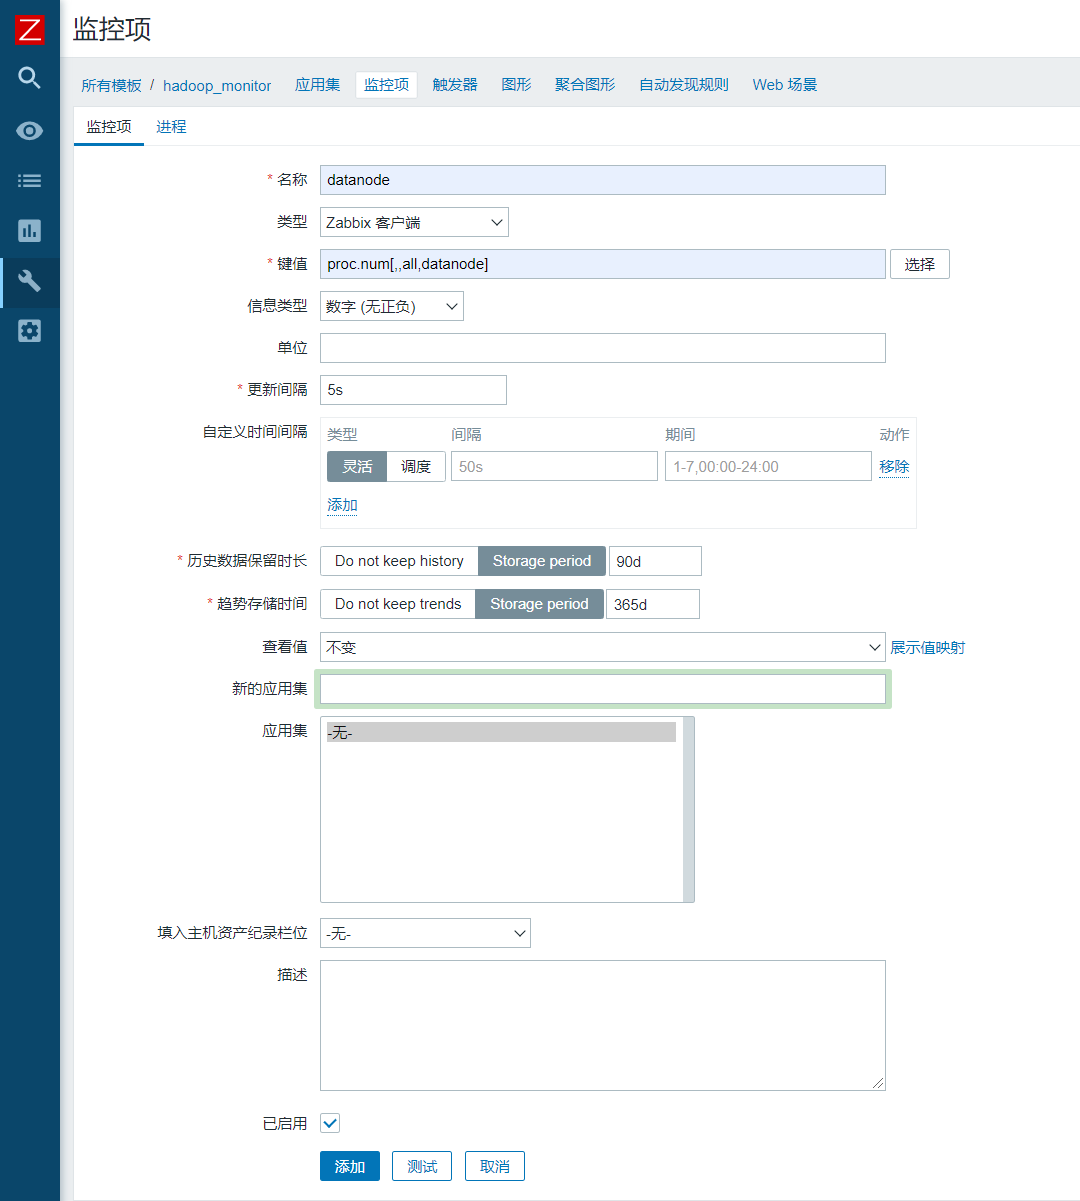
4)配置触发器
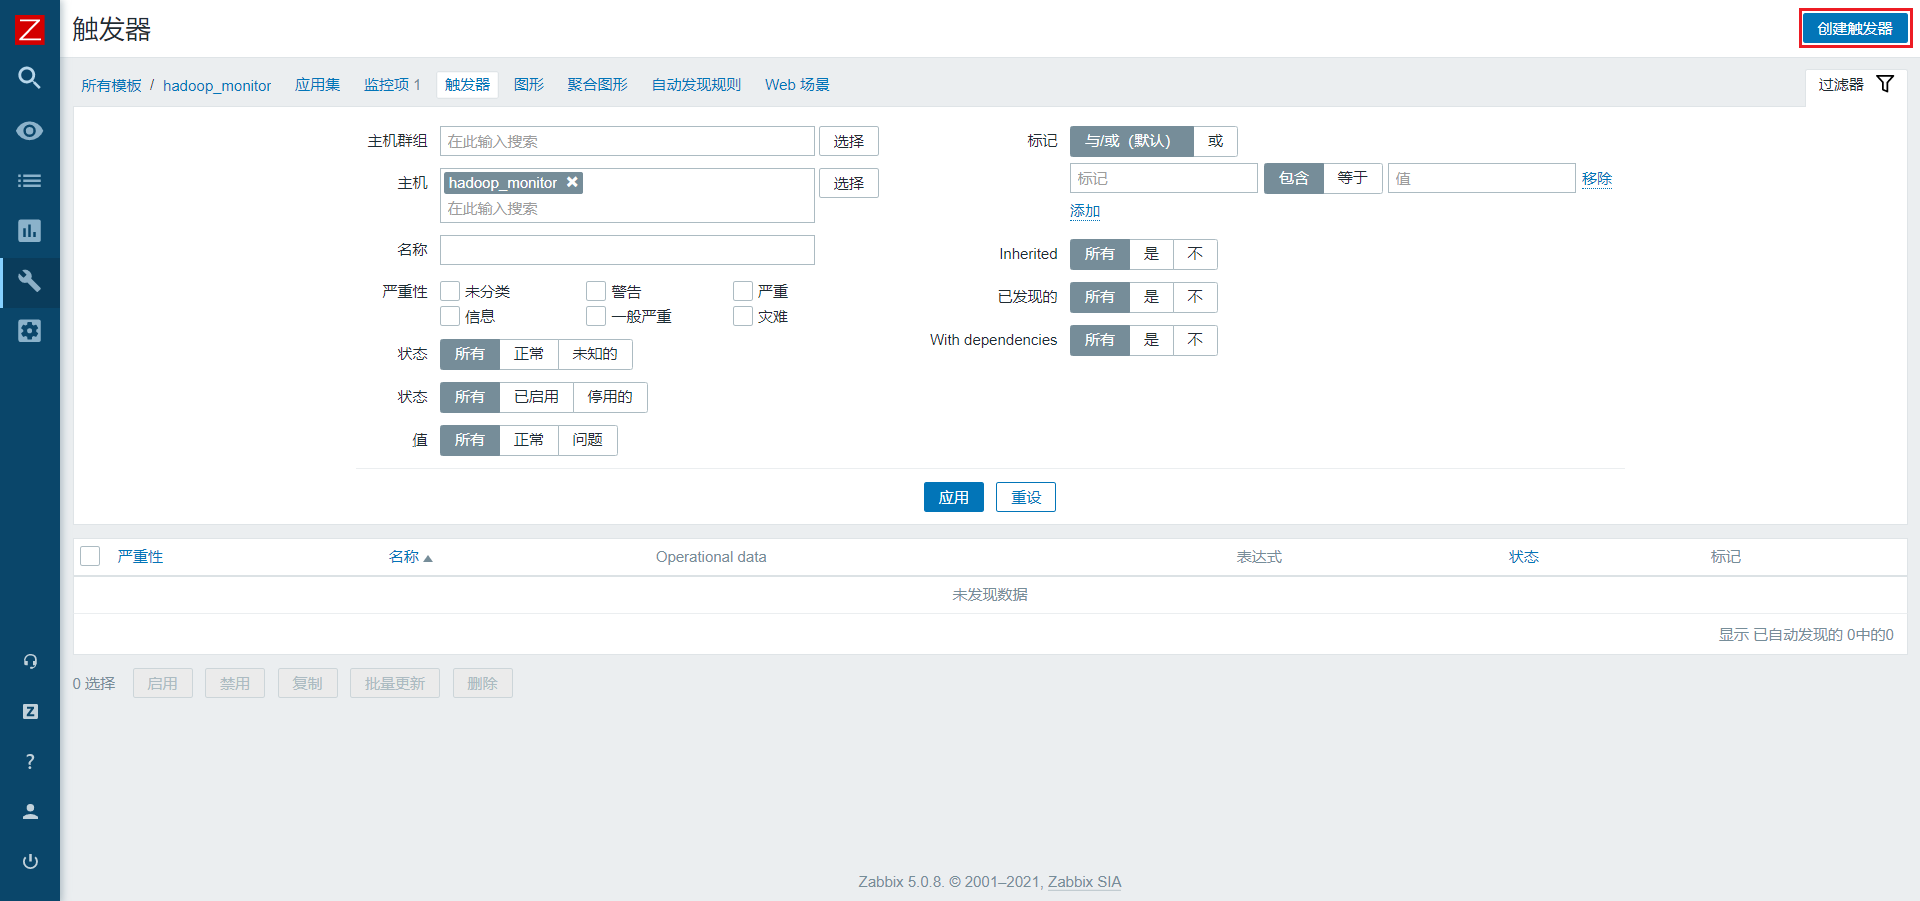
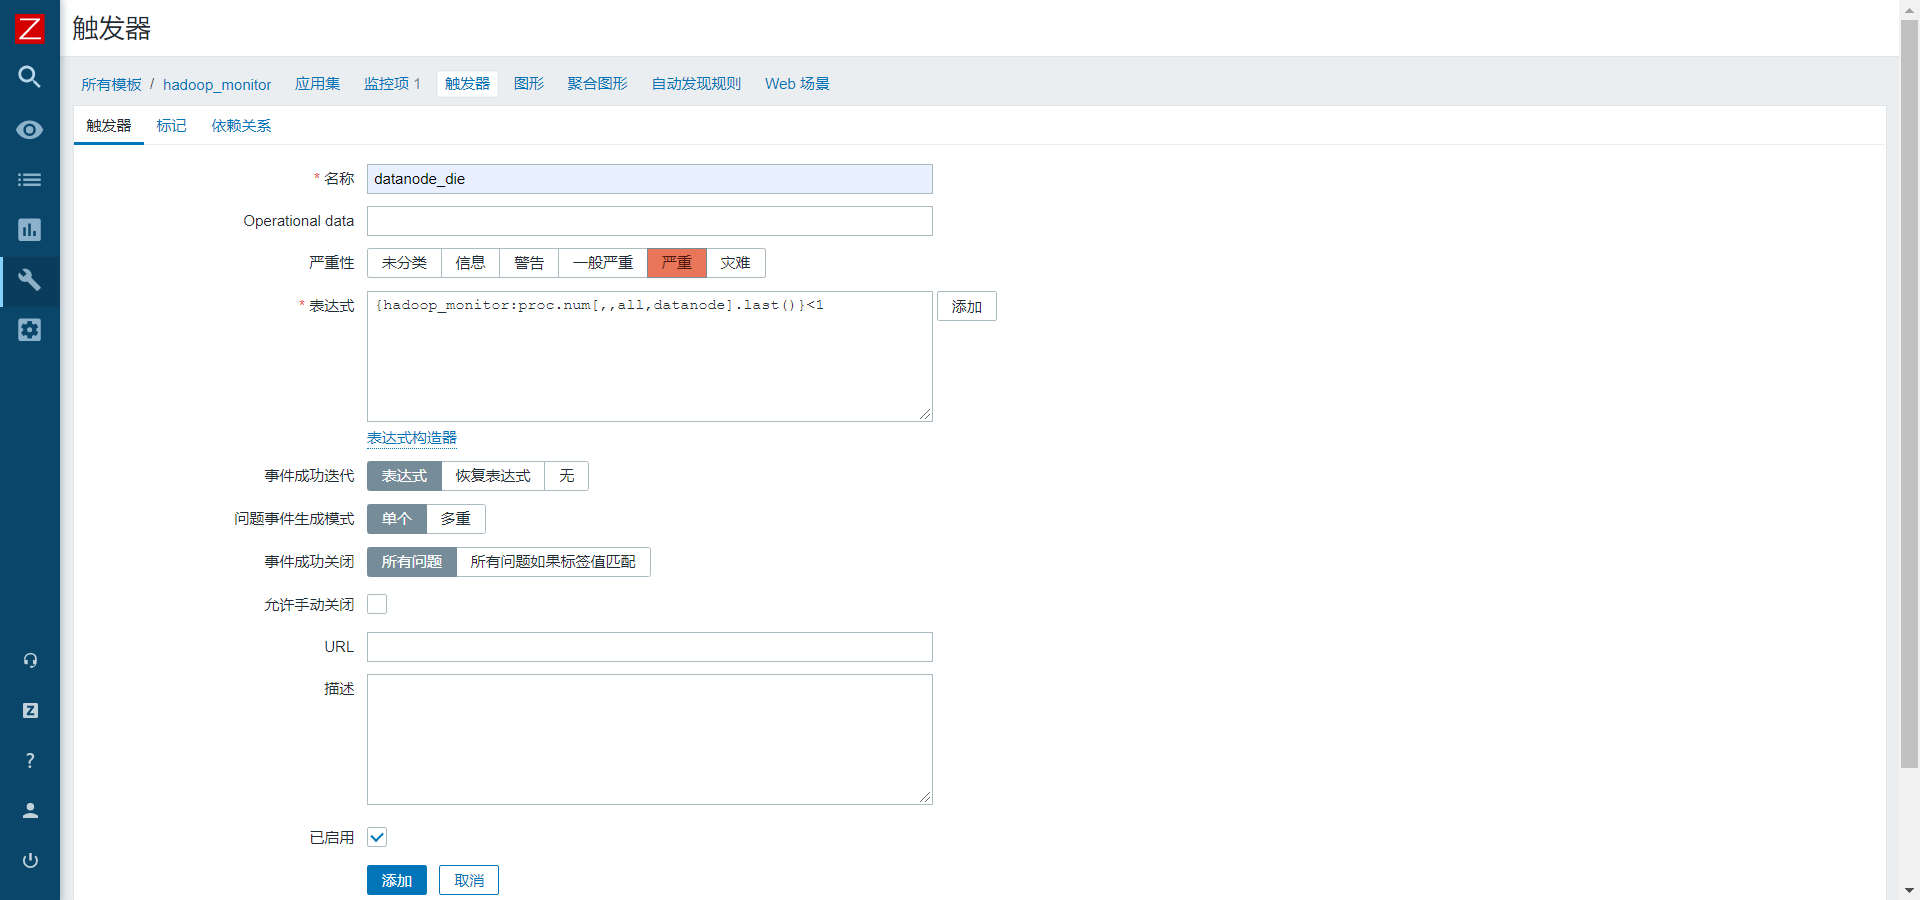
5)配置动作
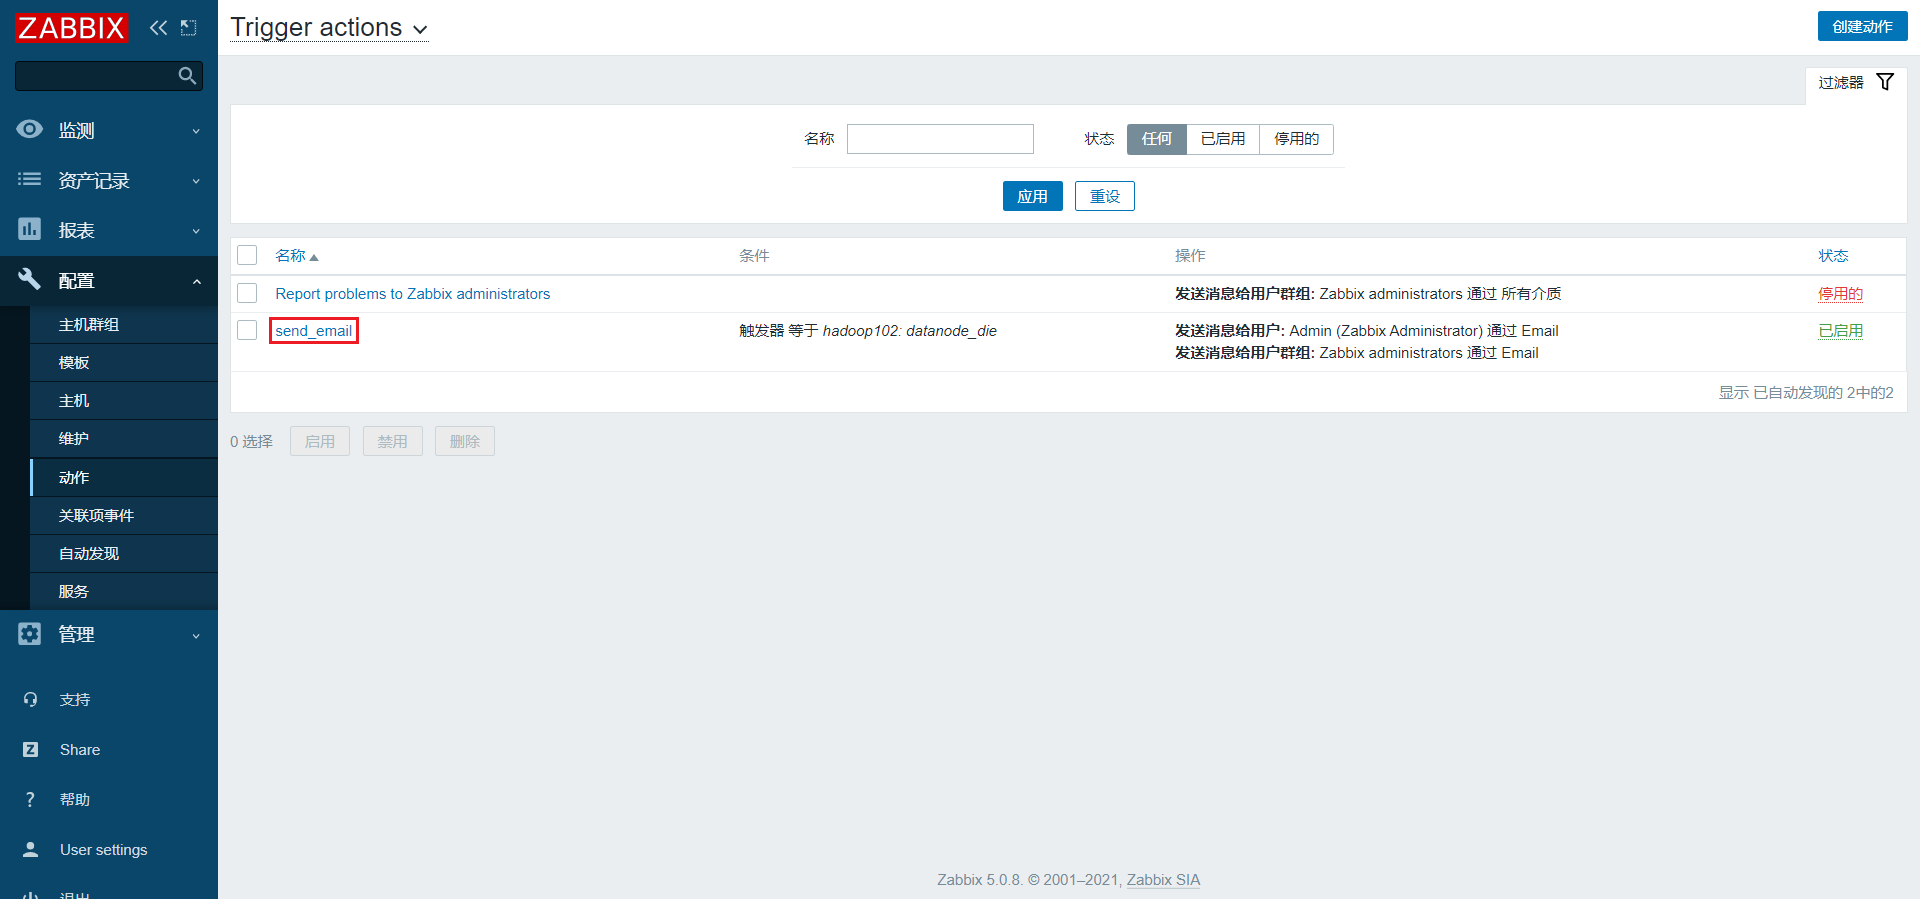
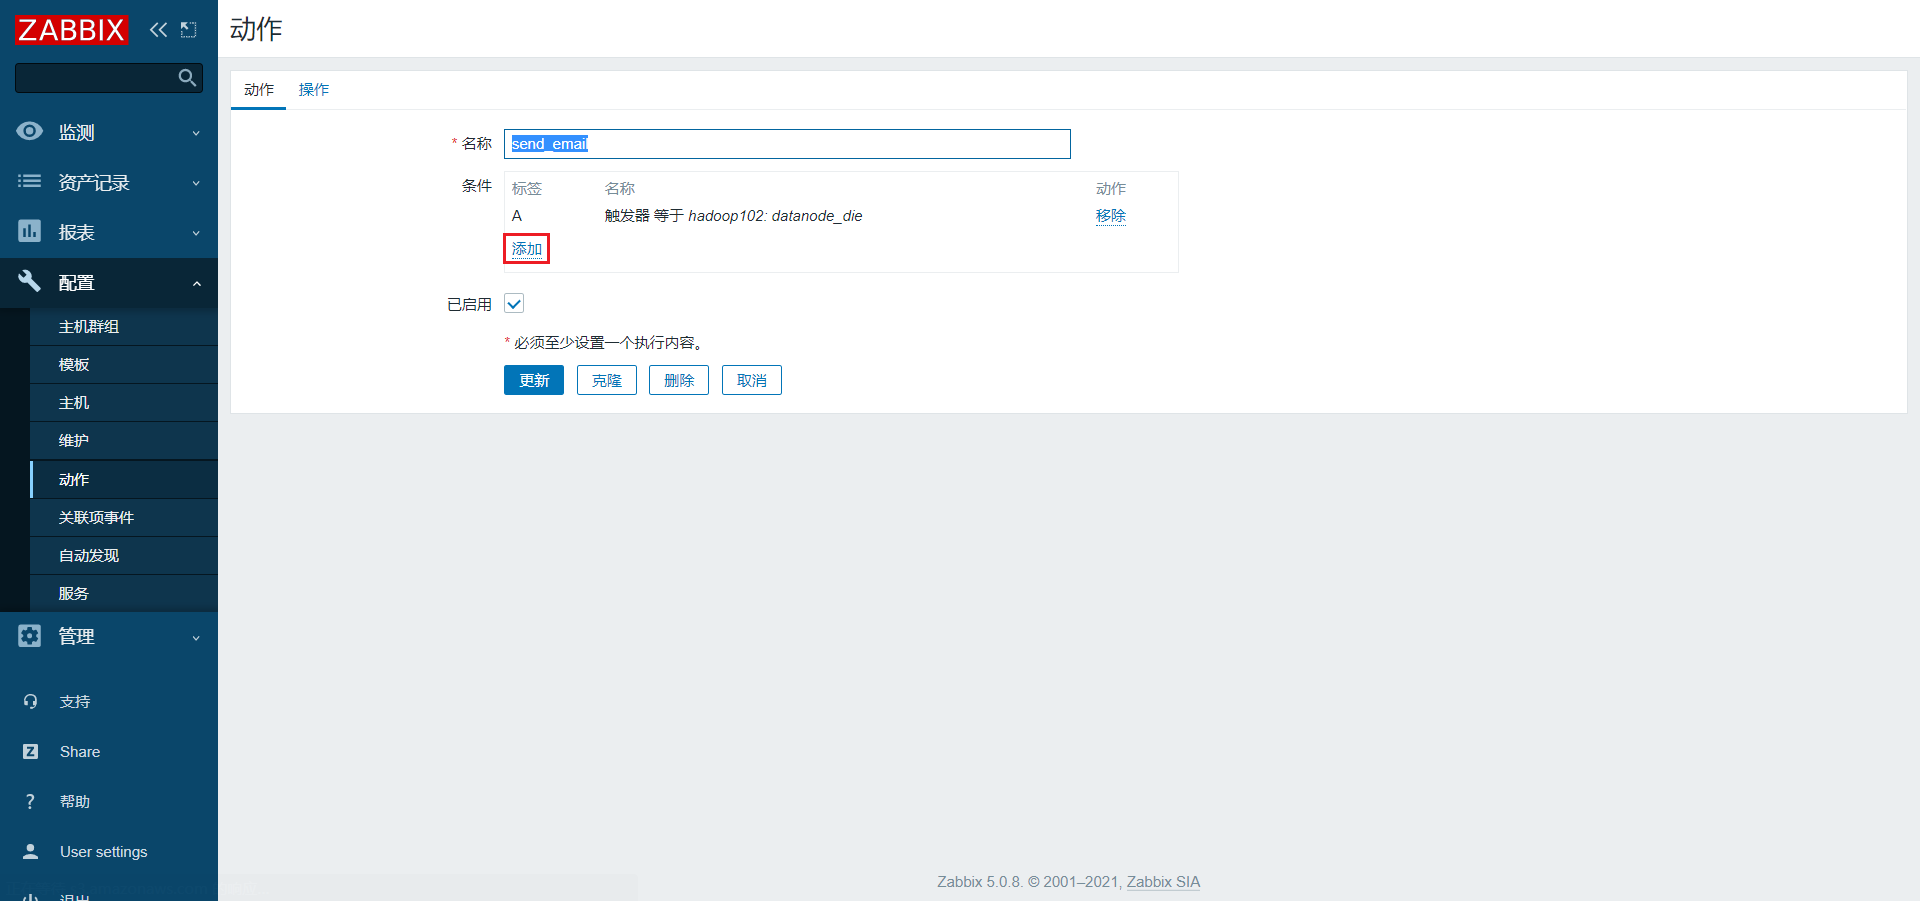

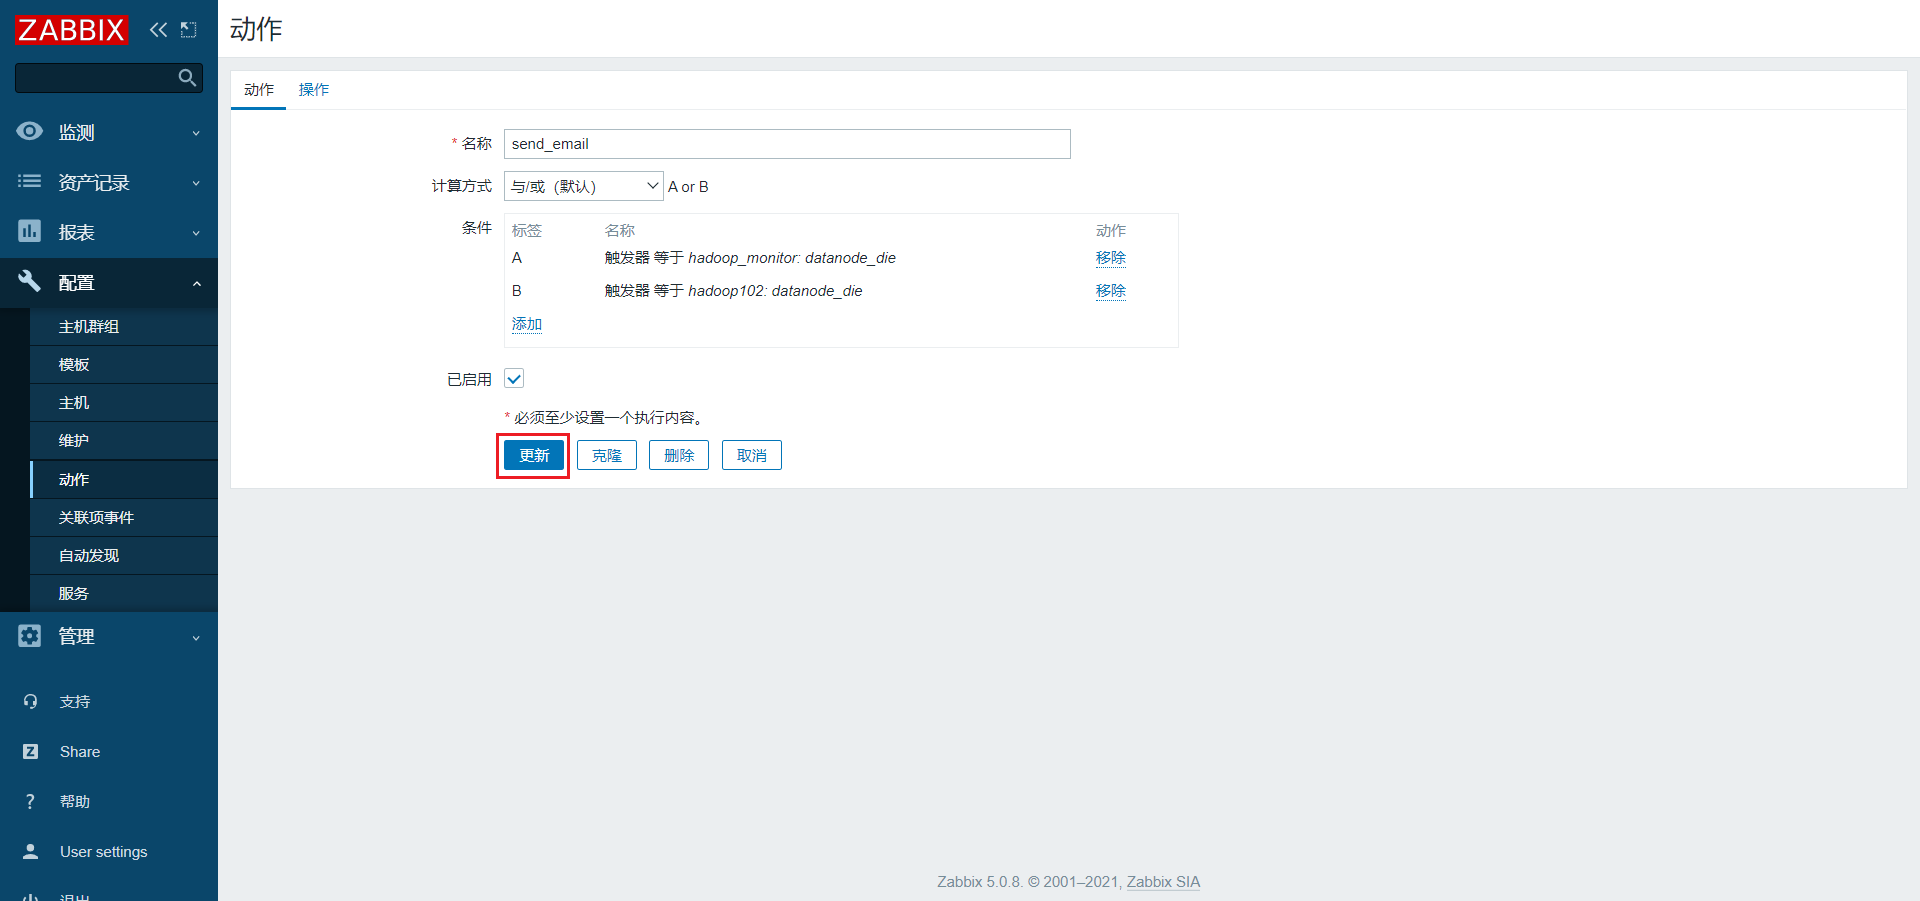
6)为hadoop103应用模板
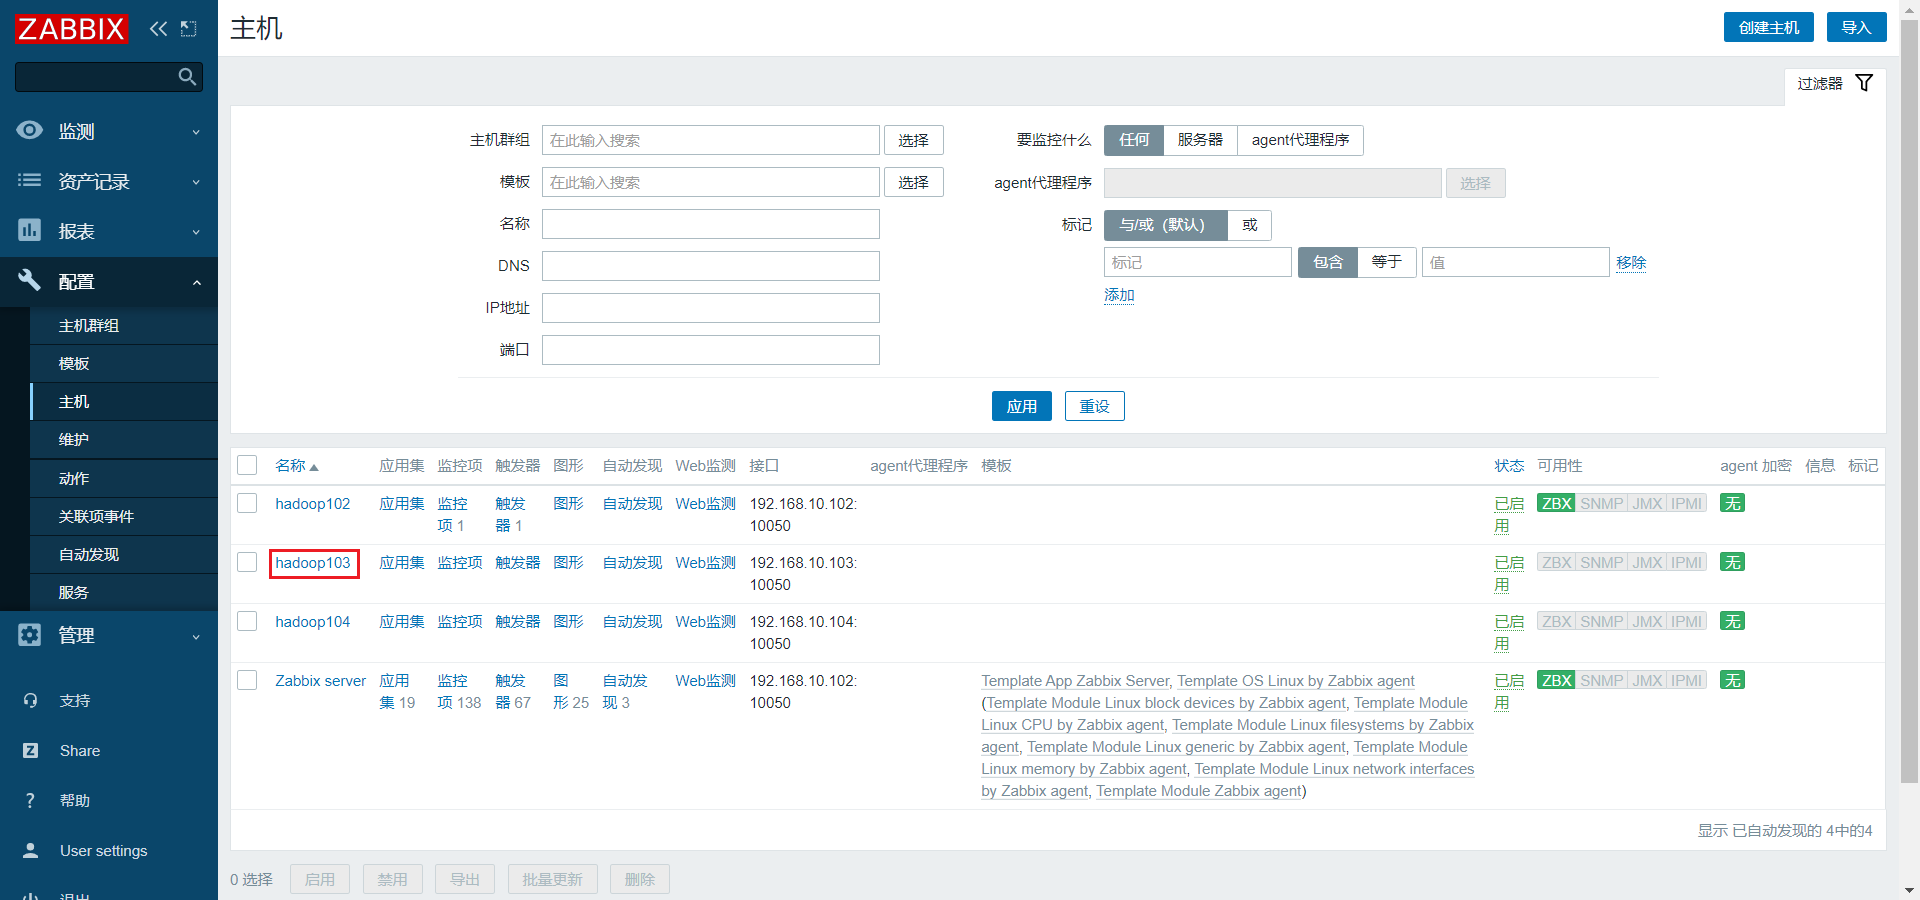
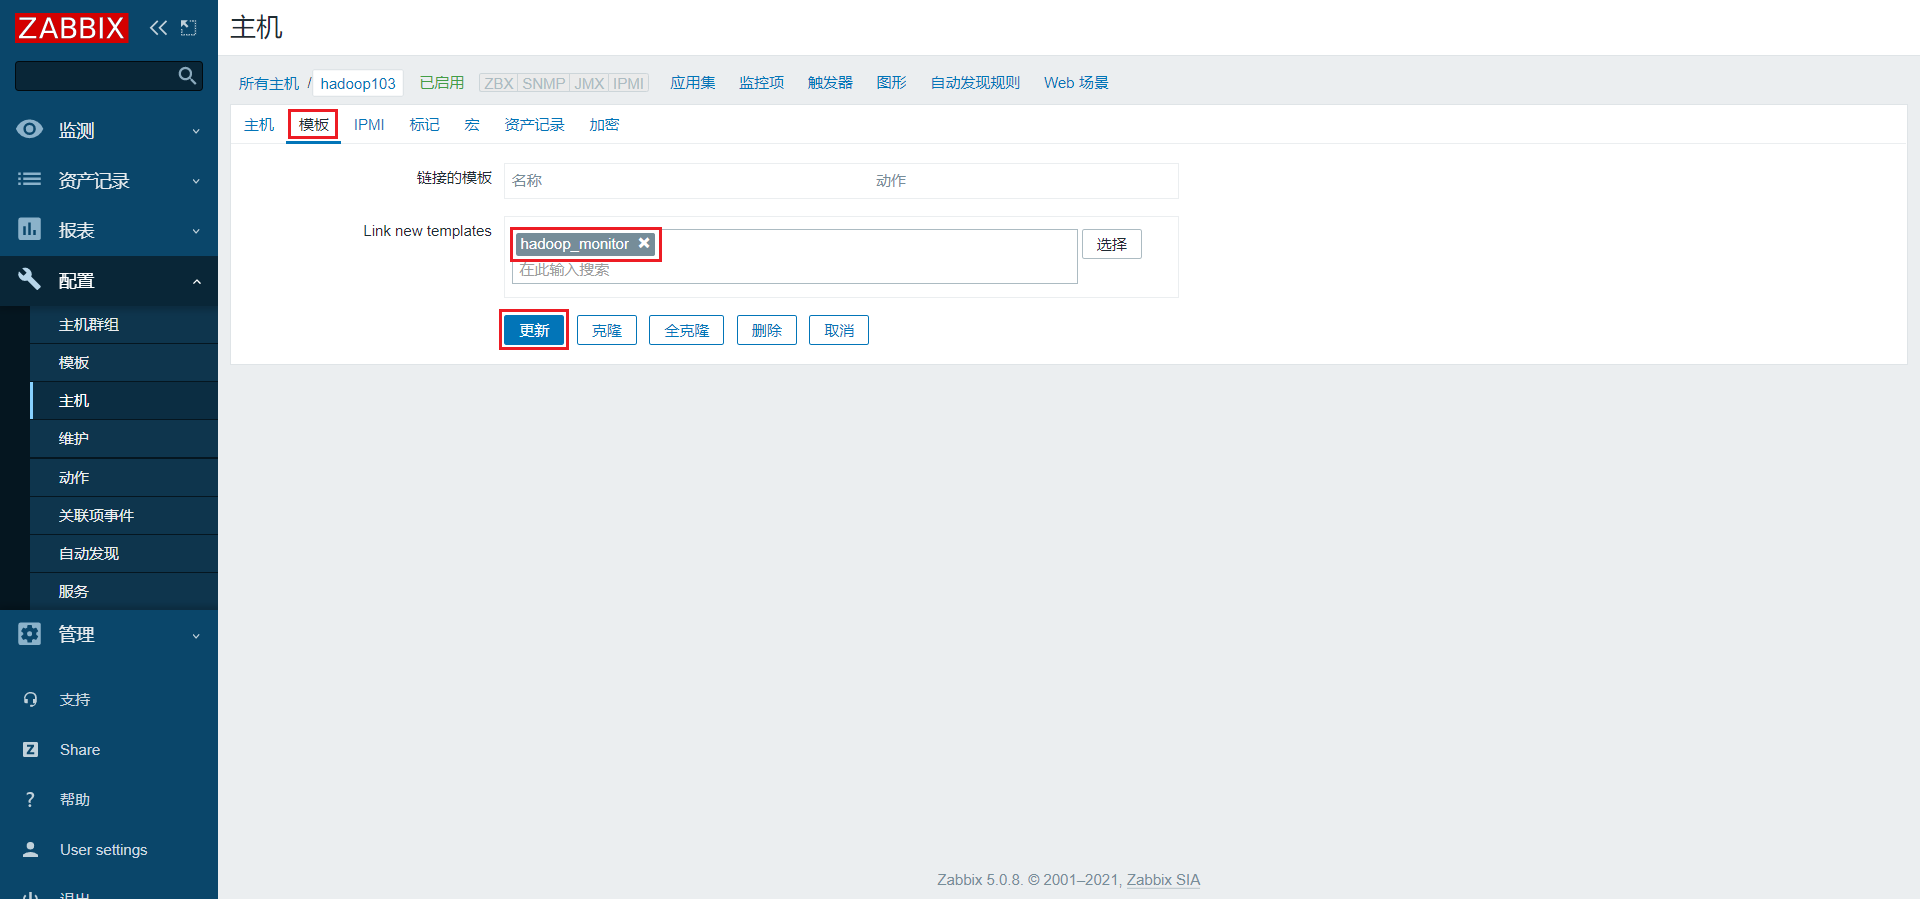
7)为hadoop104应用模板
同上
8)测试
(1)启动hadoop集群
[atguigu@hadoop102 hadoop-3.1.3]$ sbin/start-dfs.sh
(2)停止hadoop集群
[atguigu@hadoop102 hadoop-3.1.3]$ sbin/stop-dfs.sh
(3)查看报警邮件
第4章 集成Grafana
4.1 部署Grafana
1.下载Grafana安装包
官方仓库:https://dl.grafana.com/oss/release/grafana-7.4.3-1.x86_64.rpm
国内镜像:https://repo.huaweicloud.com/grafana/7.4.3/grafana-7.4.3-1.x86_64.rpm
2.将安装包上传到hadoop102主机的/opt/software路径
3.使用rpm安装Grafana
[atguigu@hadoop102 software]$ sudo rpm -ivh grafana-7.4.3-1.x86_64.rpm
4.启动Grafana
[atguigu@hadoop102 software]$ sudo systemctl start grafana-server
5.访问Grafana页面
访问地址为:http://hadoop102:3000/
首次登录用户名和密码均为 admin

设置新密码或者跳过

4.2 快速入门
1.创建Dashboard
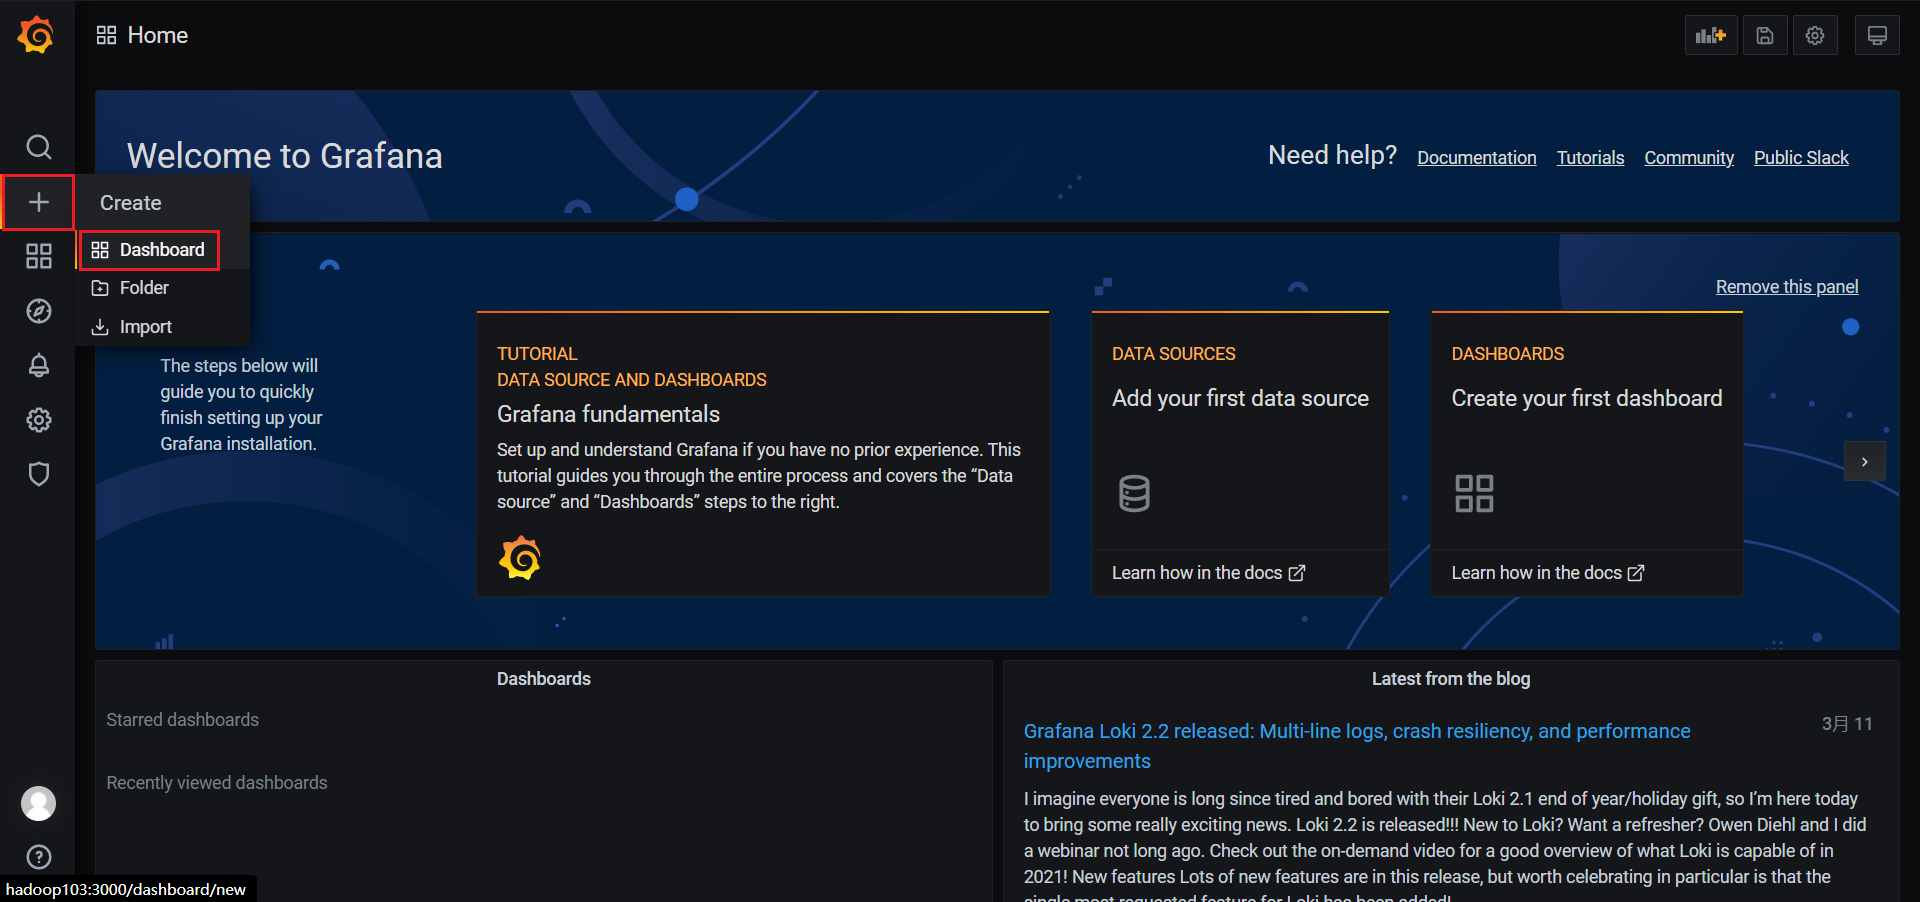
2.新建panel

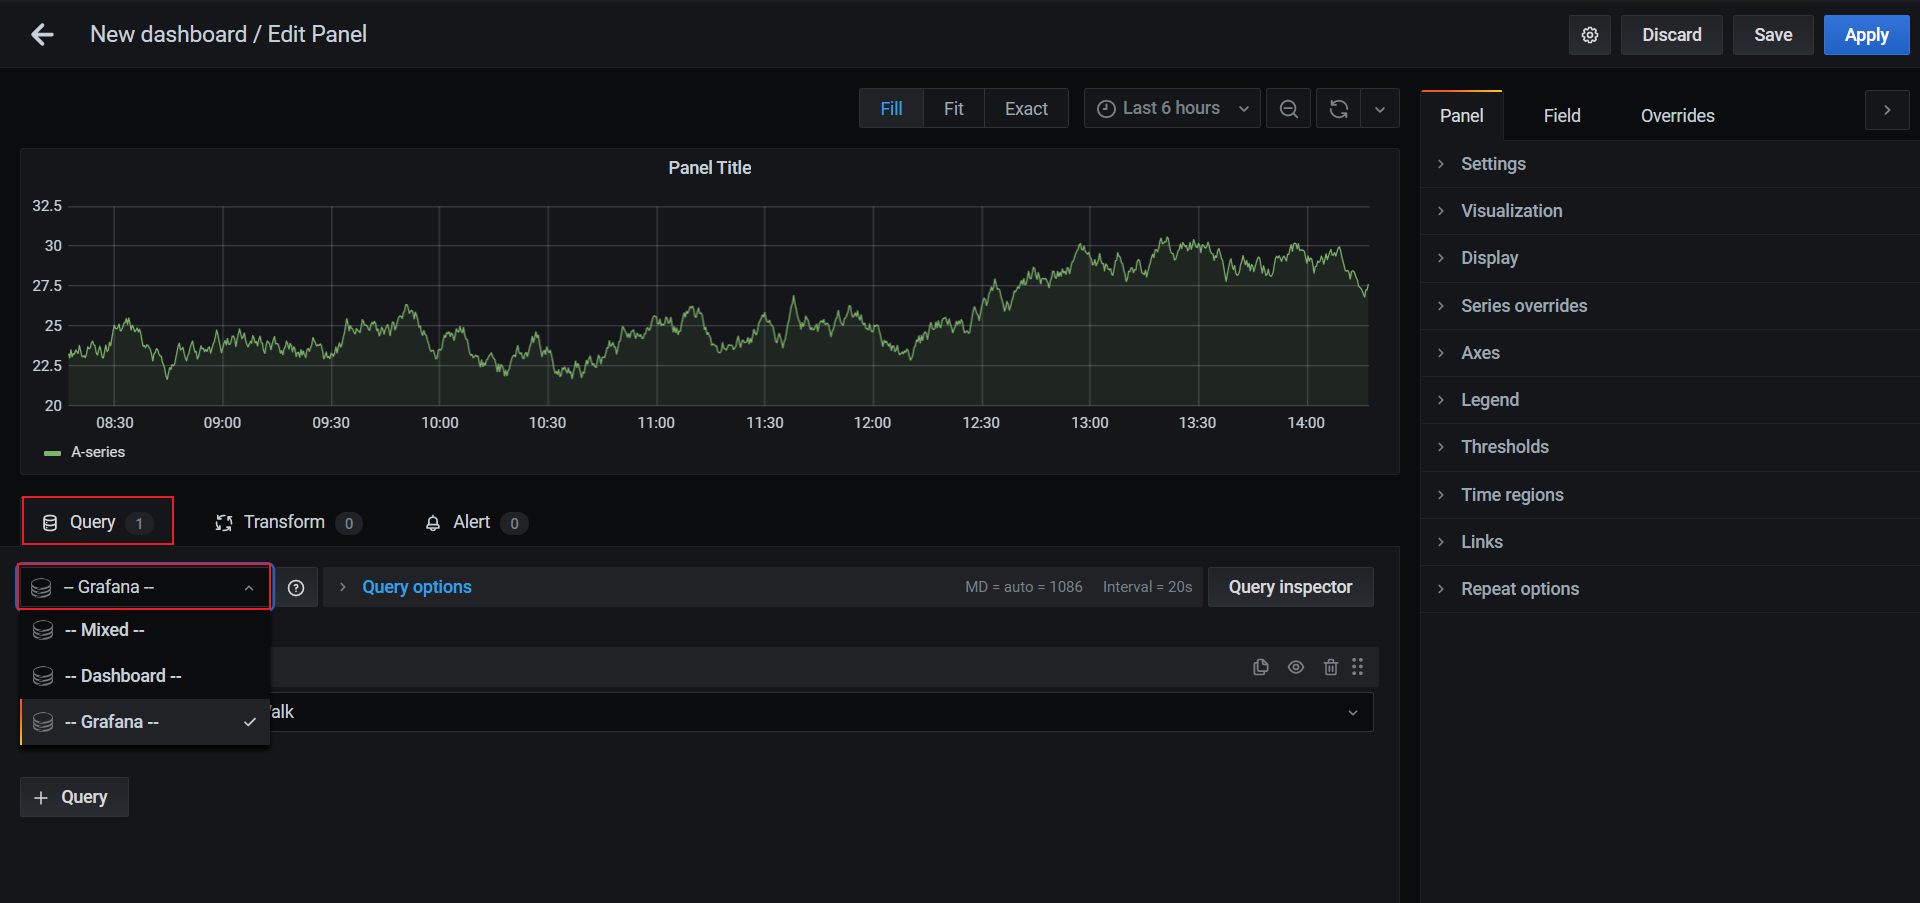
3.选择数据源,此处选择Grafana提供的随机测试数据
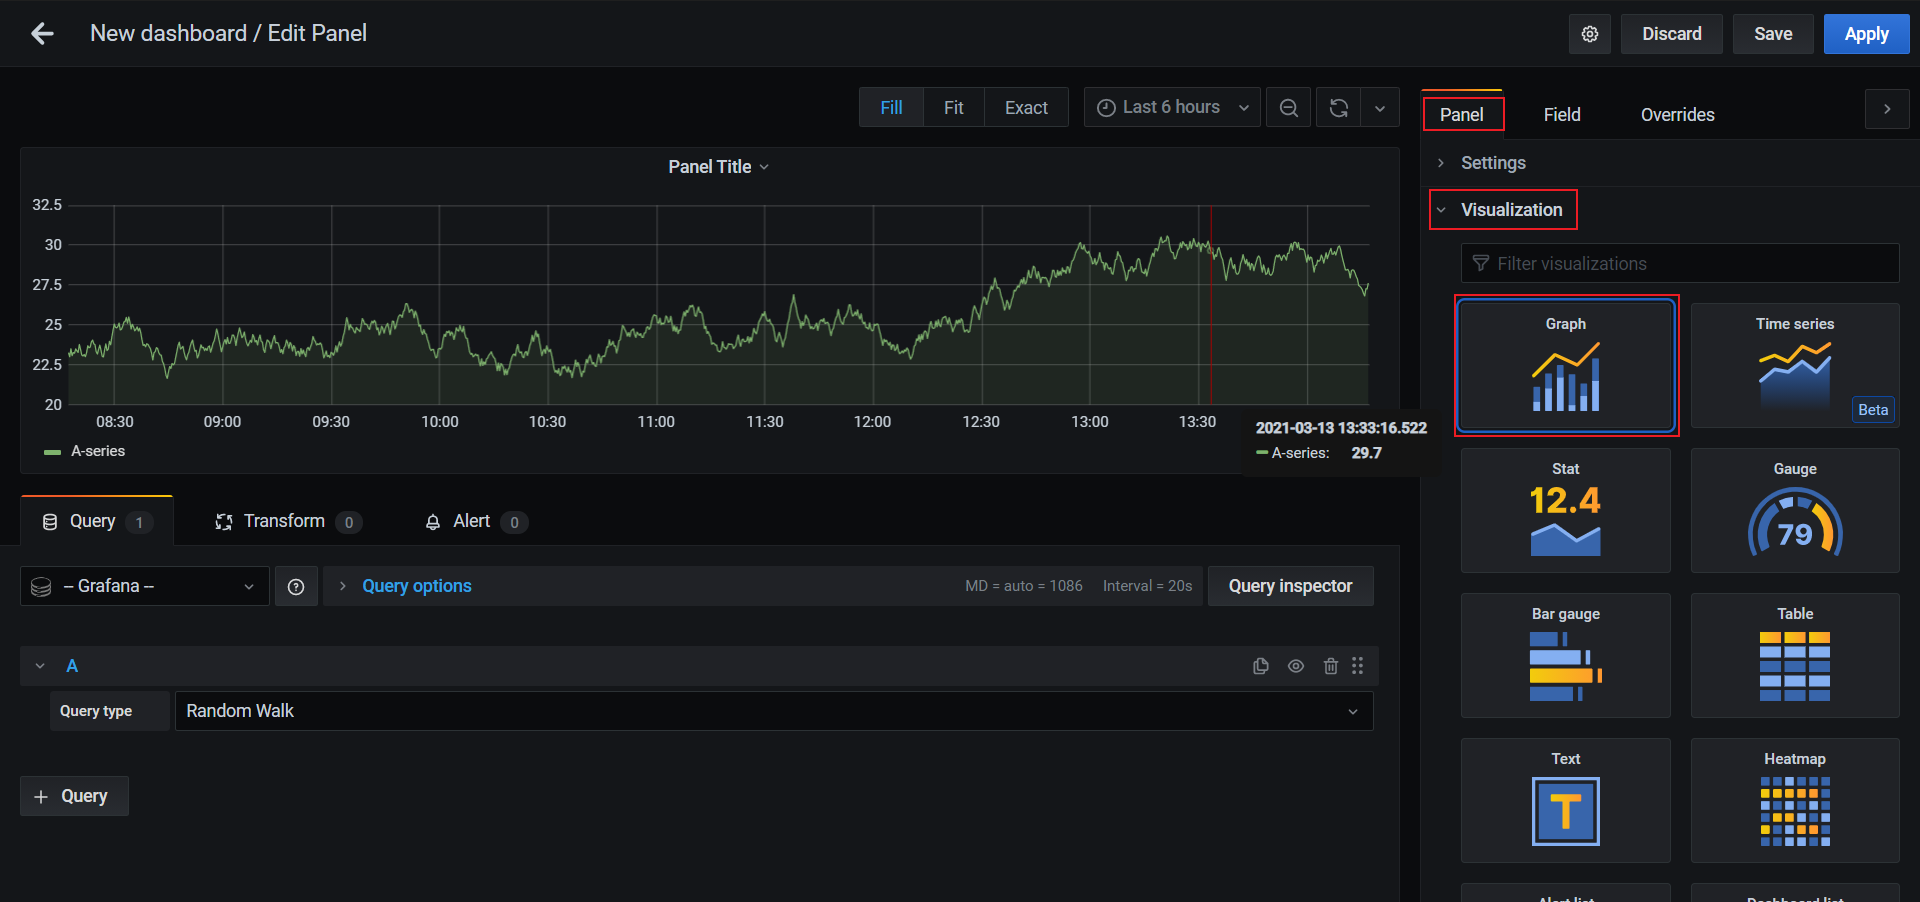
4.选择合适的可视化类型
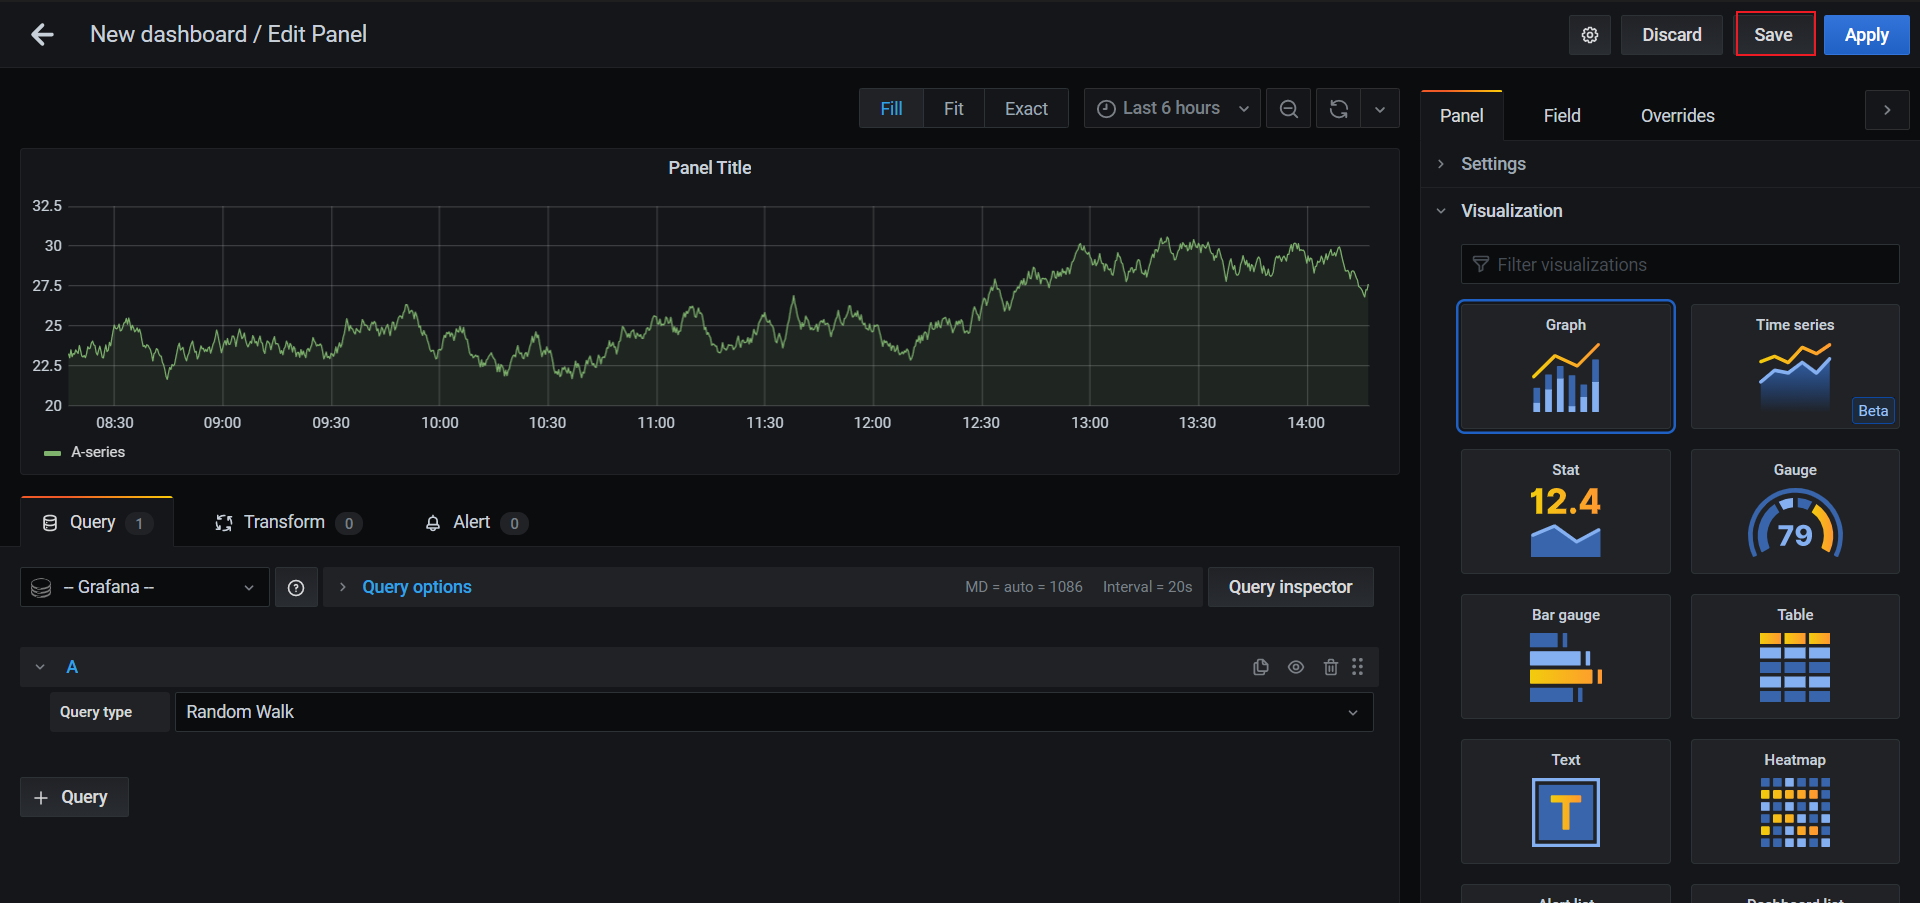
5.保存Dashboard和panel,并命名
4.3 集成Zabbix
4.3.1 配置数据源
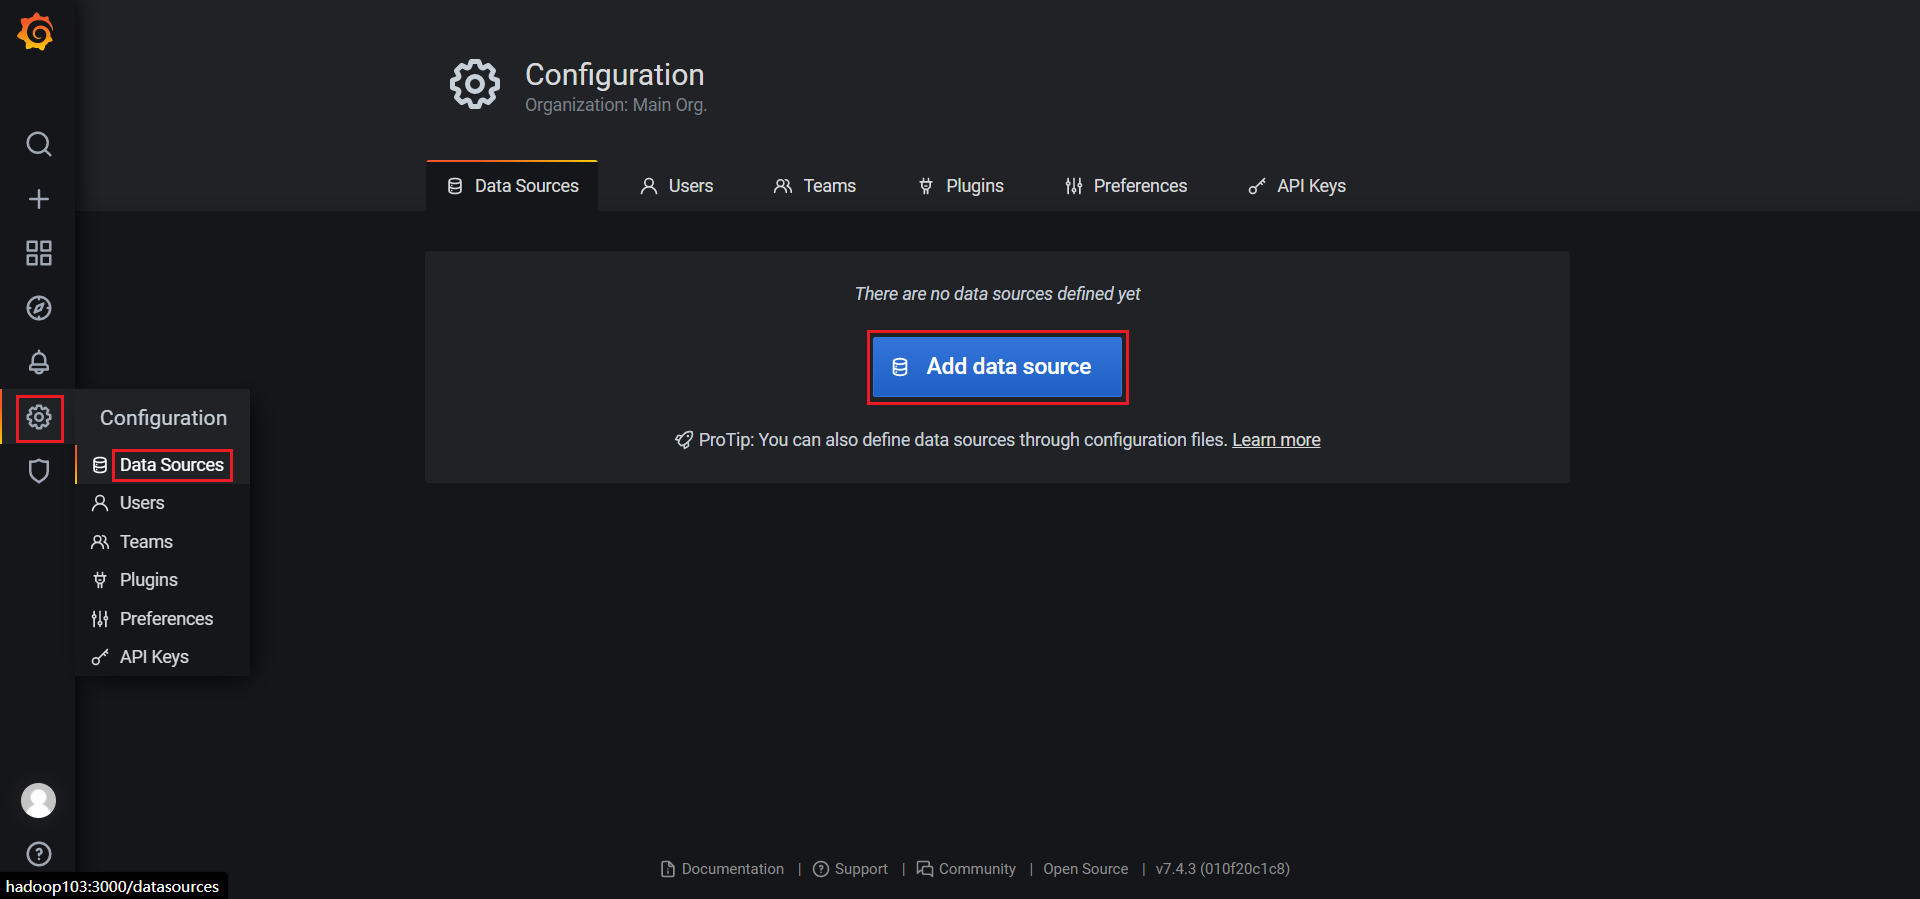
使用Grafana与其他系统集成时,需要配置对应的DataSource
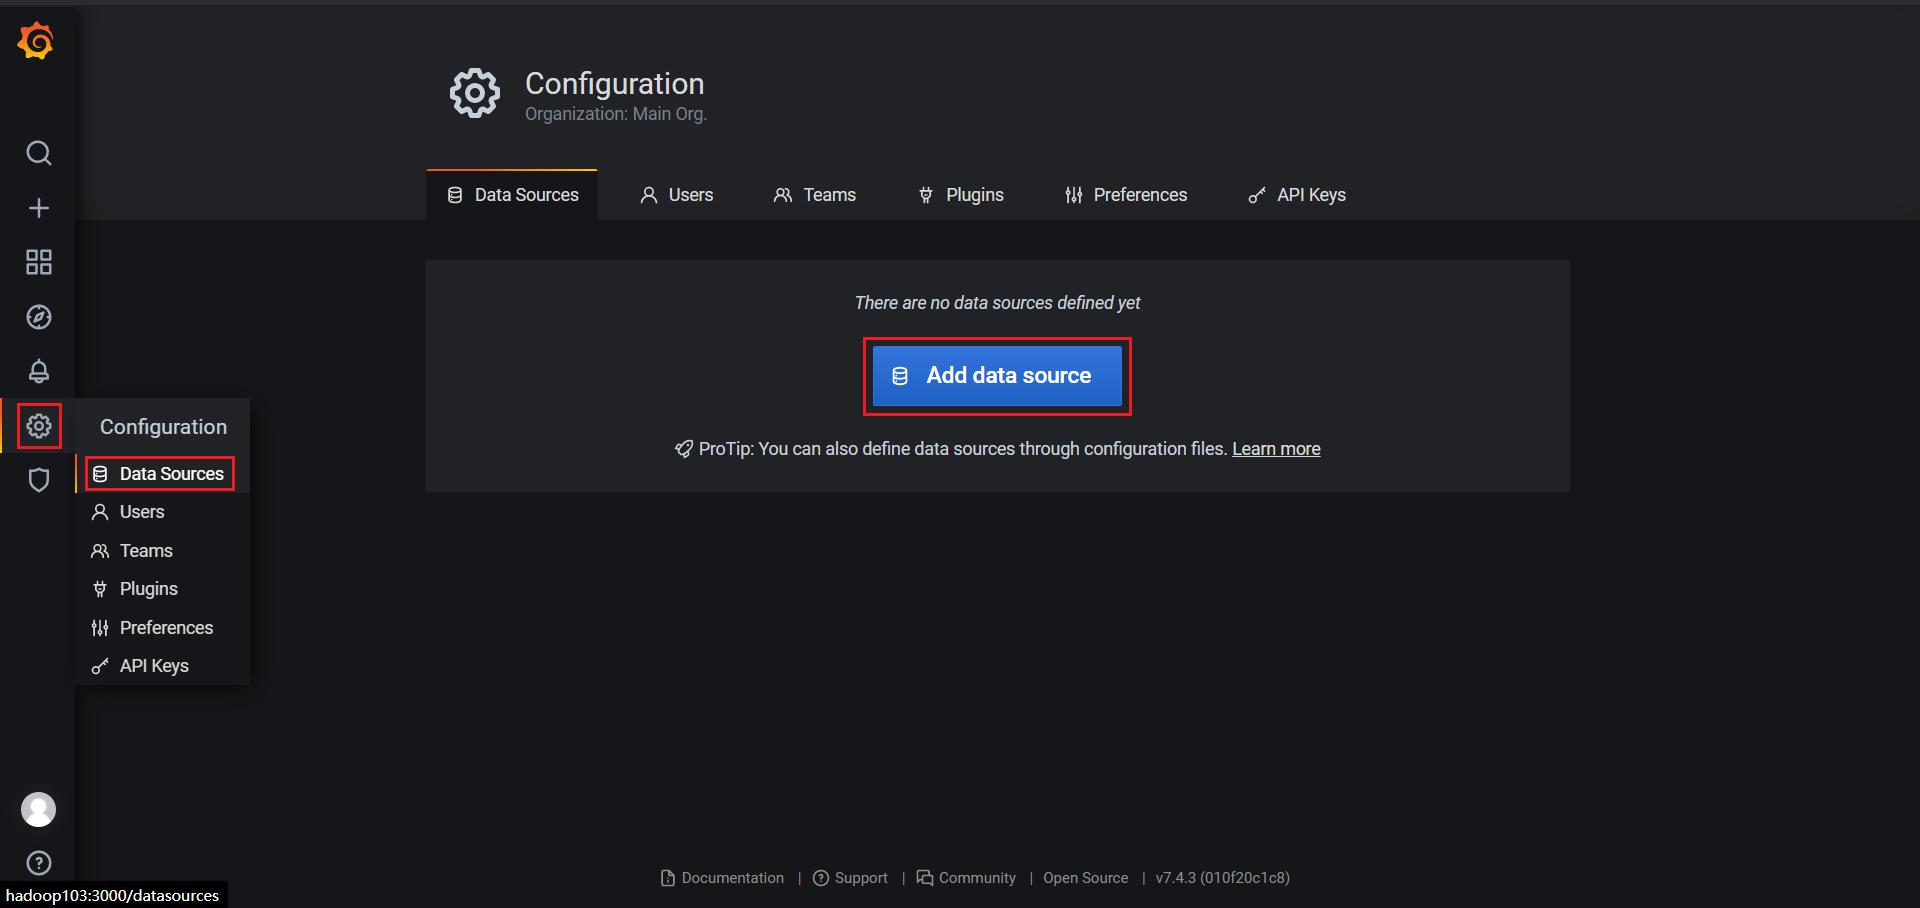
1.点击下图所示按钮,增加数据源
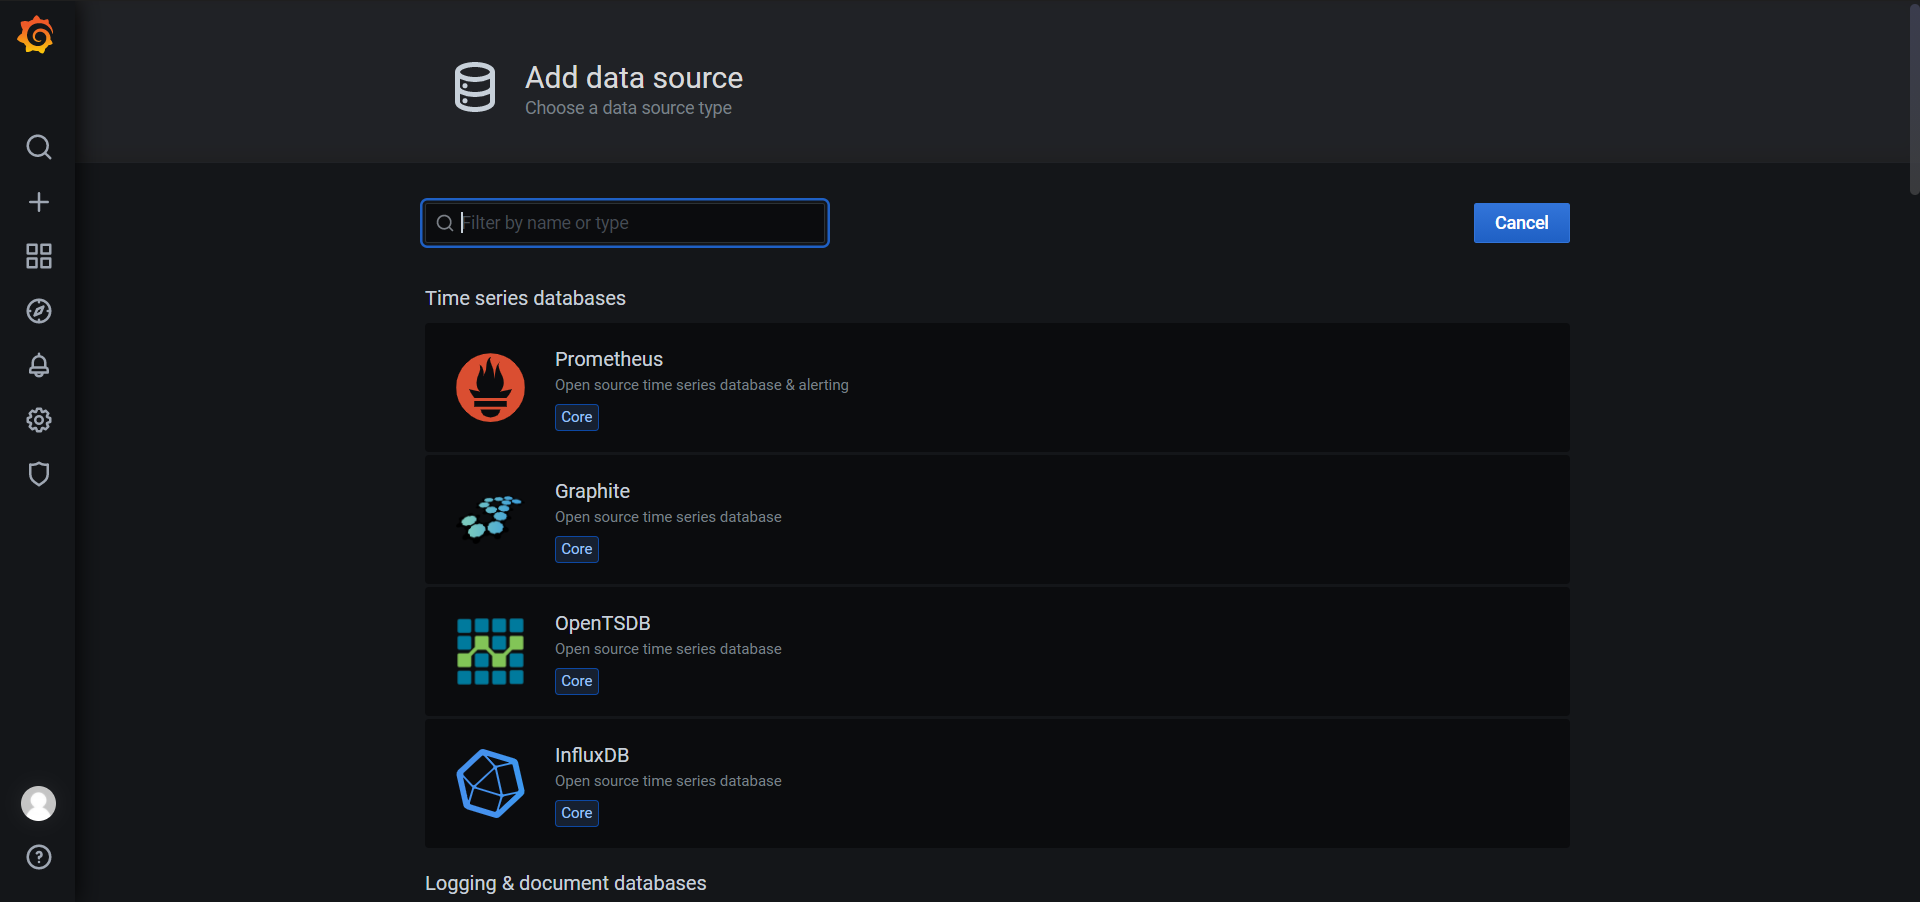
2.选择所需数据源
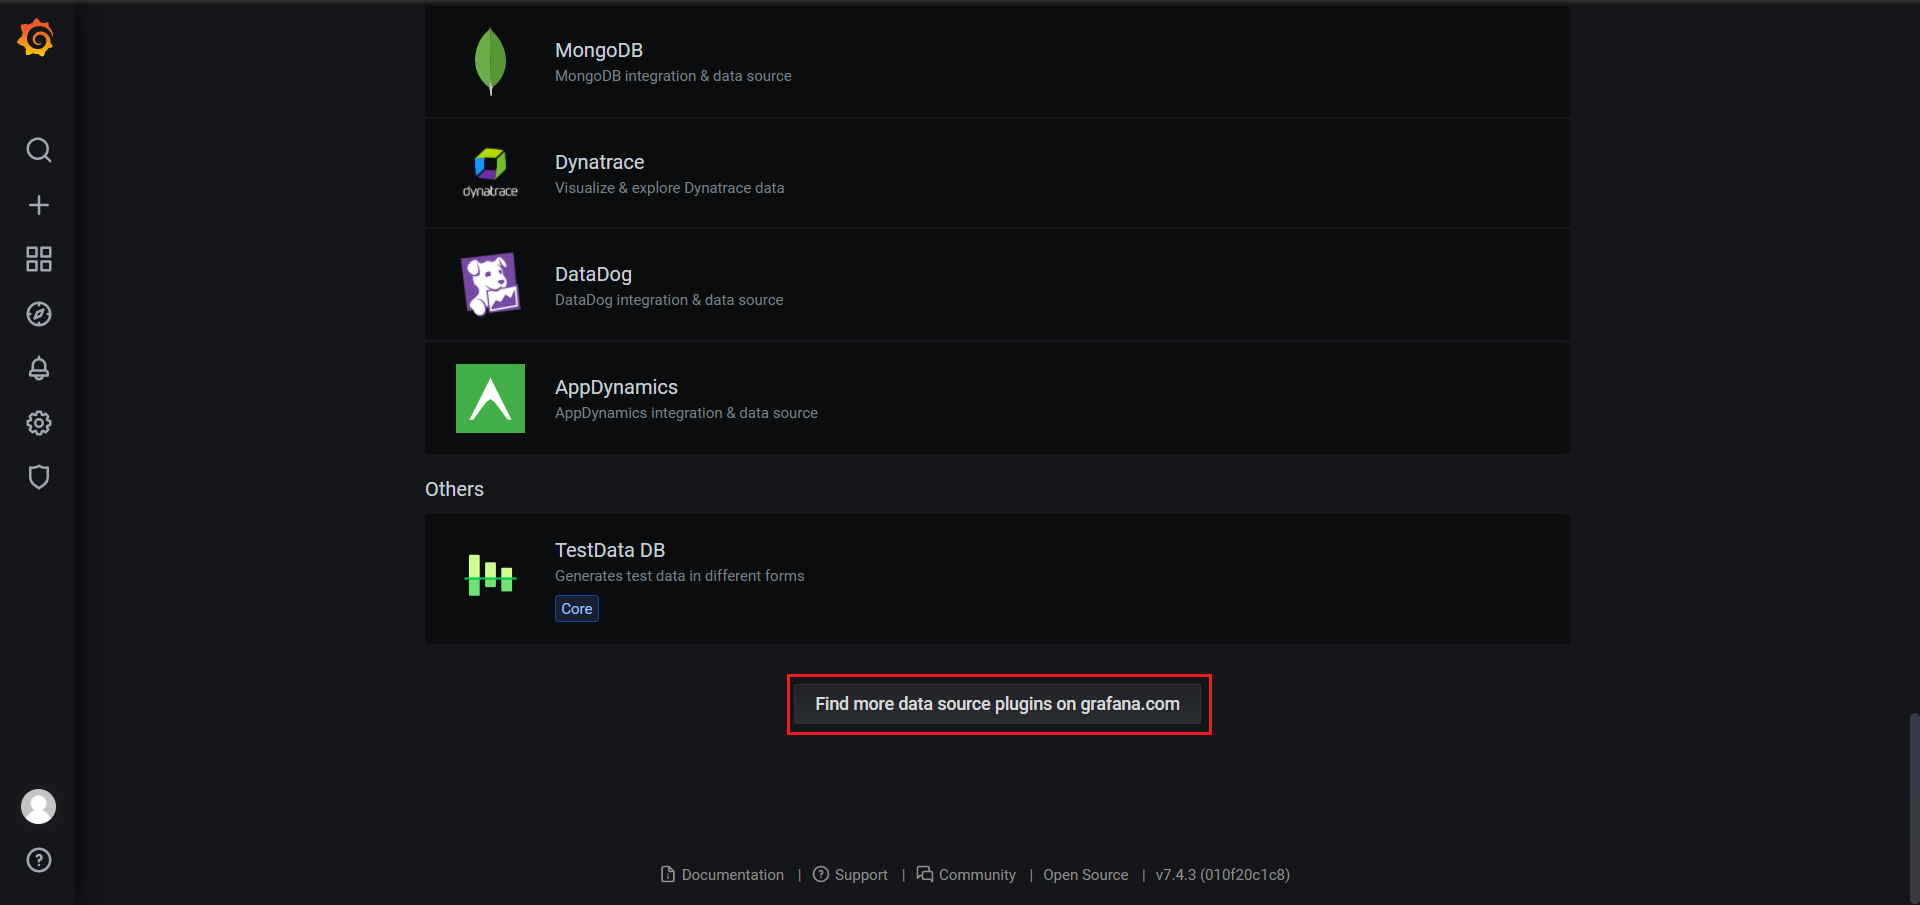
3.如没有所需数据源,点击下图所示地址,获取更多数据源
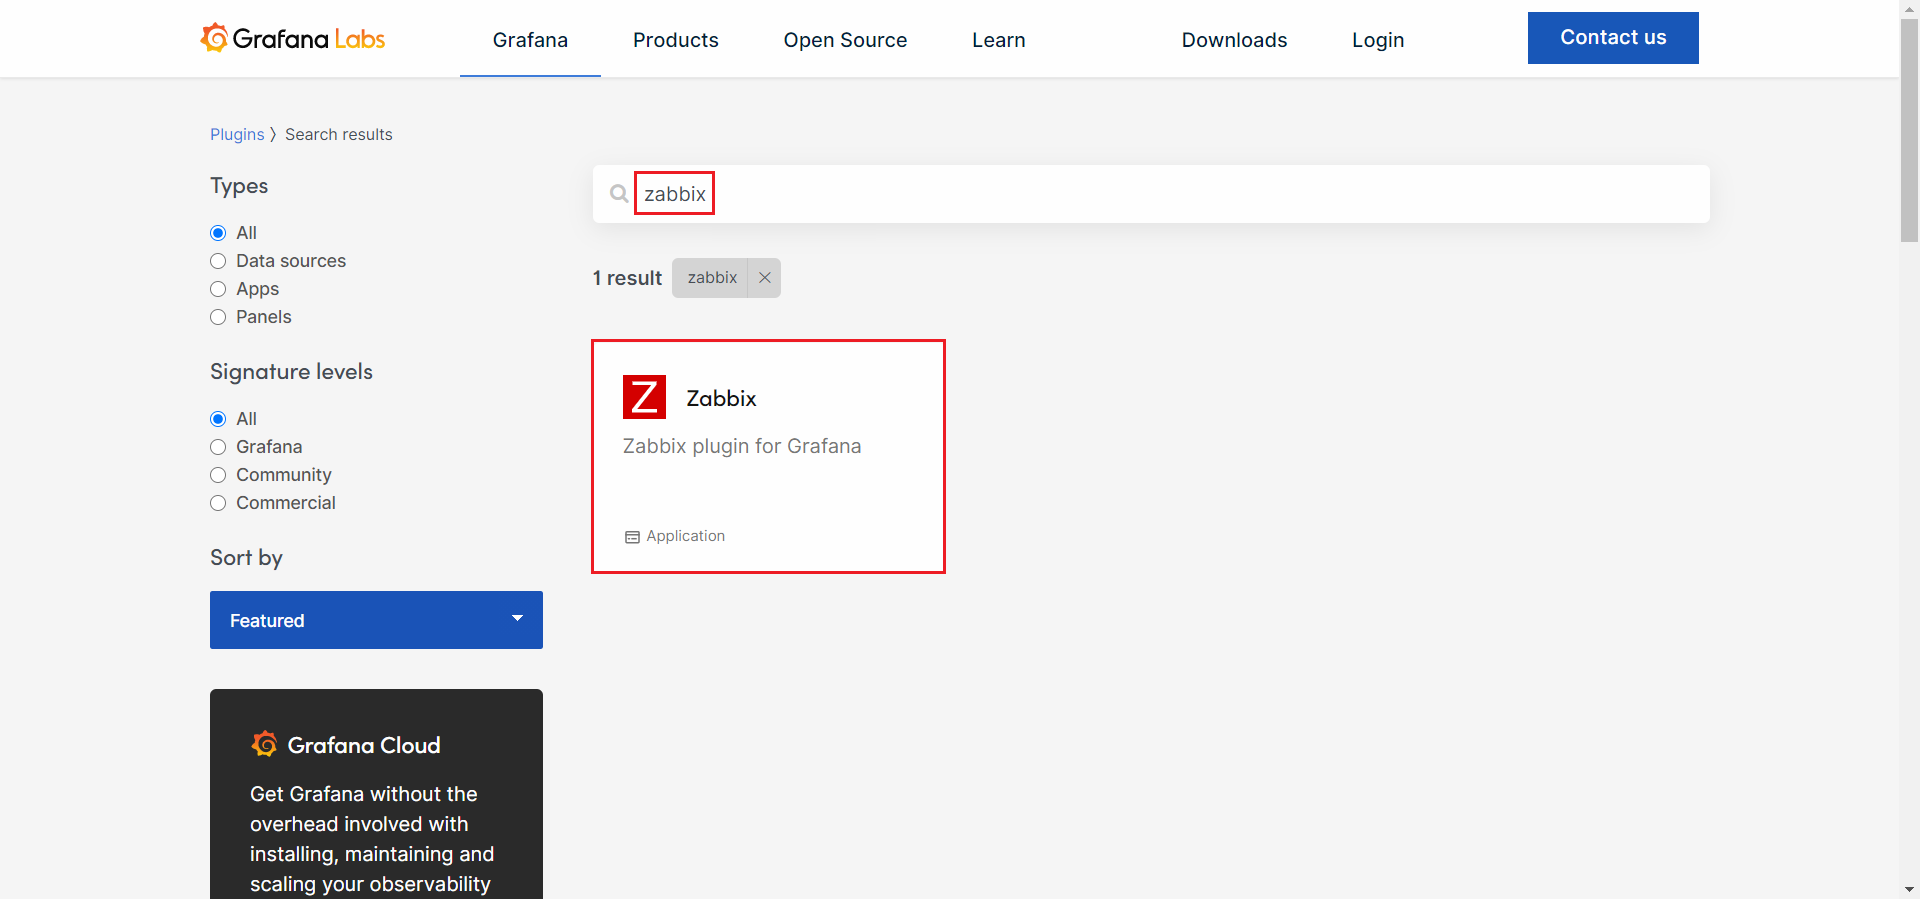
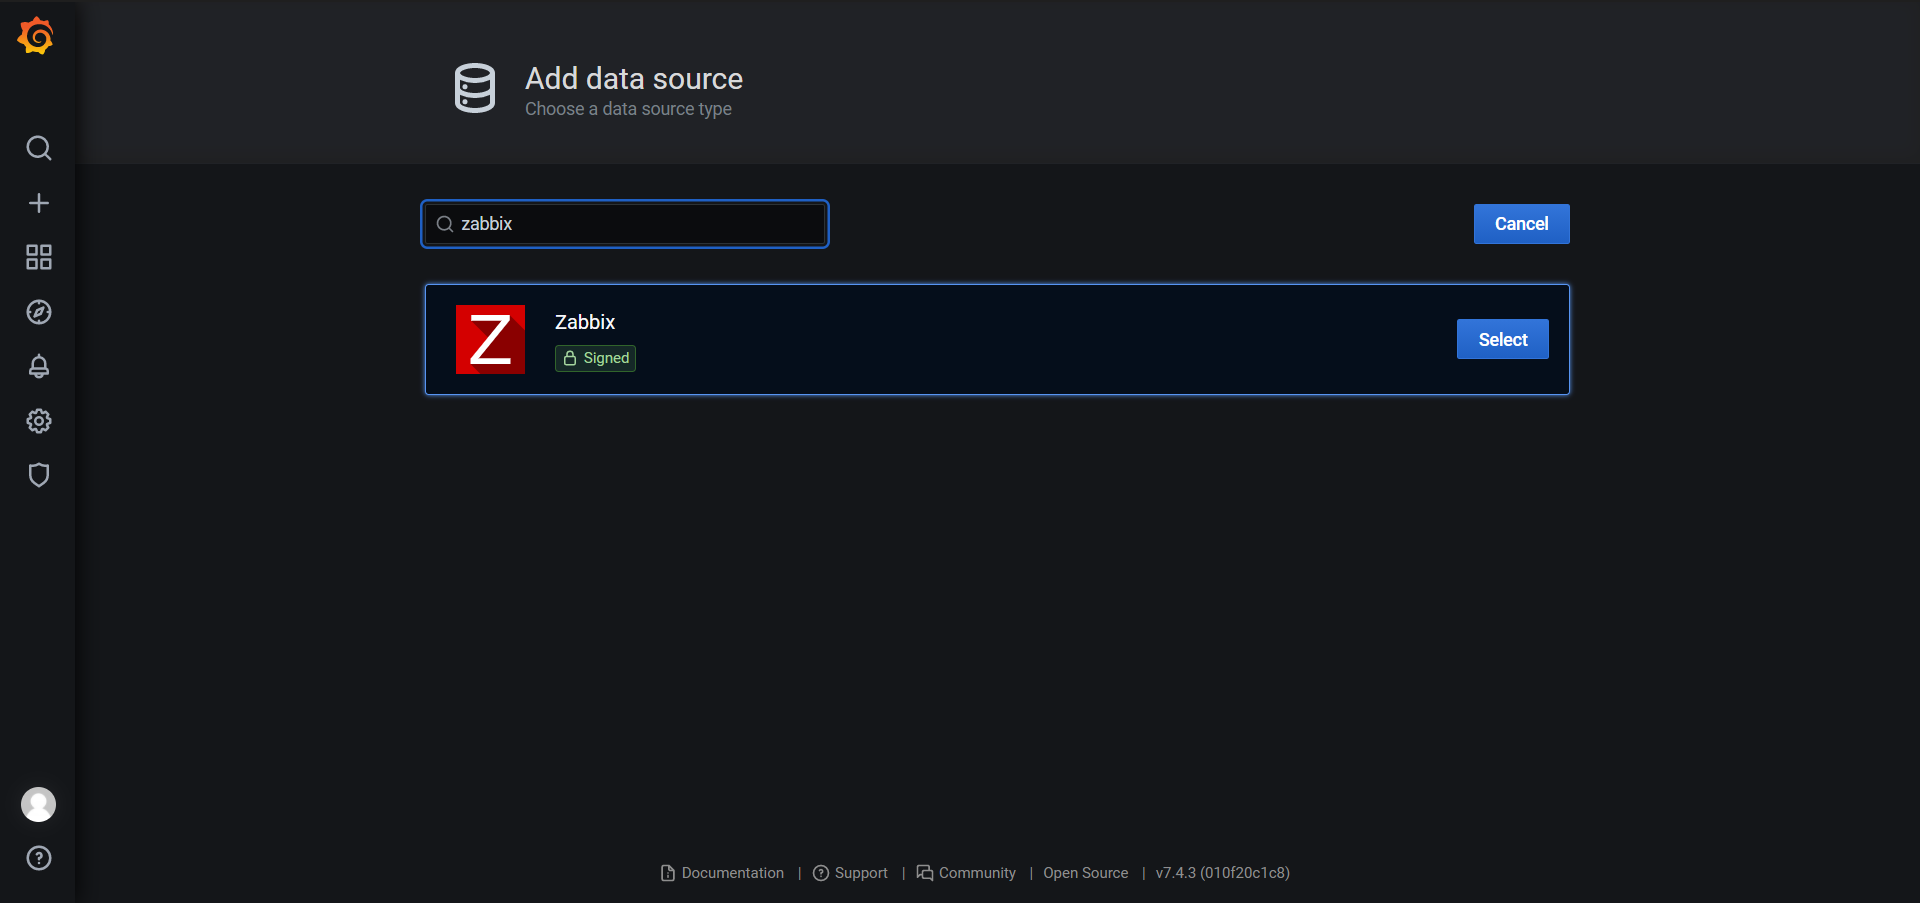
4.搜索zabbix,并点击搜索结果
5.按照所需插件的说明进行部署
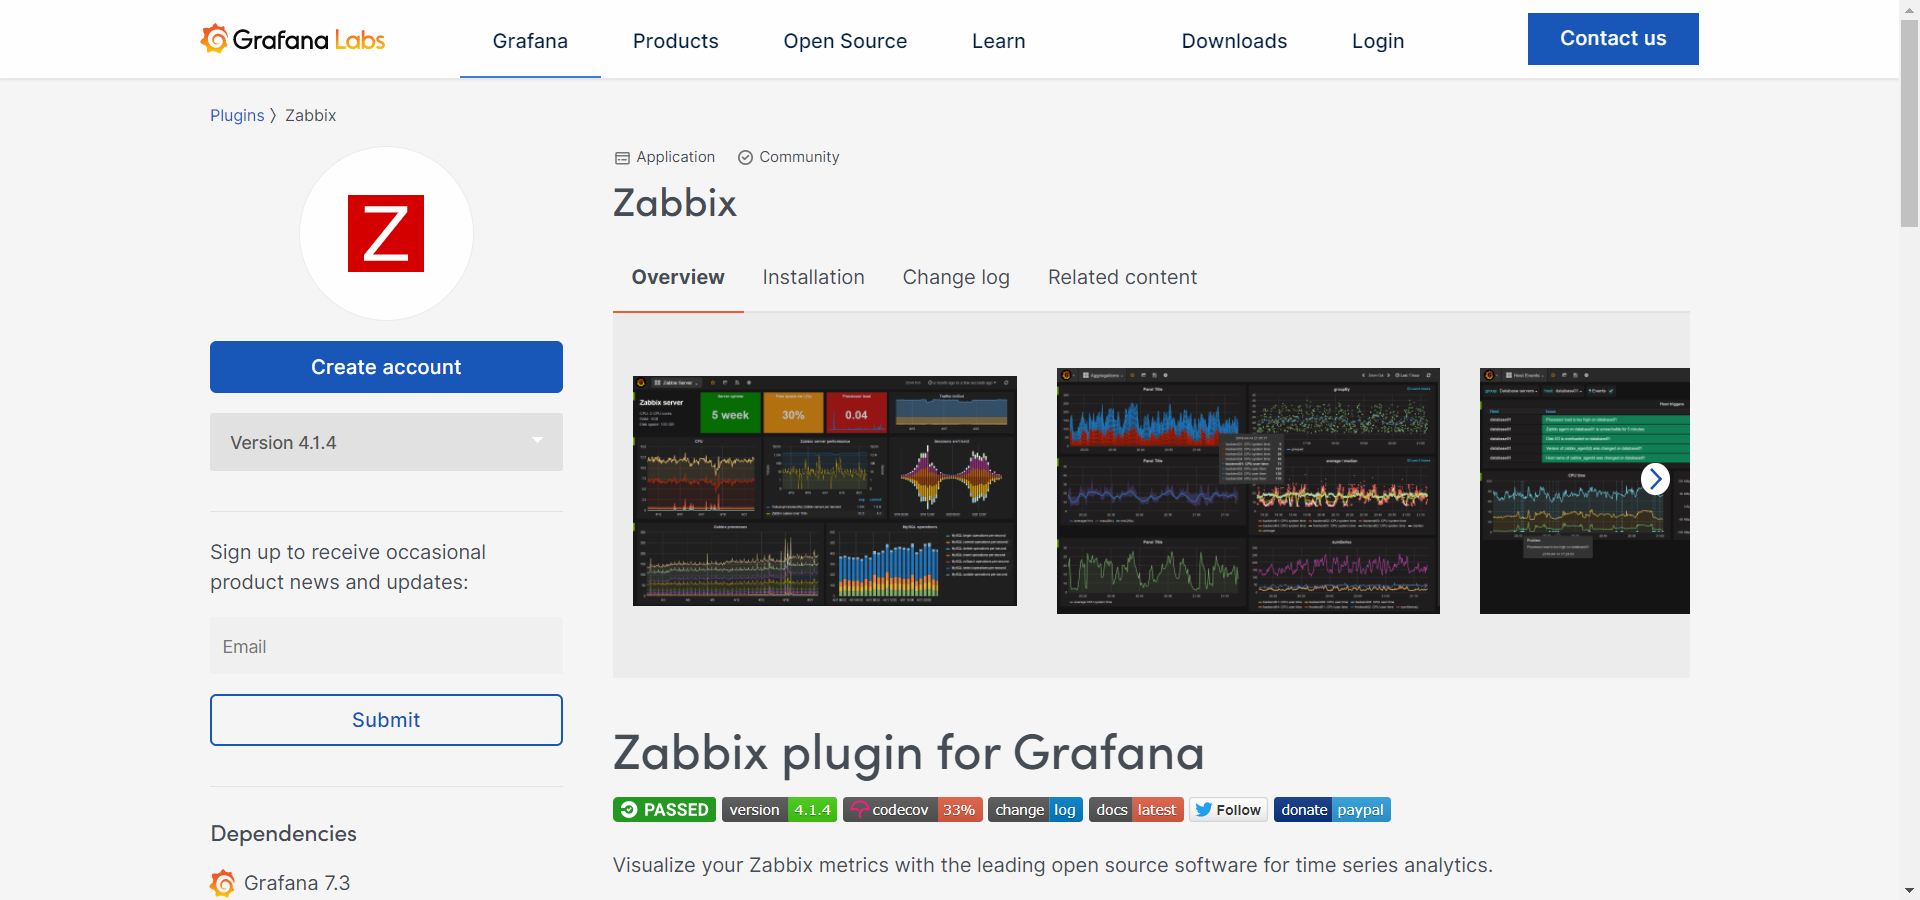
6.以下是插件部署步骤
1)安装插件
[atguigu@hadoop102 software]$ sudo grafana-cli plugins install alexanderzobnin-zabbix-app
2)重启Grafana
[atguigu@hadoop102 software]$ sudo systemctl restart grafana-server
3)启用插件
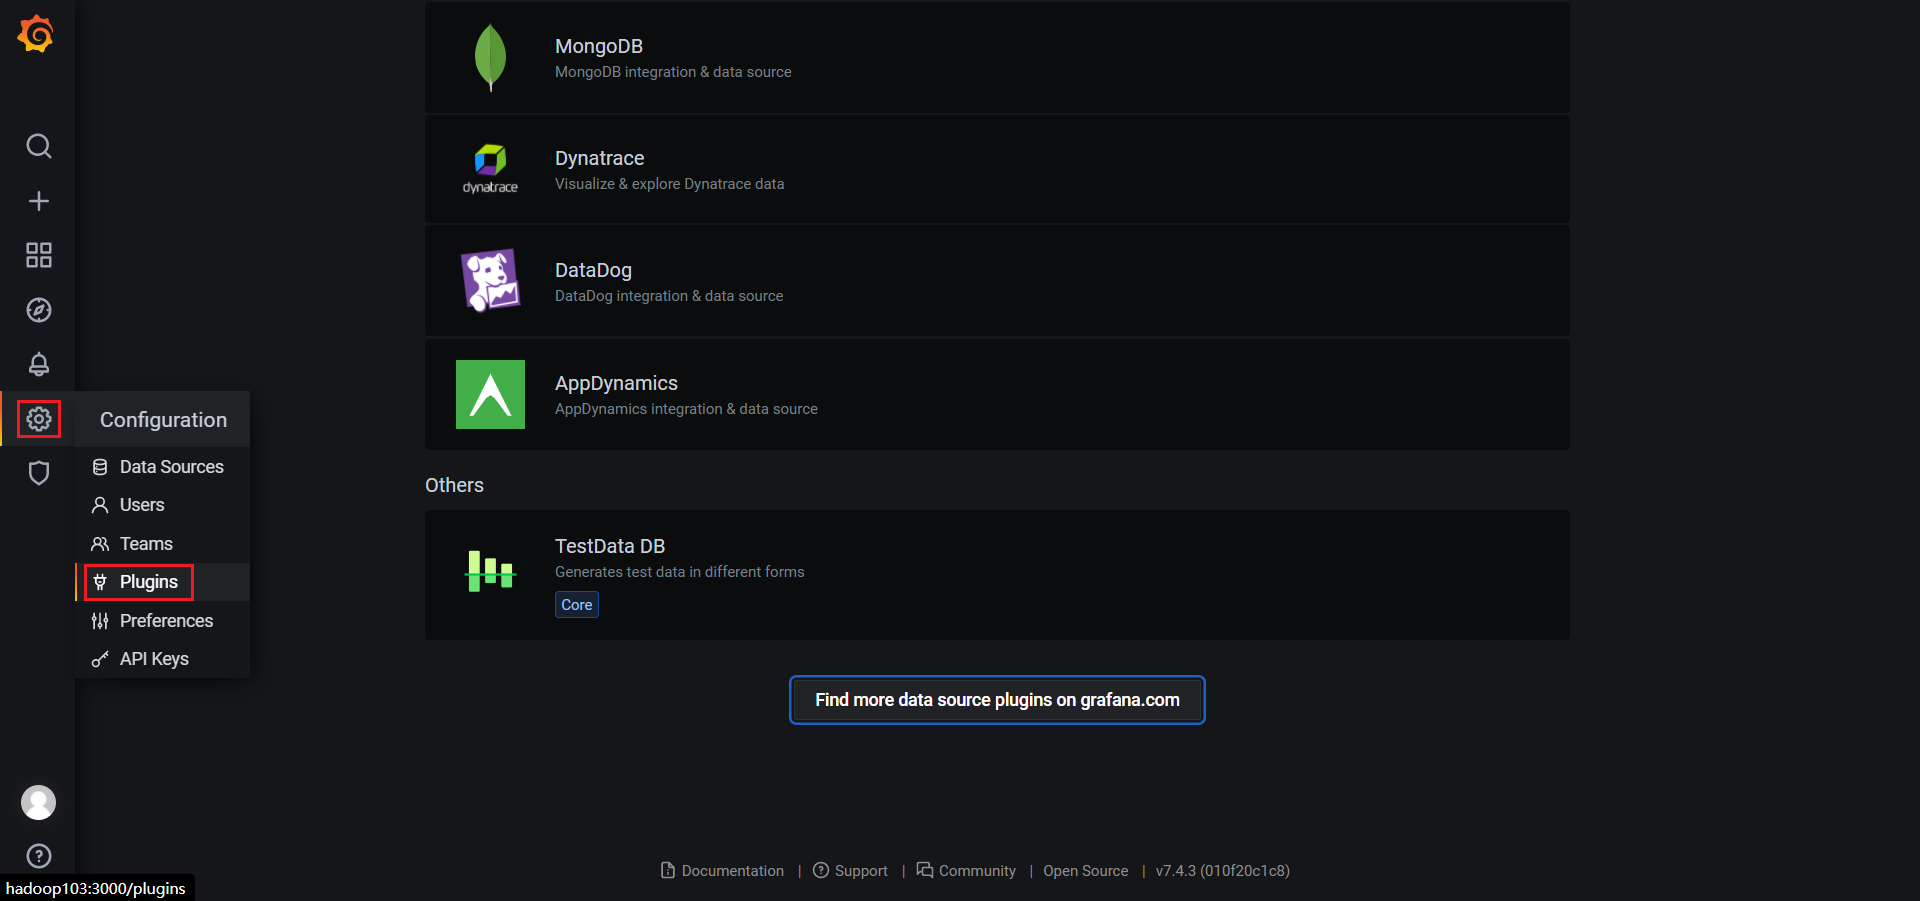
(1)点击设置/插件
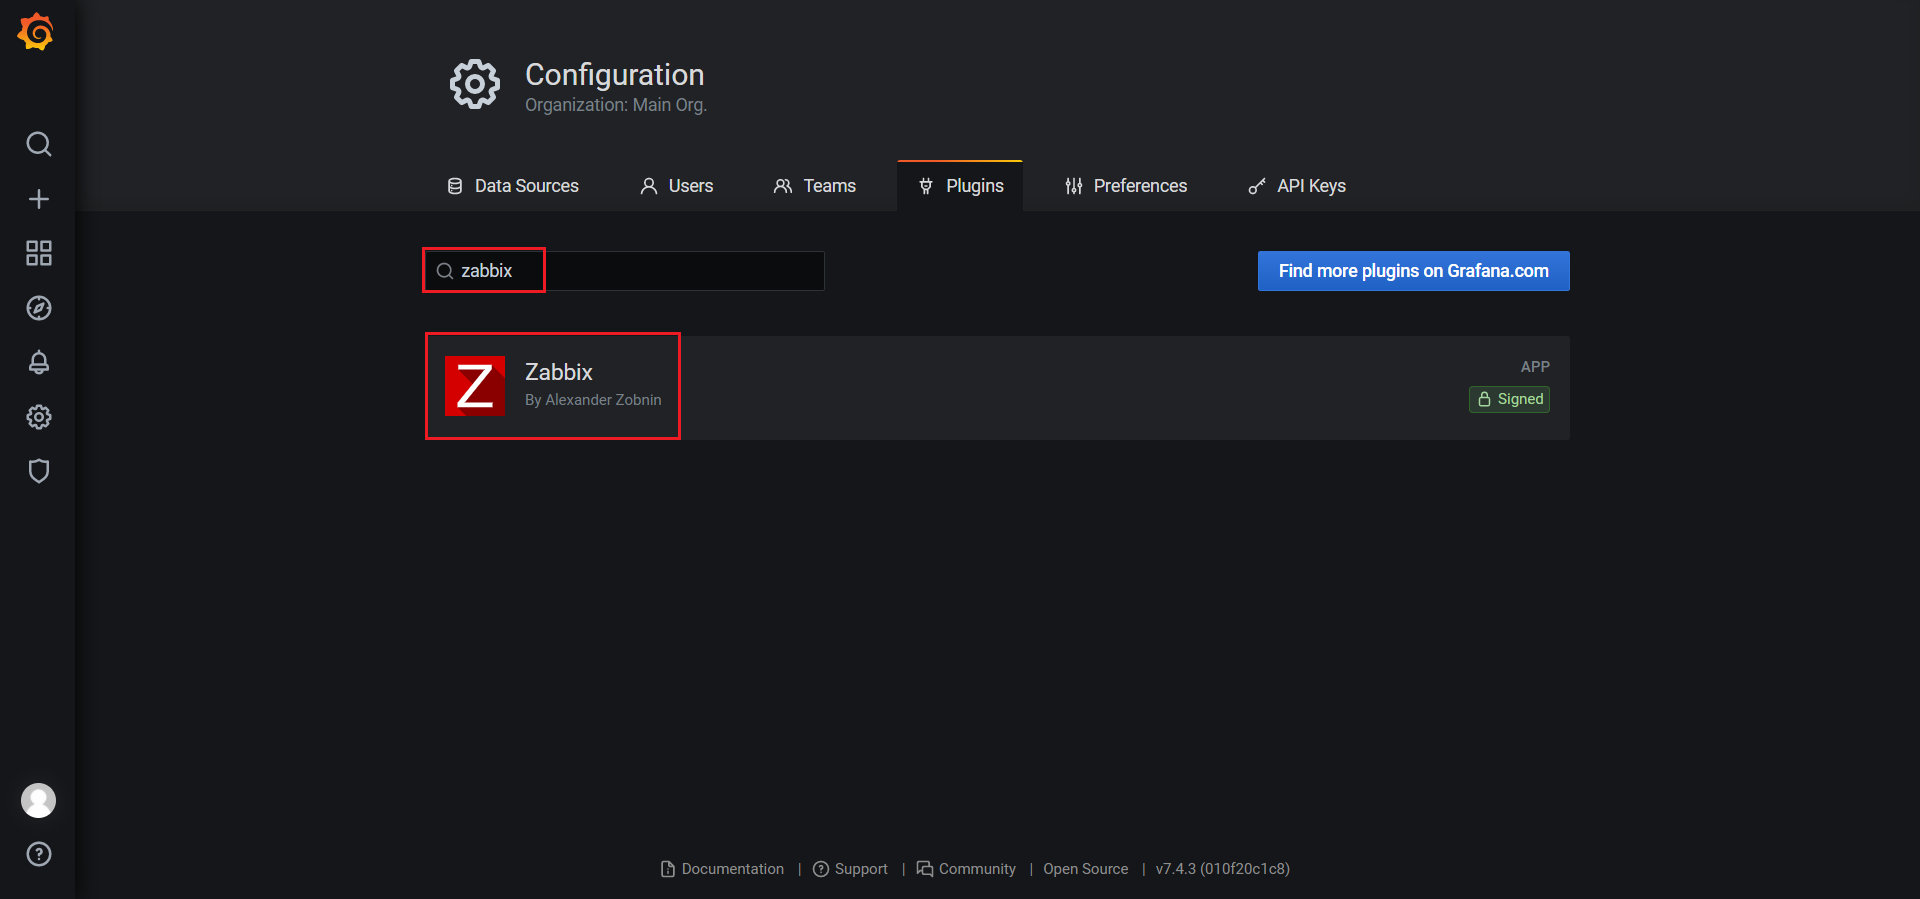
(2)搜索zabbix,并点击搜索结果
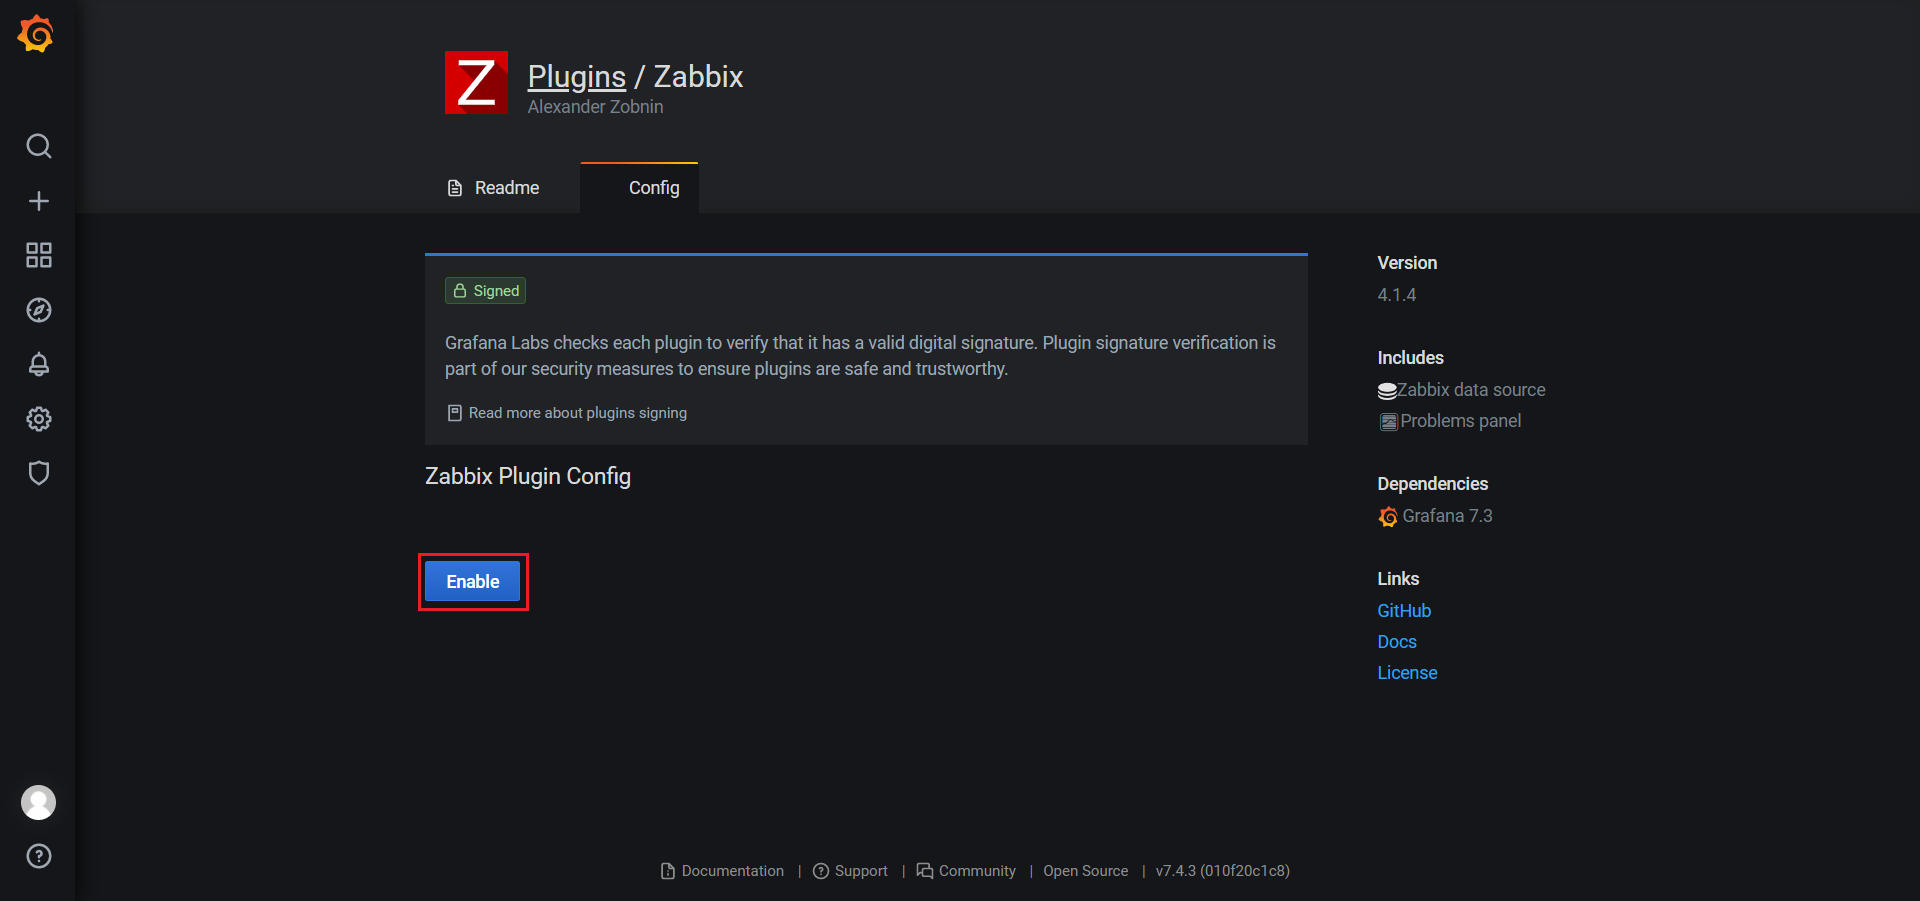
(3)启用Zabbix插件
7.配置zabbix数据源
1)新增数据源
2)搜索zabbix,并点击搜索结果
3)配置数据源
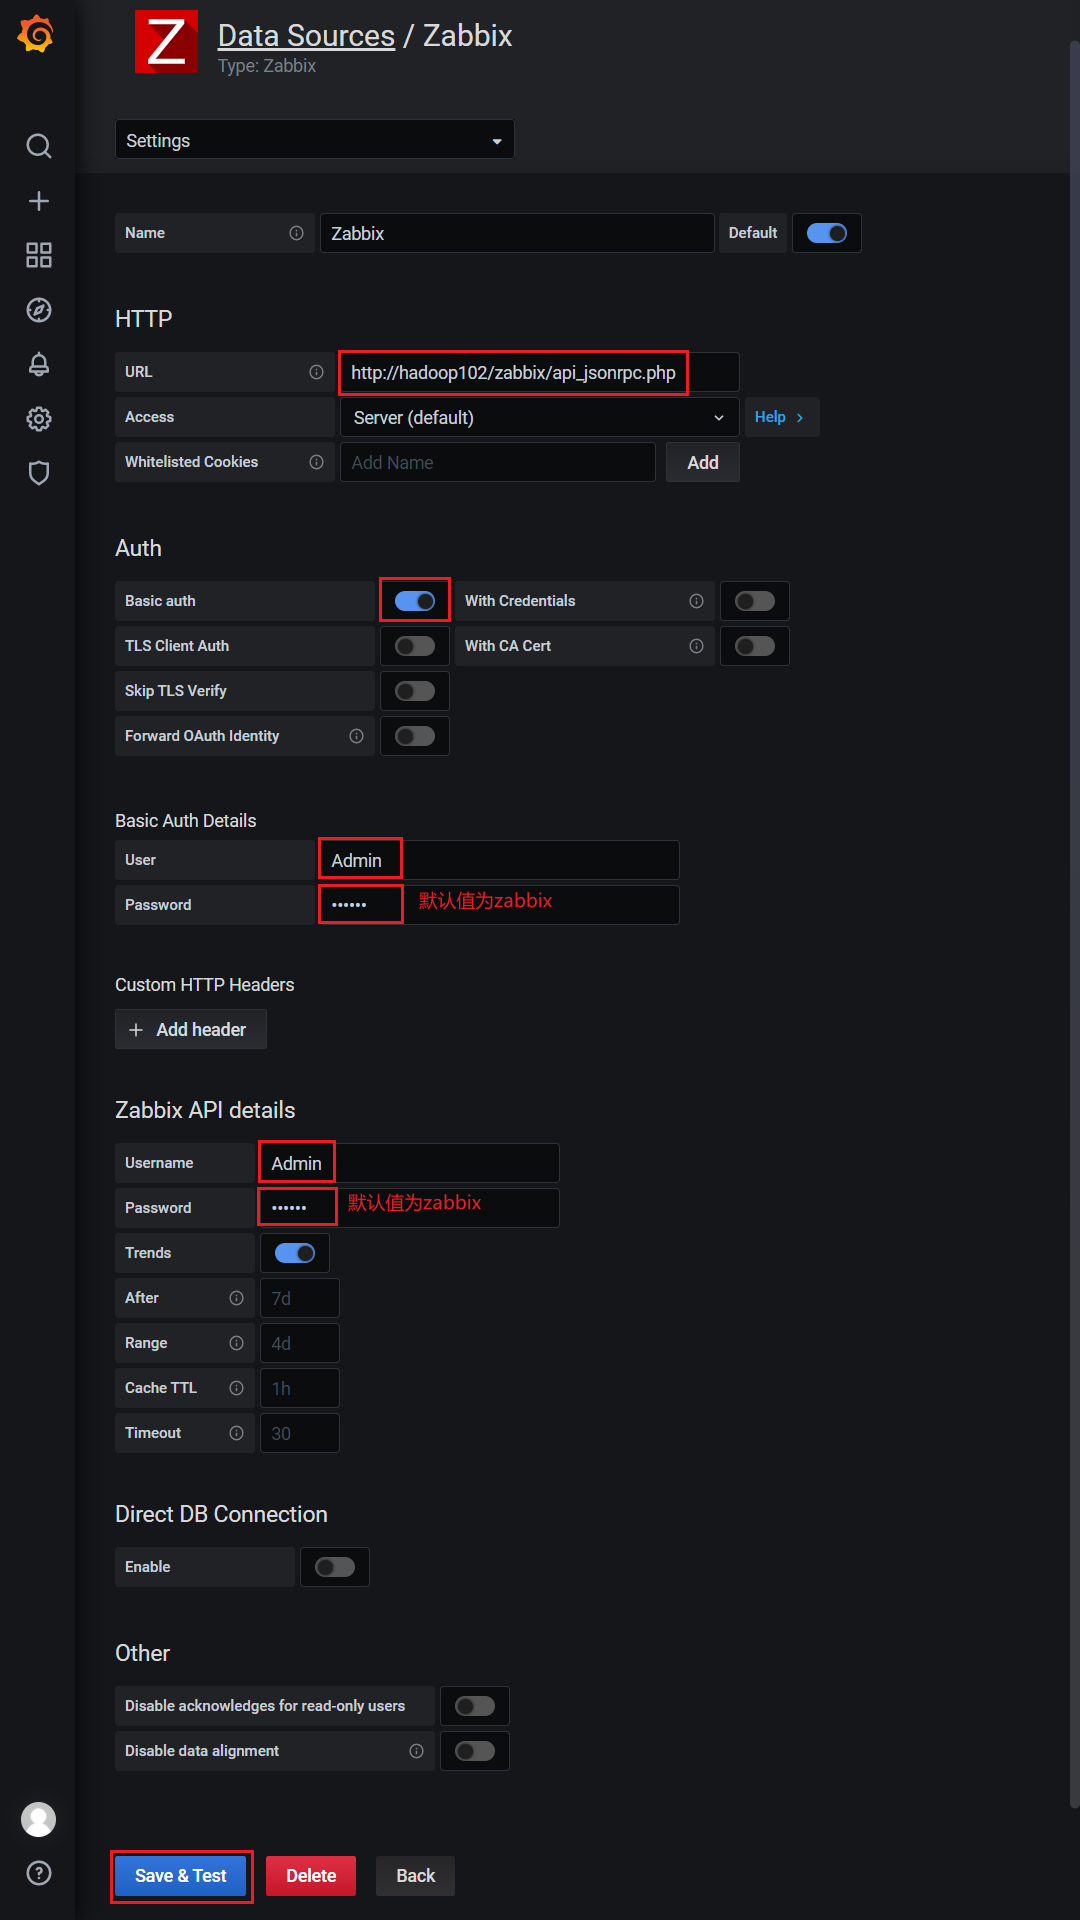
4.3.2 集成案例
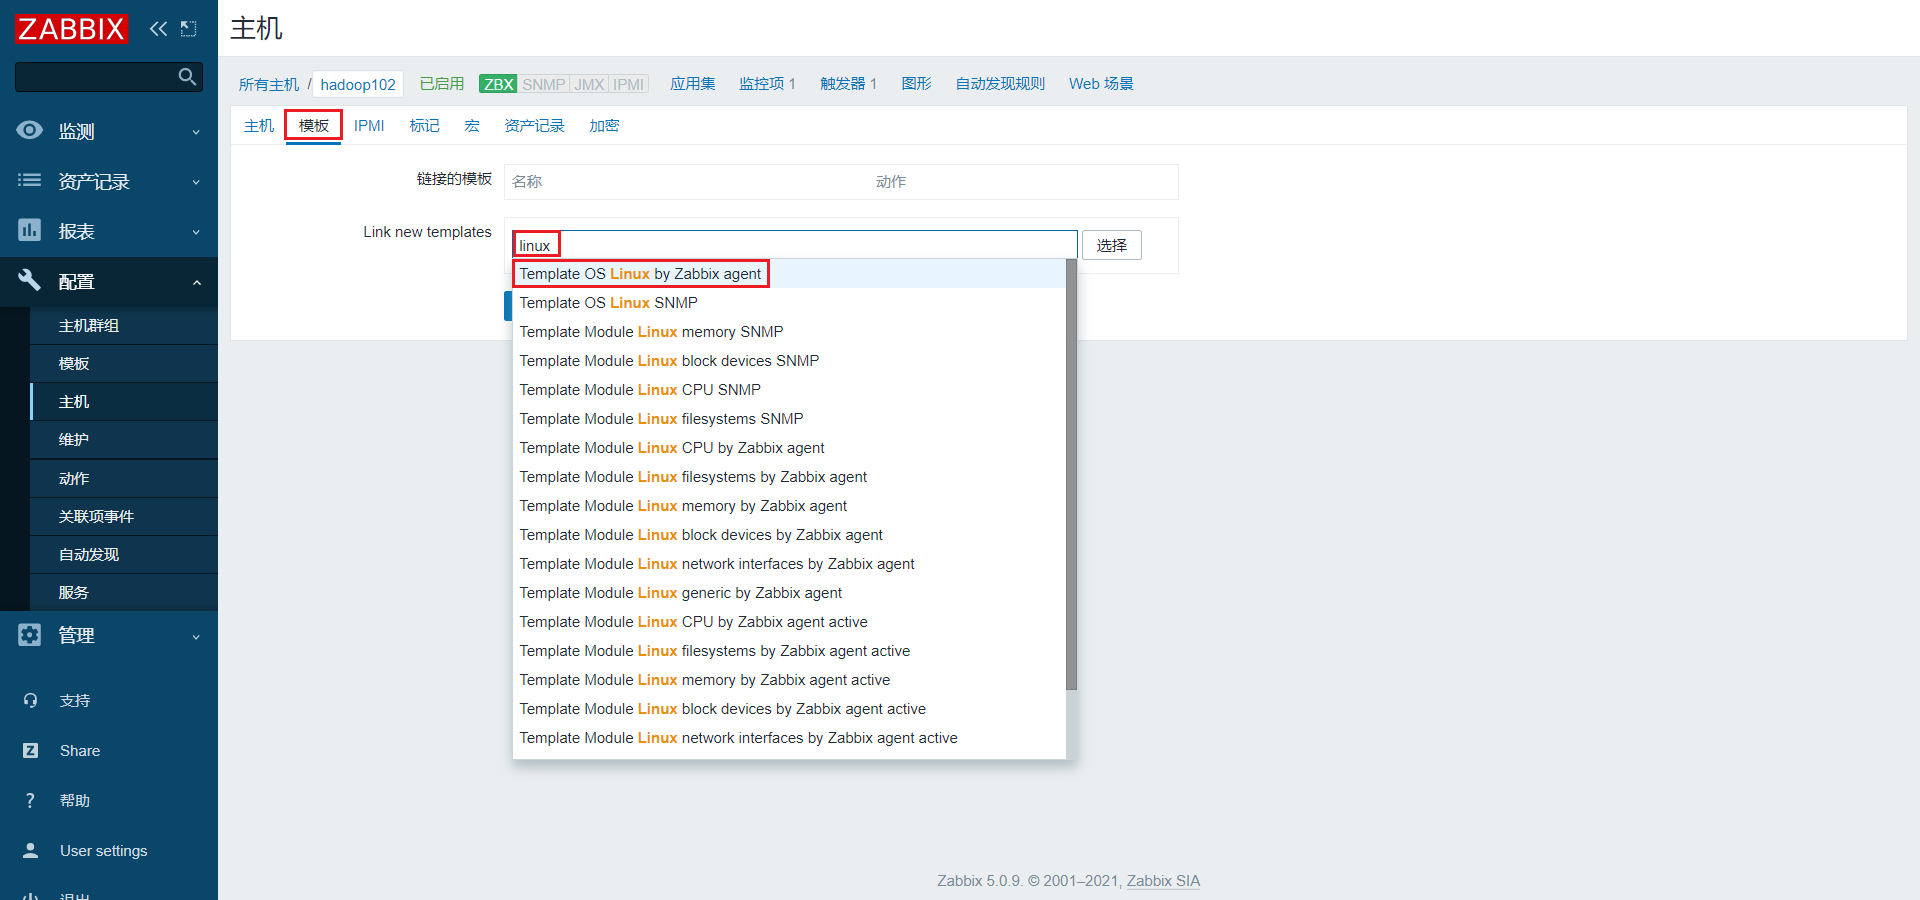
1.为方便展示效果,在Zabbix中为hadoop102主机应用一个Zabbix内置的Linux系统监控模板。
1)找到hadoop102主机
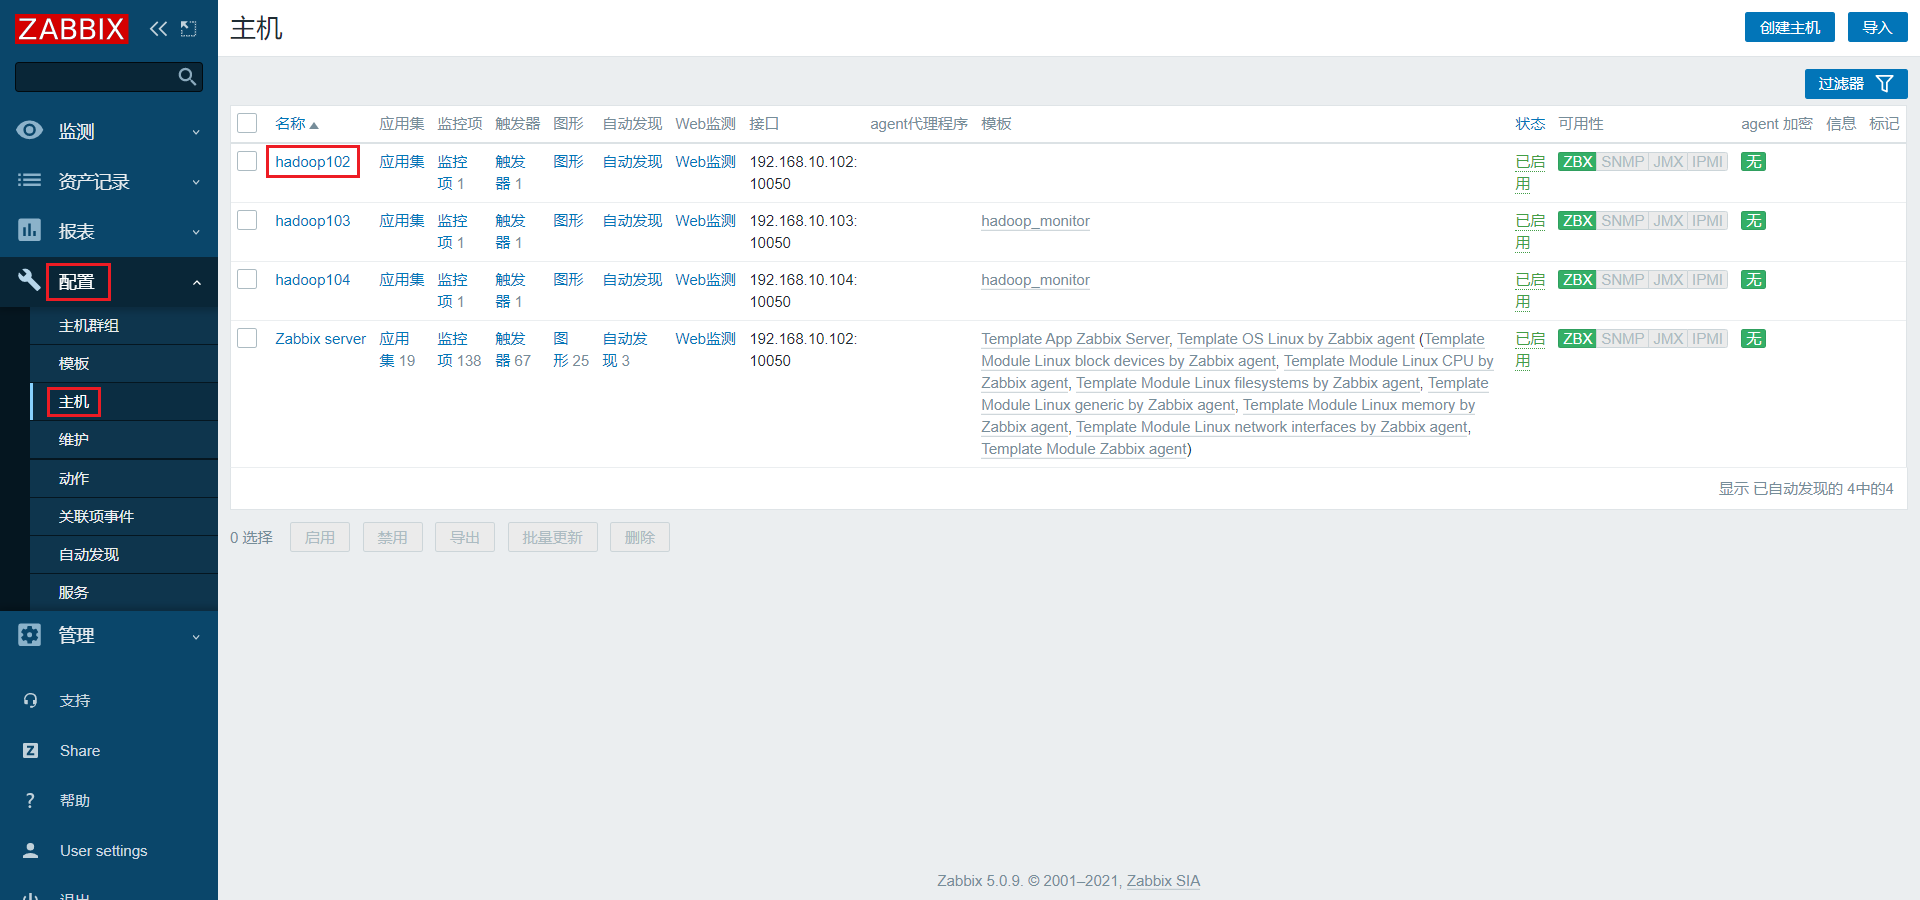
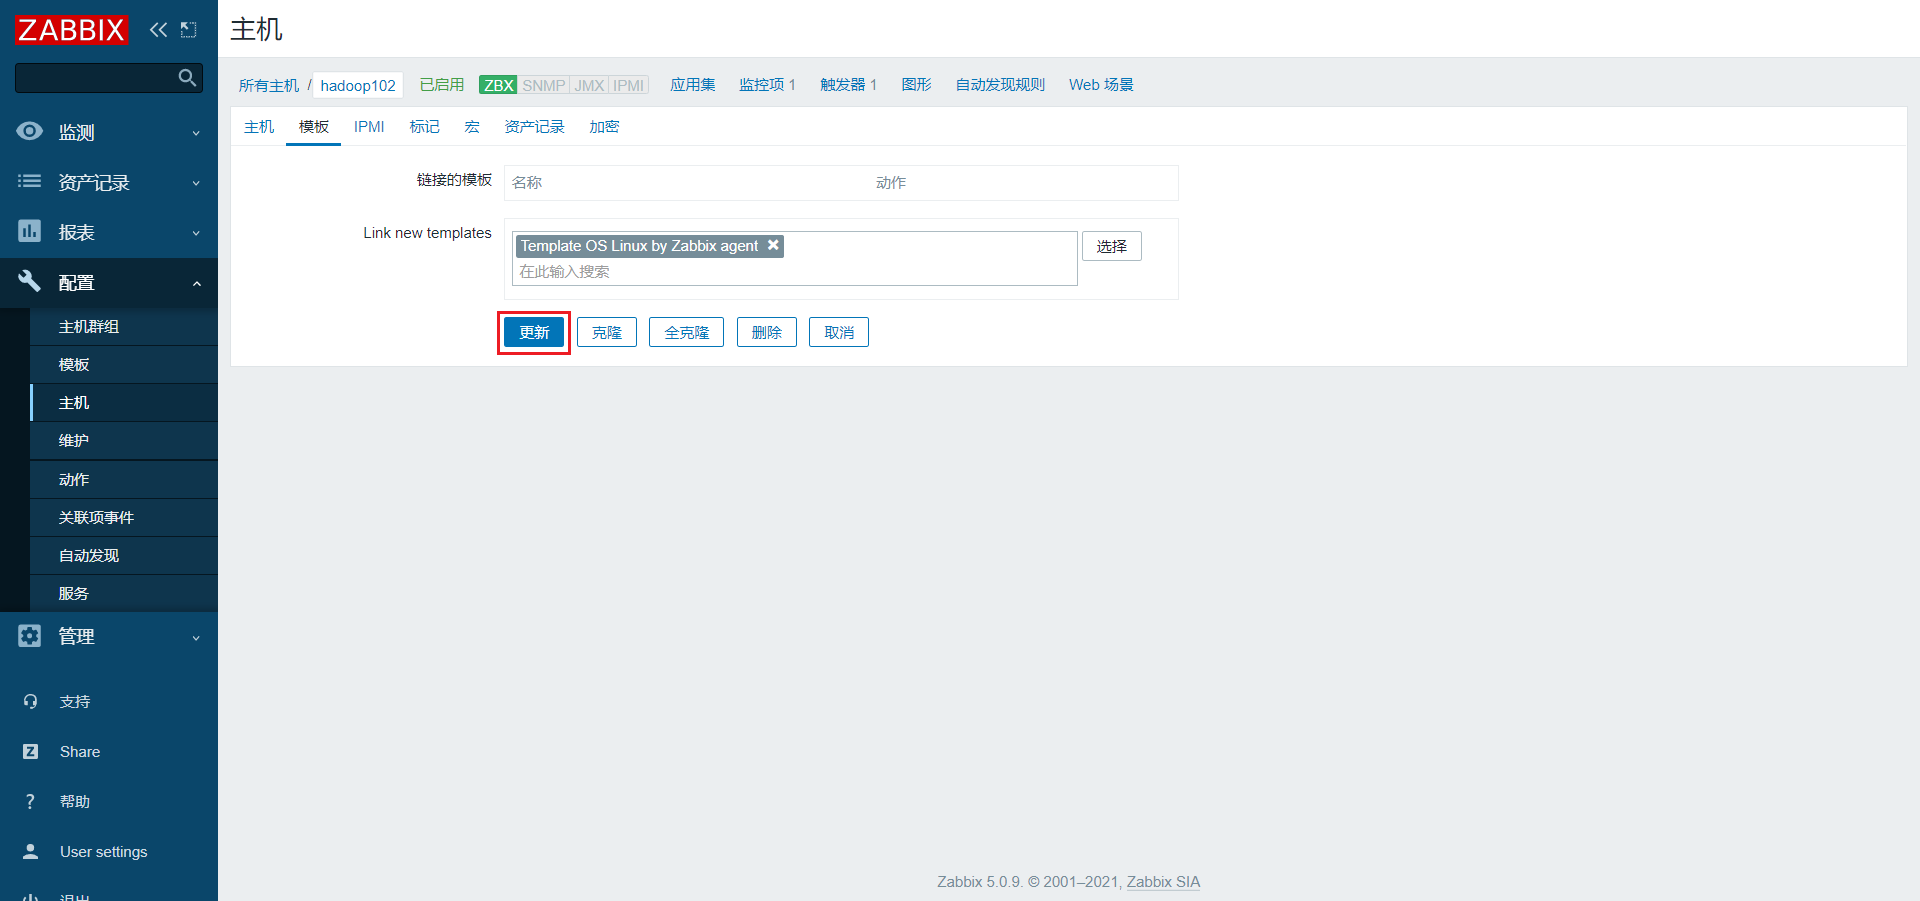
2)点击模板,搜索linux,并选择Template OS Linux by Zabbix agent
3)点击更新
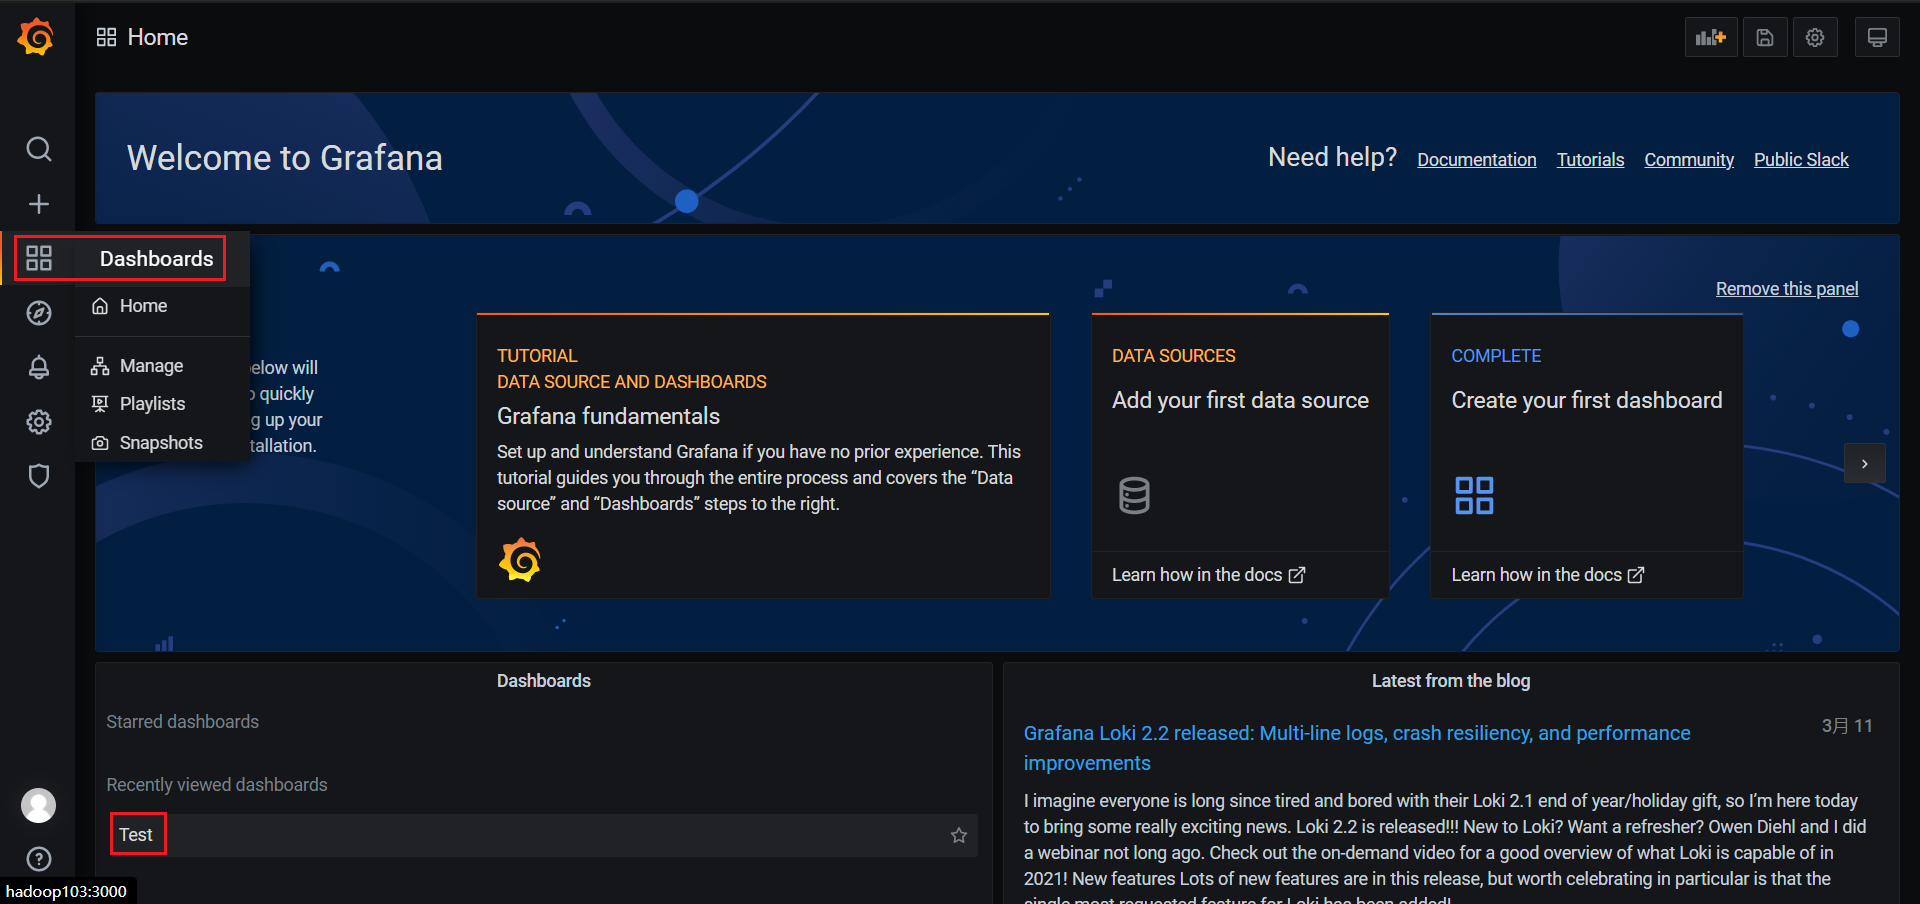
2.集成Grafana,展示模板中的系统监控项
1)点击Dashboards,找到前边创建的Test看板
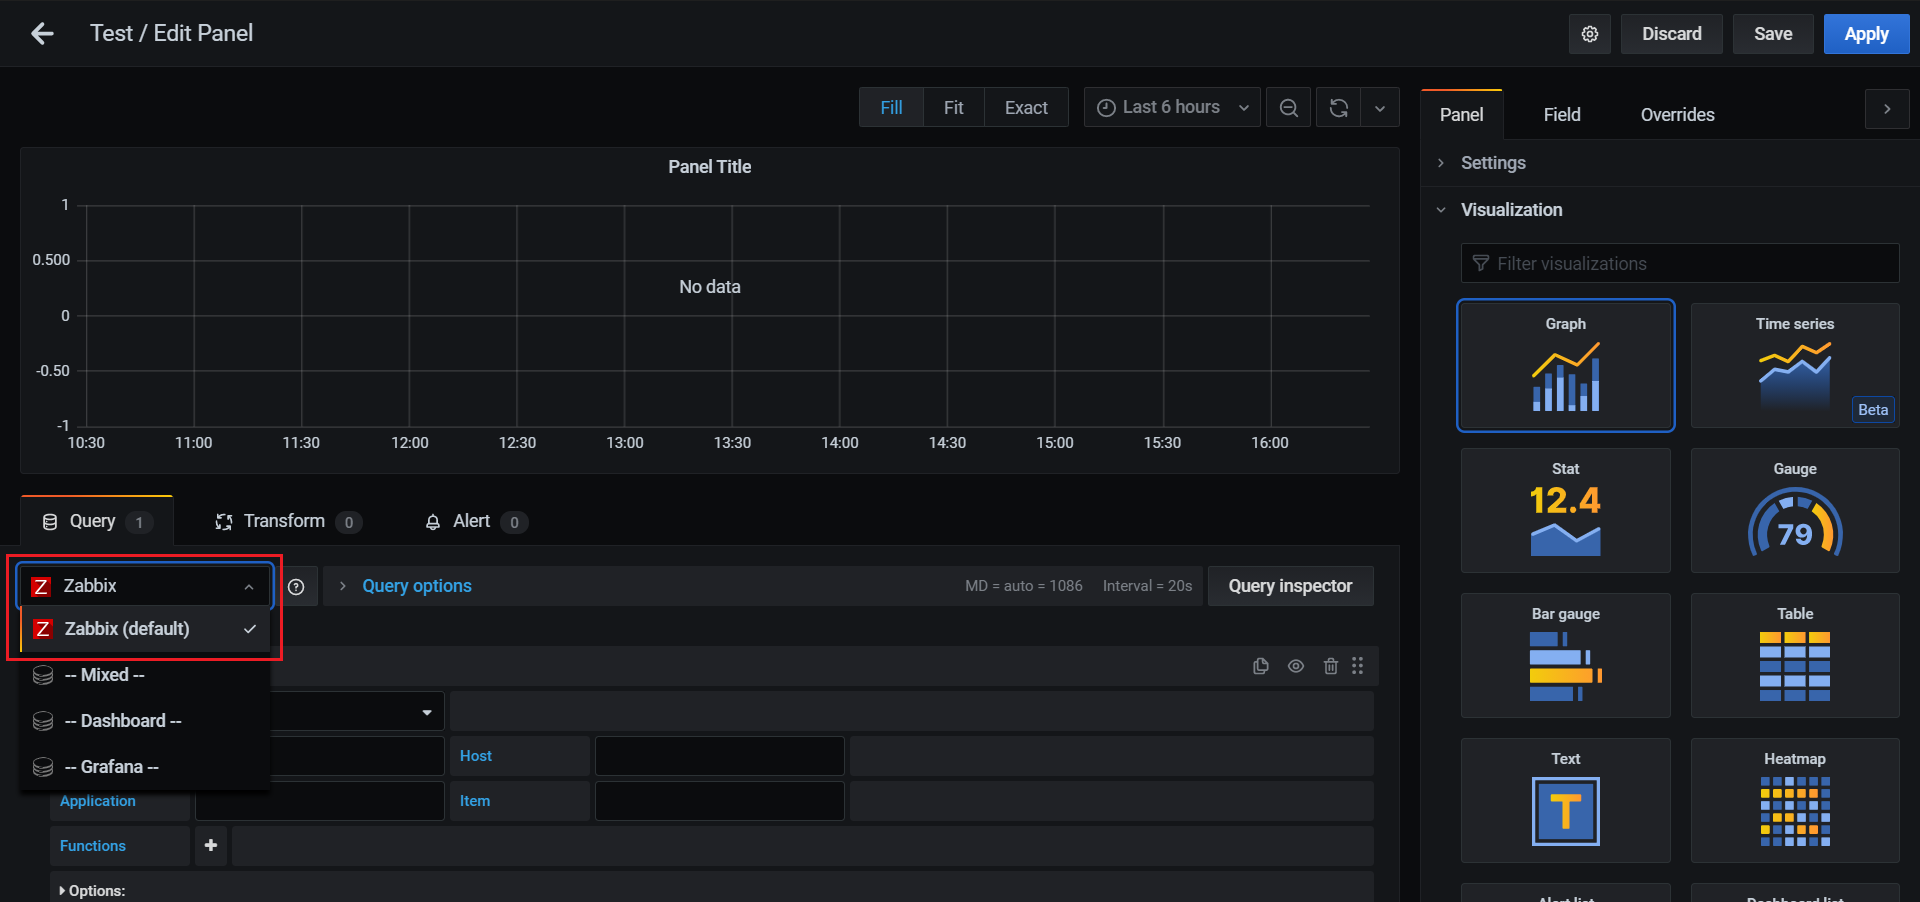
2)新建panel

3)选择Zabbix数据源
4)选择要展示的监控项
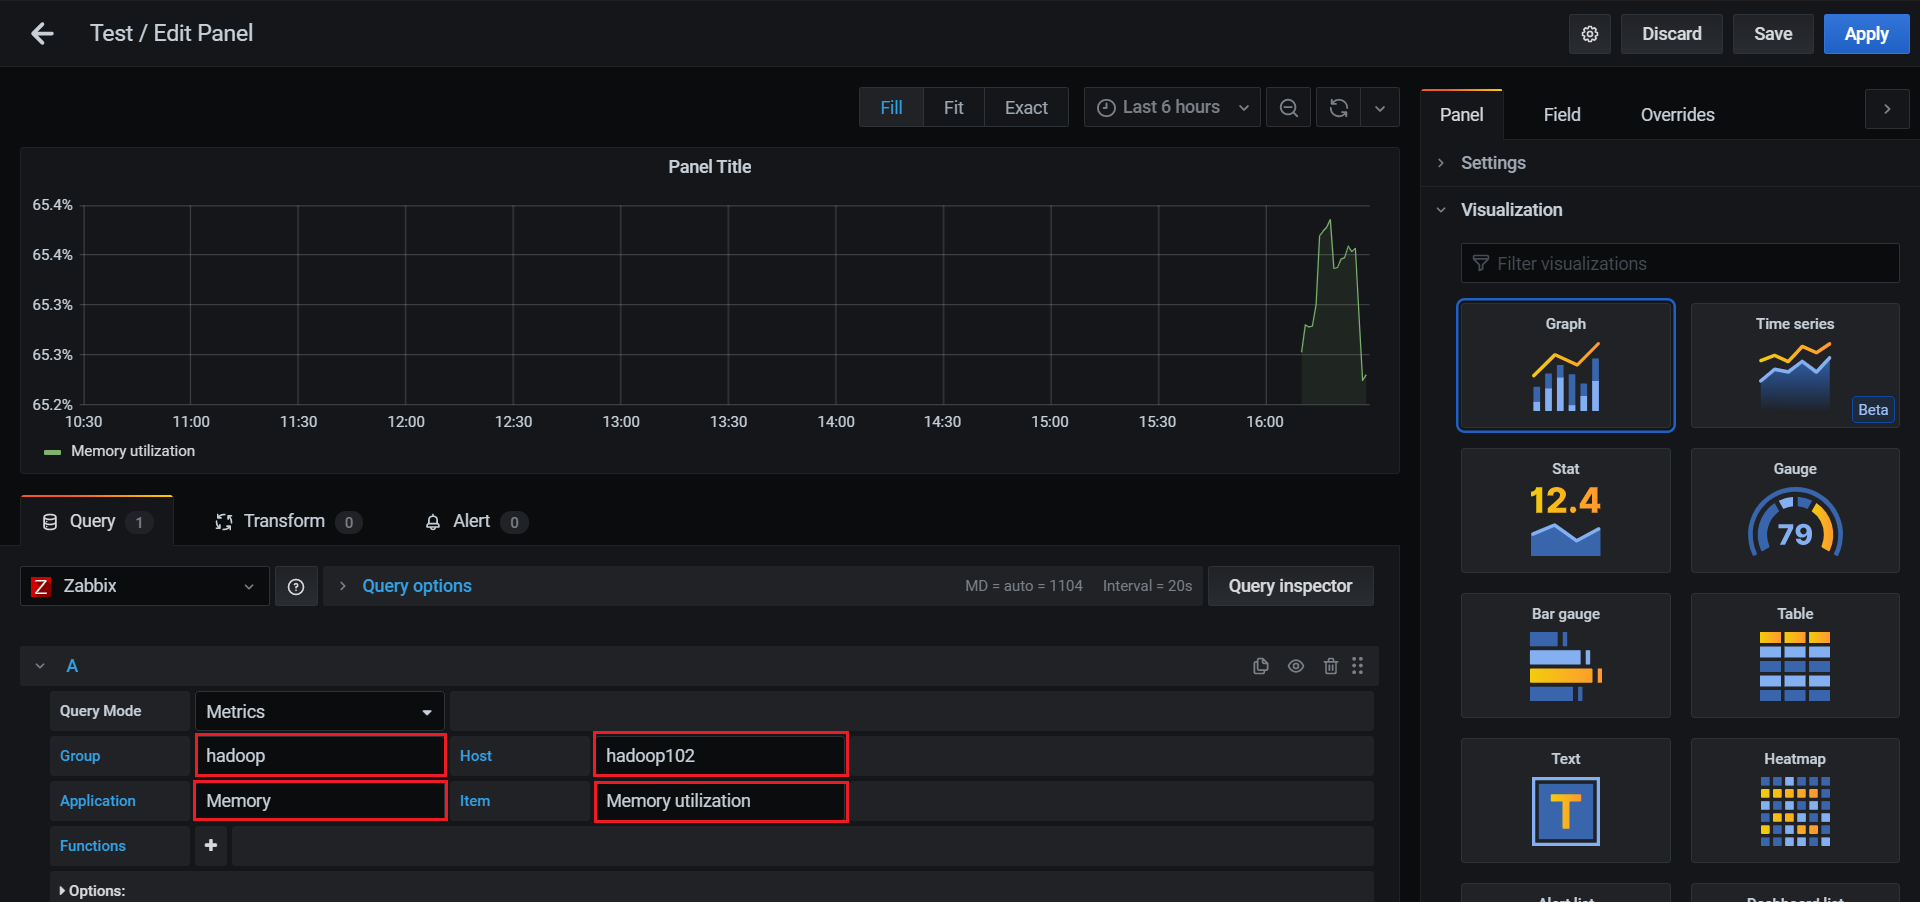
5)选择合适的图标类型
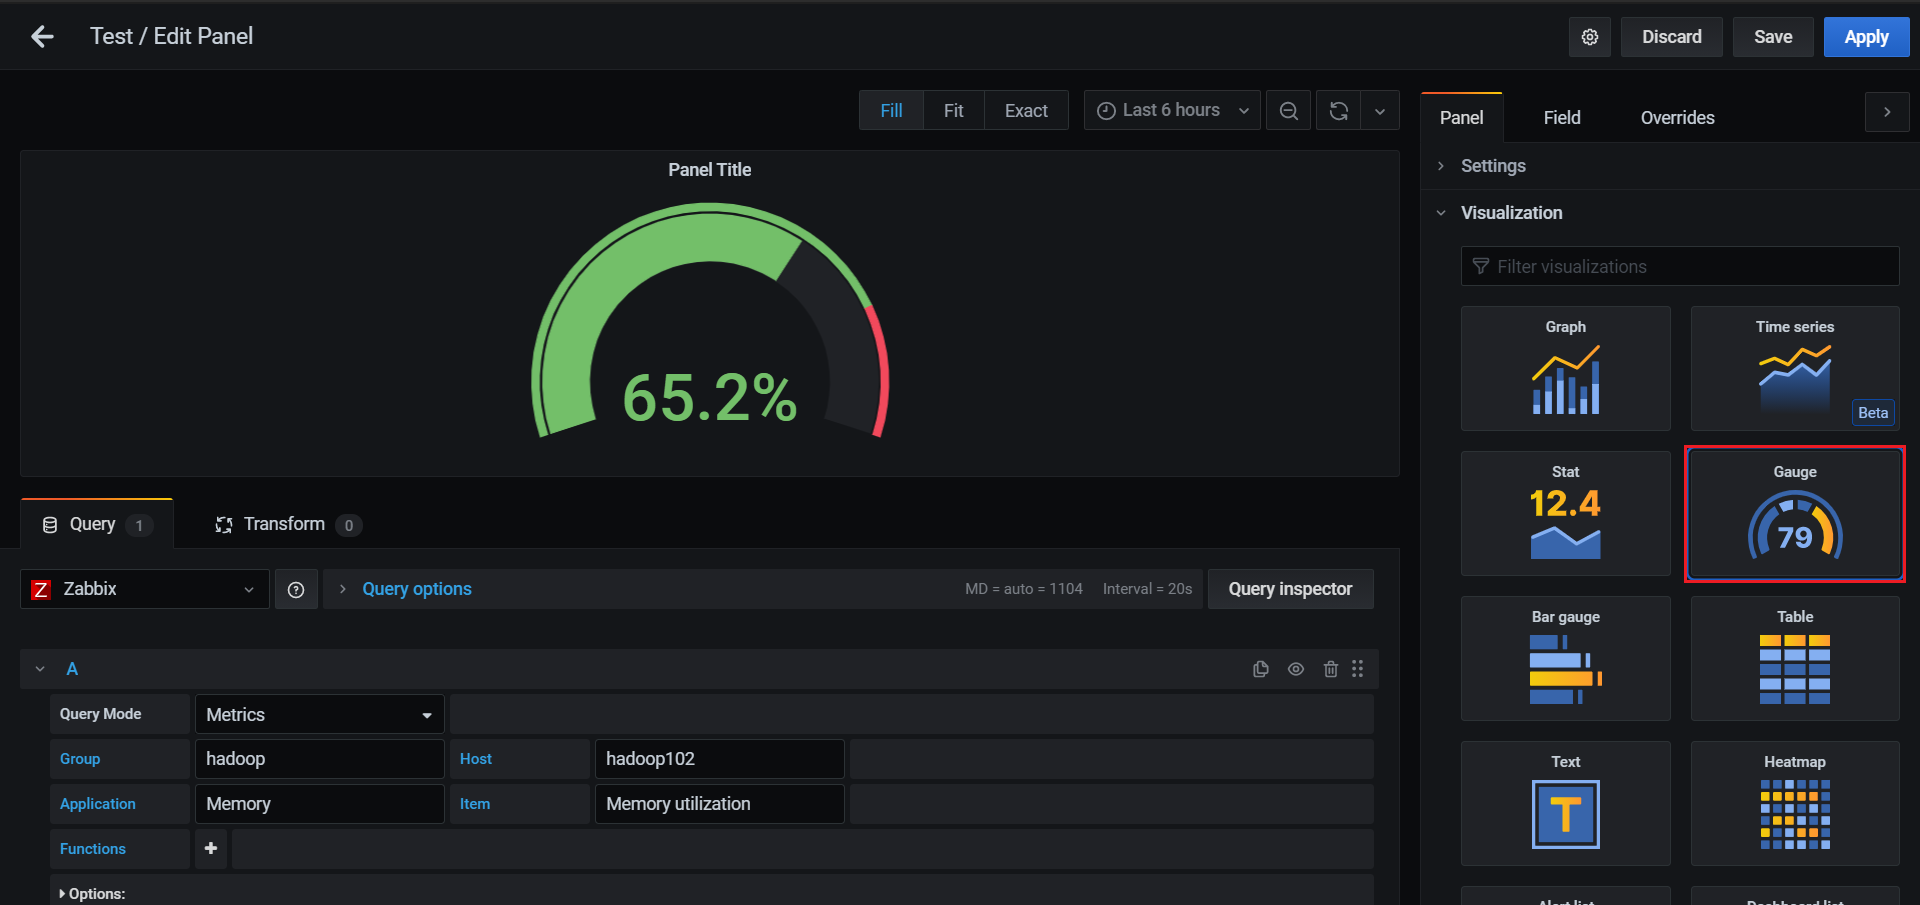
6)保存配置
