第1章 Superset入门
1.1 Superset概述
Apache Superset是一个开源的、现代的、轻量级BI分析工具,能够对接多种数据源、拥有丰富的图表展示形式、支持自定义仪表盘,且拥有友好的用户界面,十分易用。
1.2 Superset应用场景
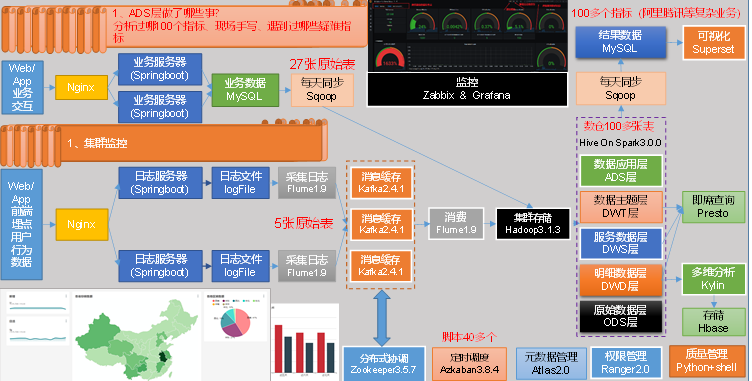
由于Superset能够对接常用的大数据分析工具,如Hive、Kylin、Druid等,且支持自定义仪表盘,故可作为数仓的可视化工具。

第2章 Superset安装及使用
Superset官网地址:http://superset.apache.org/
2.1 安装Python环境
Superset是由Python语言编写的Web应用,要求Python3.7的环境。
2.1.1 安装Miniconda
conda是一个开源的包、环境管理器,可以用于在同一个机器上安装不同Python版本的软件包及其依赖,并能够在不同的Python环境之间切换,Anaconda包括Conda、Python以及一大堆安装好的工具包,比如:numpy、pandas等,Miniconda包括Conda、Python。
此处,我们不需要如此多的工具包,故选择MiniConda。
1)下载Miniconda(Python3版本)
下载地址:https://repo.anaconda.com/miniconda/Miniconda3-latest-Linux-x86_64.sh
2)安装Miniconda
(1)执行以下命令进行安装,并按照提示操作,直到安装完成。
[atguigu@hadoop102 lib]$ bash Miniconda3-latest-Linux-x86_64.sh
(2)在安装过程中,出现以下提示时,可以指定安装路径
(3)出现以下字样,即为安装完成
3)加载环境变量配置文件,使之生效
[atguigu@hadoop102 lib]$ source ~/.bashrc
4)取消激活base环境
Miniconda安装完成后,每次打开终端都会激活其默认的base环境,我们可通过以下命令,禁止激活默认base环境。
[atguigu@hadoop102 lib]$ conda config --set auto_activate_base false
2.1.2 创建Python3.7环境
1)配置conda国内镜像
(base) [atguigu@hadoop102 ~]$ conda config --add channels https://mirrors.tuna.tsinghua.edu.cn/anaconda/pkgs/free
(base) [atguigu@hadoop102 ~]$ conda config --add channels https://mirrors.tuna.tsinghua.edu.cn/anaconda/pkgs/main
(base) [atguigu@hadoop102 ~]$ conda config --set show_channel_urls yes
2)创建Python3.7环境
(base) [atguigu@hadoop102 ~]$ conda create --name superset python=3.7
说明:conda环境管理常用命令
创建环境:conda create -n env_name
查看所有环境:conda info –envs
删除一个环境:conda remove -n env_name –all
3)激活superset环境
(base) [atguigu@hadoop102 ~]$ conda activate superset
激活后效果如下图所示
说明:退出当前环境
(superset) [atguigu@hadoop102 ~]$ conda deactivate
4)执行python命令查看python版本
2.2 Superset部署
2.2.1 安装依赖
安装Superset之前,需安装以下所需依赖
(superset) [atguigu@hadoop102 ~]$ sudo yum install -y gcc gcc-c++ libffi-devel python-devel python-pip python-wheel python-setuptools openssl-devel cyrus-sasl-devel openldap-devel
2.2.2 安装Superset
1)安装(更新)setuptools和pip
(superset) [atguigu@hadoop102 ~]$ pip install --upgrade setuptools pip -i https://pypi.douban.com/simple/
说明:pip是python的包管理工具,可以和csentos中的yum类比
2)安装Supetset
(superset) [atguigu@hadoop102 ~]$ pip install apache-superset -i https://pypi.douban.com/simple/
说明:-i的作用是指定镜像,这里选择国内镜像
注:如果遇到网络错误导致不能下载,可尝试更换镜像
(superset) [atguigu@hadoop102 ~]$ pip install apache-superset --trusted-host https://repo.huaweicloud.com -i https://repo.huaweicloud.com/repository/pypi/simple
3)初始化Supetset数据库
(superset) [atguigu@hadoop102 ~]$ superset db upgrade
4)创建管理员用户
(superset) [atguigu@hadoop102 ~]$ export FLASK_APP=superset
(superset) [atguigu@hadoop102 ~]$ superset fab create-admin
说明:flask是一个python web框架,Superset使用的就是flask
5)Superset初始化
(superset) [atguigu@hadoop102 ~]$ superset init
2.2.3 启动Supterset
1)安装gunicorn
(superset) [atguigu@hadoop102 ~]$ pip install gunicorn -i https://pypi.douban.com/simple/
说明:gunicorn是一个Python Web Server,可以和java中的TomCat类比
2)启动Superset
(1)确保当前conda环境为superset,及下图所示
(2)启动
(superset) [atguigu@hadoop102 ~]$ gunicorn --workers 5 --timeout 120 --bind hadoop102:8787
“superset.app:create_app()” –daemon
说明:
–workers:指定进程个数
–timeout:worker进程超时时间,超时会自动重启
–bind:绑定本机地址,即为Superset访问地址
–daemon:后台运行
(3)登录Superset
访问http://hadoop102:8787,并使用2.2.2节中第4步创建的管理员账号进行登录。

3)停止superset
停掉gunicorn进程
(superset) [atguigu@hadoop102 ~]$ ps -ef | awk '/superset/ && !/awk/{print $2}' | xargs kill -9
退出superset环境
(superset) [atguigu@hadoop102 ~]$ conda deactivate
2.2.4 superset启停脚本
1)创建superset.sh文件
[atguigu@hadoop102 bin]$ vim superset.sh
内容如下
#!/bin/bash

superset_status(){
    result=`ps -ef | awk '/gunicorn/ && !/awk/{print $2}' | wc -l`
    if [[ $result -eq 0 ]]; then
        return 0
    else
        return 1
    fi
}
superset_start(){
        source ~/.bashrc
        superset_status >/dev/null 2>&1
        if [[ $? -eq 0 ]]; then
            conda activate superset ; gunicorn --workers 5 --timeout 120 --bind hadoop102:8787 --daemon 'superset.app:create_app()'
        else
            echo "superset正在运行"
        fi

}

superset_stop(){
    superset_status >/dev/null 2>&1
    if [[ $? -eq 0 ]]; then
        echo "superset未在运行"
    else
        ps -ef | awk '/gunicorn/ && !/awk/{print $2}' | xargs kill -9
    fi
}


case $1 in
    start )
        echo "启动Superset"
        superset_start
    ;;
    stop )
        echo "停止Superset"
        superset_stop
    ;;
    restart )
        echo "重启Superset"
        superset_stop
        superset_start
    ;;
    status )
        superset_status >/dev/null 2>&1
        if [[ $? -eq 0 ]]; then
            echo "superset未在运行"
        else
            echo "superset正在运行"
        fi
esac
2)加执行权限
[atguigu@hadoop102 bin]$ chmod +x superset.sh
3)测试
启动superset
[atguigu@hadoop102 bin]$ superset.sh start
停止superset
[atguigu@hadoop102 bin]$ superset.sh stop
第3章 Superset使用
3.1 对接MySQL数据源
3.1.1 安装依赖
(superset) [atguigu@hadoop102 ~]$ conda install mysqlclient
说明:对接不同的数据源,需安装不同的依赖,以下地址为官网说明
https://superset.apache.org/docs/databases/installing-database-drivers
3.1.2 重启Superset
(superset) [atguigu@hadoop102 ~]$ superset.sh restart
3.1.3 数据源配置
1)Database配置
Step1:点击Data/Databases

Step2:点击+DATABASE

Step3:点击填写Database及SQL Alchemy URI
注:SQL Alchemy URI编写规范:mysql://用户名:密码@主机名:端口号/数据库名称
此处填写:
mysql://root:123456@hadoop102:3306/gmall_report?charset=utf8

Step4:点击Test Connection,出现“Connection looks good!”提示即表示连接成功
Step5:点击ADD

2)Table配置
Step1:点击Data/Datasets

Step2:点击Data/ Datasets

Step3:配置Table

3.2 制作仪表盘
3.2.1 创建空白仪表盘
1)点击Dashboards/+DASHBOARDS

2)命名并保存

3.2.2 创建图表
1)点击Charts/+CHART

2)选则数据源及图表类型

3)选择何使的图表类型

4)创建图表

5)按照说明配置图表

6)点击“Run Query”
7)如配置无误,可出现以下图标

8)命名该图表,并保存至仪表盘


3.2.3 编辑仪表盘
1)打开仪表盘,点击编辑按钮

2)调整图表大小以及图表盘布局

3)点击下图中箭头,可调整仪表盘自动刷新时间

第4章 Superset实战
4.1 制作地图
4.1.1 配置Table

4.1.2 配置Chart

4.2 制作饼状图

4.2.1 配置Table

4.2.2 配置Chart